RACELOGIC Support Centre

Lane Survey - Curved Line

To survey a curved line within a Lane Departure Warning test, please follow the steps below:

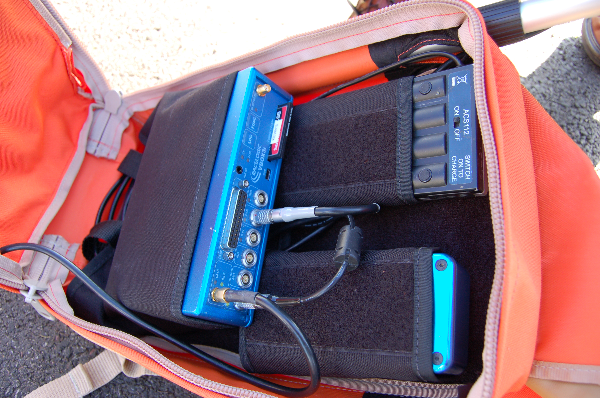
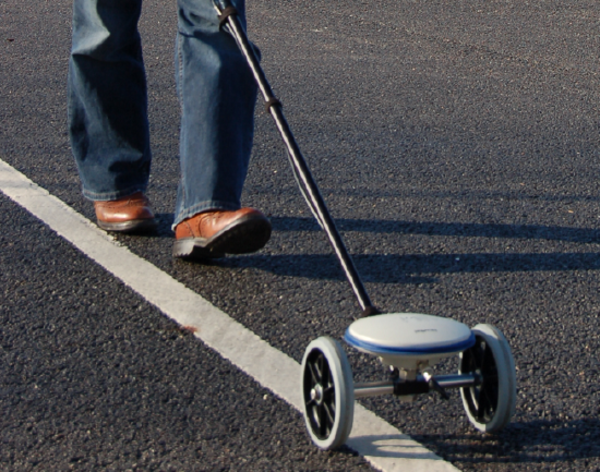
If the test lane is curved then this method can be used to obtain the reference lane data. This method requires the use of a Survey Trolley (RLACS173-XXX where XXX represents the frequency of the Base Station if being used).

When using the Survey Trolley, data is recorded at 10 Hz and provides a more accurate representation of a lane on a curved road.

Multiple Lanes

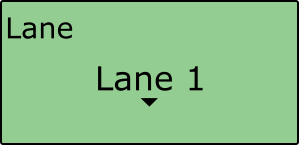
It is possible to load three surveyed lanes into the VBOX which can then be individually selected via VBOX Manager.

It is NOT possible for the VBOX to make measurements to more than 1 lane edge at a time.

For 2 cm positional accuracy during the Lane Departure Warning Test, an RTK Base Station or NTRIP solution is required.

Surveying a Curved Line

  1. Assemble the Survey Trolley and mount the VBOX, radio modem, ACS112L Li-Ion battery and VBOX Manager into the surveying back pack.
    Assembly instructions can be found here
  1. Using VBOX Manager, Select the 'ADAS' option from the 'SETUP' menu and ensure 'Lane Dep' is selected. Scroll to 'Configure Lane', select and choose the 'Survey Mode' option.

    VBMAN ADAS Subject Contact Points.png
     
  2. Exit the 'ADAS' menu and return to the VBOX Manager home screen. This presents a new display designed for controlling the survey mode function.

    Lane Dep Survey Mode 2.png
Lane Dep Survey Survey Trolley 1.png
  1. When the VBOX displays 'RTK Fixed' you can start to survey the lane.
     
  2. Place the centre line of the Survey Trolley over the lane edge to be surveyed and select ‘START’ on VBOX Manager to start the logging before moving.
     
  3. When the lane surveying is completed, stop the logging and revert the VBOX back to standard operating mode by de-selecting 'Survey Mode' enabled in step 2.
     
  4. Remove the CF card from the VBOX and download the recorded reference lane .vbo file from the VBOX onto a PC.
     
  5. Run VBOX File Processor software, and using the ‘Load Input File’ option select the recorded reference lane .vbo.
Lane Dep Survey Survey Trolley 2.png
  1. Expand the 'ADAS' drop down menu and select the ‘Lane Data Generation’ process block, either by double clicking or dragging and dropping it in to the ‘Selected Process Blocks’ window.
     
  2. Click on the ‘Process Output File’ at the bottom of the screen to create the required .vbc file.

    Notes:
    • The software will automatically append ‘_Processed’ on to the end of the reference lane file name (i.e. VBOX0005_Processed.vbc). If you wish to change the filename to something more representative click on the three dot ‘…’ icon at the bottom of the screen.
    • Use a maximum of 8 characters to allow the full file name to be displayed on VBOX Manager.

Loading a lane

  1. Copy the created .vbc file on to the root directory of the compact flash card being used in the VB3iSL-RTK unit.
     
  2. Place the Compact Flash card into the VB3iSL-RTK unit.
     
  3. Connect VBOX Manager to the VBOX within the vehicle.
     
  4. Select the 'ADAS' option from the 'SETUP' menu and ensure 'Lane Dep' is selected.

    VBMAN ADAS Subject Contact Points.png
     
     
  5. Select the appropriate lane number within the 'Lane' menu.

    VBMAN ADAS Subject Contact Points.png
     
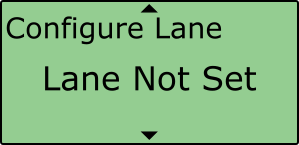
  6. Scroll to 'Configure Lane', select and choose the 'Load' option.
 VBMAN ADAS Subject Contact Points.png  VBMAN ADAS Subject Contact Points.png
  1. The VBOX will browse the CF card for .vbc files, select the appropriate .vbc file for the reference lane in question.

    VBMAN ADAS Subject Contact Points.png
     
     
  2. Once loaded, the 'Configure Lane' menu will display 'Lane Set'

    VBMAN ADAS Subject Contact Points.png
     
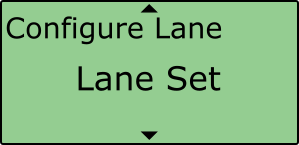
  3. The lane is now loaded into the VBOX and is ready to be used to generate live Lane Departure values.
  • Was this article helpful?