LDWS - Video

The addition of the Video VBOX to the VB3i ADAS system adds synchronised video logging with the added benefit of overlaid data at static images.
Video is often required to be recorded as part of regulation requirements.
For Lane departure the ability to add static images offers the ability to visually gauge wheel to lane edge distances.
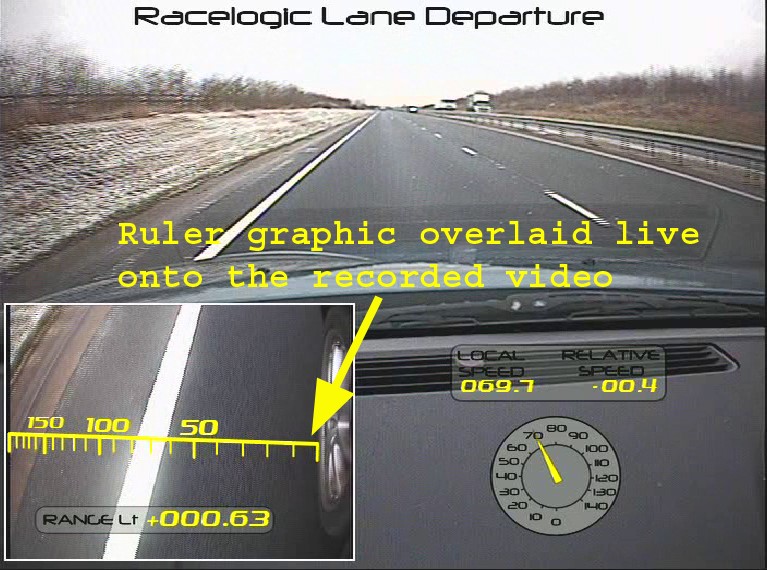
This guide will explain the process to create accurate on-screen gauges for showing the distance from a vehicle front edge to the “road edge”.
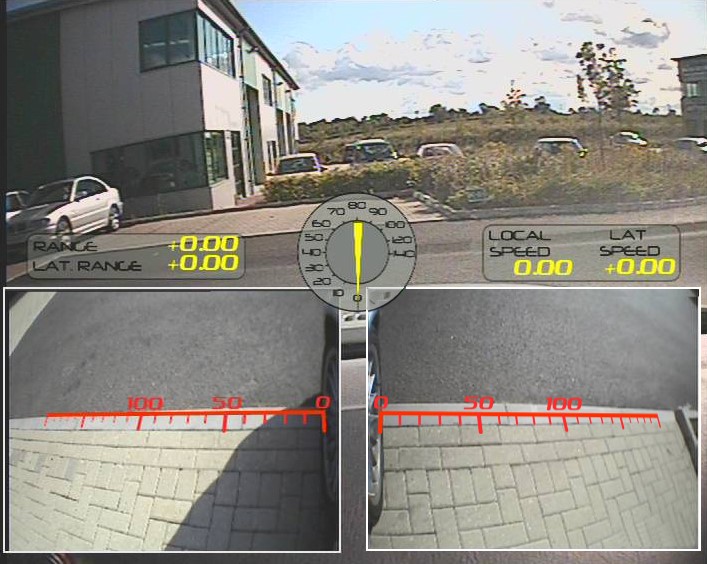
Example scene
Configuration procedure
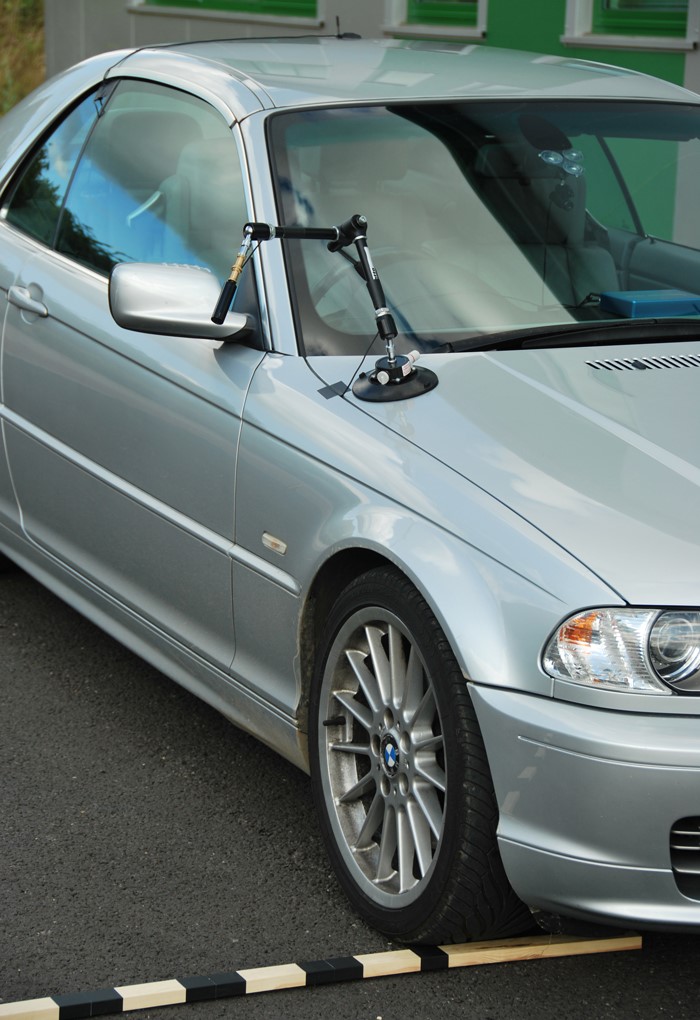
- Set the Video VBOX up on the test vehicle, with both side mounted cameras aligned as required. Use the supplied Camera preview unit to ensure correct camera alignment, as shown above. The supplied extendable suction mounted camera mounts will allow the cameras to be mounted as shown in the picture below. Place your clearly marked calibration rods at the front wheel positions at exact 90 degrees to the body of the car. These will act as the proof of distance measurement.
Do not move the vehicle, the cameras or the marked rulers until the end of the following process.
- Connect your Laptop computer via USB to the Video VBOX, run Video VBOX setup software on the laptop.
- Select the software option “Download preview into background”, the software will then take a snap shot from each camera and save it into the background of the Video VBOX software screen.
- Now, a ruler image can be created using the line style simple shape elements within VVB Setup.

.png?revision=1)
- Alternatively, take a “print screen” image of your Video VBOX software screen to use in a third party image manipulation software.
- Paste the captured “print screen” image into a suitable graphics package like Photoshop or Inkscape, ensuring that pixel ratios are maintained.
- Then draw the new ruler image over the top of the ruler line in the captured video image.
- You will then be able to create a custom ruler image calibrated to the camera positions on your test vehicle like the right hand gauge shown below.
.png?revision=1)
- Save these new gauges in a PNG format.
- Go back into the Video VBOX setup software and select the option Elements – New - Static image.
- This will create space for a new Static image in your scene
- Got to the ‘Static Image properties’ section of the software and click load to load in one of your new gauge images.
- Then move this gauge into position in your corresponding picture in picture, aligning it with the video image of the ruler line.
- Repeat this process for the other camera picture in picture position.
- Then save this scene.
- Reconnect to your Video VBOX in the test car and download the new scene into the video VBOX.
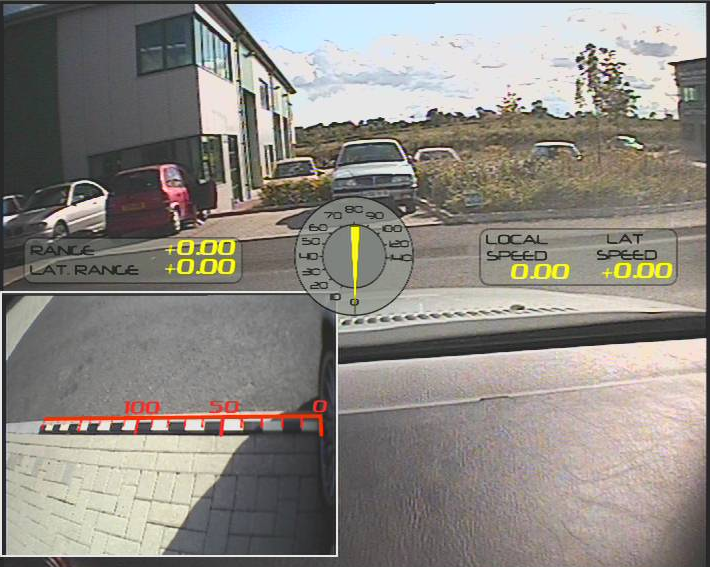
- Without moving the vehicle or the rulers record a few seconds of video to confirm that the on screen gauges and the markings on the Rulers line up. As shown in the single camera image below.
- Once confirmed, the marked rulers can be removed and the lane departure test conducted.