11 - VBOX Tools Data Display
A ‘live window’ is a display window that can display data from a VBOX channel in real time or from a logged channel in a VBOX file. The live windows can be placed anywhere on the screen and each may be set to one of six different display types. The colour and format of these windows can also be adjusted.
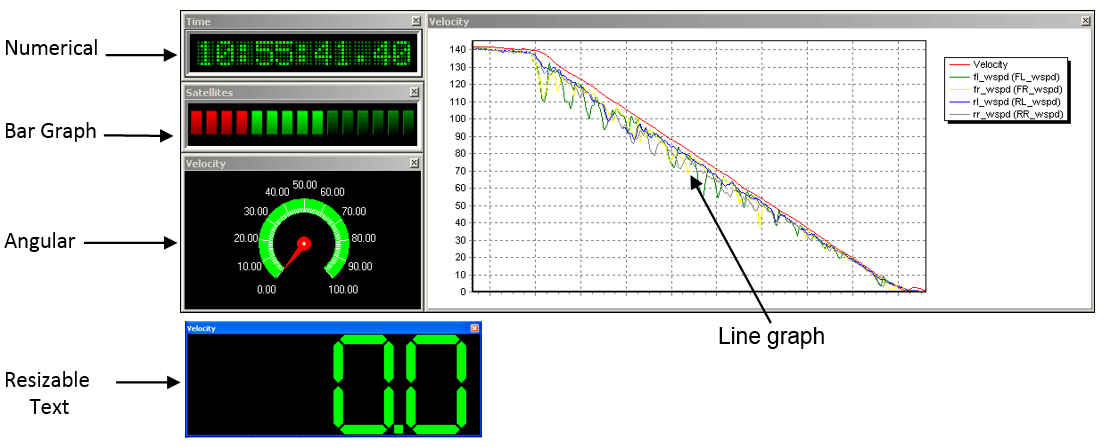
There are four examples in the screenshot below. Time is shown in a numerical window, satellite count is shown as a level bar, speed is shown on an angular meter and then speed and four separate wheel speeds are shown together in one line graph window.
Numerical and Level bar windows cannot be re-sized, all others can. Having a large number of live windows open, or many channels on a single window, requires a fast processor.
Creating a Live Window
Click on the ‘New Window’ icon in the main toolbar and a new live window will be created. The new live window shows speed in the numerical display format by default. This window can be moved and sized just like any normal window. The live windows have a ‘snap’ facility, which means if one is placed close to another, it will automatically snap into alignment with the other live window.
Selecting the Live Display Data Channel
To change the display channel in any one window, move the mouse cursor over the display window and right click the mouse, then select the ‘Main Data’ option.
This will bring up a new selection box showing the different channel types. Select one to bring up a new selection box and then select any of the channels listed within that box.
- Standard Channels: These are the standard channels created by the VBOX.
- Calculated Channels: These are channels calculated using the standard channel data.
- CAN Channels: These are any channels from CAN modules connected to the VBOX.
- Lap Timing Channels: These are speed at start/Finish, speed at Finish, and speed at Split.
- Memory Stores: These are any Memory store channels saved.
- Serial Status: These are channels which report any CRC errors in the serial communications.
Selecting the Live Display Data Format
To change the display format of a live window, move the mouse over the live window and right click the mouse, then select ‘Display Type’. From the drop down menu that appears select the format of your choice.
Live Window SetupOnce a live window has been created there are attributes of the window that can be configured from the menu that appears when the mouse is right clicked when over the live window. The attributes that can be changed vary between different types of live window; not all options are available for every display type. The options available include: |
.png?revision=1) |
- Update Only When Moving – This option causes the live window to only update when speed is detected.
- Smooth Level – This option will apply smoothing to the live channel on the VBOX, useful when displaying Acceleration channels.
- Chart – This option opens an advanced editing window.
- Automatic axis scaling – With this option set the display window will automatically scale the axis to fit the incoming data.
- Y-Axis Scale Reset – Selecting this option will rescale the Y-axis to fit the current value, allowing the user to quickly zoom the window to a scale suitable for viewing. This is particularly useful if, for example, the satellite reception is obscured momentarily, causing the Y-axis to reset to extremes of value, losing resolution.
- Max Samples – The number of samples of data displayed in the window can be set with this option.
- Display – This contains setup options for maximum and minimum range values and display colours.
- Number of elements – The number of bars shown in the level bar can be altered to make it easier to read.
- Font Colour – The font colour of the Text format window can be set in this option.
- Level Alerts – This feature allows the user to enable warnings in the form of audible beeps and a flashing window surround when user-definable levels are exceeded or ranges are met.
Setting Level Alerts
|
Right click the mouse to open the data setup menu of the live window, then select Set-up from the menu options. Then select Level Alerts to open the following window. The Level Alerts setup window allows the configuration of the channel levels at which audible alerts can sound accompanied by the border of the Live Window flashing. The Alert options allow a warning beep to be triggered when the data is. 1) Above a threshold 2) Below a threshold 3) Between two thresholds 4) Outside of two thresholds. |
.png?revision=1) |