05 - LabSat Connecting USB
Prior to powering up LabSat for the first time the USB cable should be connected, this allows the correct configuration of the USB connection from LabSat to the computer.
When the USB is connected for the first time you will need to follow the instructions below.
Note: The order in which the connections are made is important.
- Connect the USB A to B cable between the LabSat and the computer.
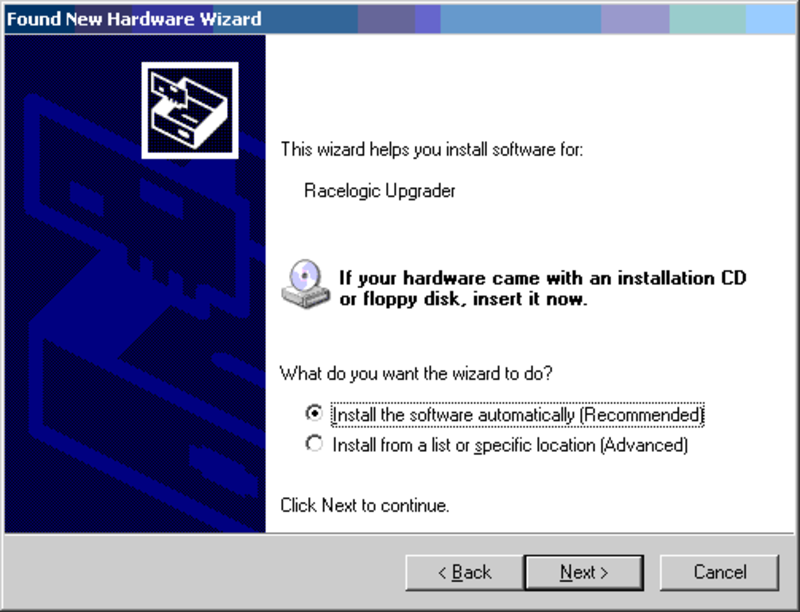
Note: The LabSat does not need to be powered for these steps as the USB board inside the LabSat will obtain power via the USB cable connection to the computer. - The computer should now recognise the presence of a new USB device; after a short period of time a ‘Found New Hardware Wizard’ window will appear.
Click Next to continue the installation. - Click ‘next’, with the option ‘Install the software automatically (Recommended)’ Selected. (See image below)
- At the last window click ‘Finish’ to complete the installation.
- This process will then repeat a second time beginning with step 2.
Now connect the LabSat to its power supply. Your computer should now recognise the unit, and the USB connections will be recognised by the LabSat Setup software when started. Double-click the LabSat software icon to start the software. If you intend to use the Internal GNSS monitor connect the USB - USB - 5 Way LEMO Serial Cable and select the correct serial port in the Plug-ins section of the setting menu.
See the Troubleshooting section if the installation process fails at any stage.

