Quick Start Guide - VBOX Sport (v3)
Using as a Standalone Logger
If you are using the internal antenna, then the unit should be mounted low down in the windscreen to maximise the view of the sky. Optional accessories available on our website include a windscreen suction mount and an external antenna.
The external antenna gives the optimum GNSS performance and also means that the VBOX Sport can be mounted anywhere convenient.
After mounting the VBOX Sport, insert the SD card, and briefly press the power button to switch on. Wait for the satellite LED to stop flashing, and then logging will start as soon as you start moving. Alternatively, you can select ‘record continuously’ mode by pressing the logging button.
|
|
 |
.jpg?revision=2)
Pairing with an iPhone/iPad
VBOX Sport contains an Apple-certified Bluetooth chip, which makes pairing a very simple process.
- Make sure that Bluetooth is enabled in the Settings menu and that VBOX Sport is switched on.
- The first time you connect, VBOX Sport and its corresponding serial number will appear in the DEVICES area. Tap on the device name to connect to it.
- The mobile device will display a connecting progress wheel during the connection and once it has been connected, VBOX Sport will move to the MY DEVICES area.

You will only need to do this step once. The mobile device will remember the VBOX unit and will automatically connect to it whenever it is in range and the Bluetooth is on.
Pairing with a second device
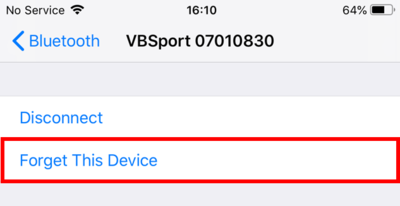
VBOX Sport can only be connected to one iOS device at a time. If your VBOX unit has been connected to an iOS device and you want to connect it to a different iOS device, you must unpair VBOX Sport from the connected iOS device. Select the VBOX unit in the MY DEVICES list and then select Forget This Device.
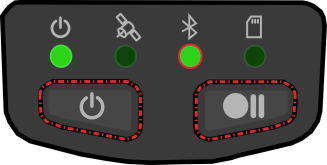
After this, you must clear the automatic pairing function of the VBOX Sport. This is done by pressing and holding both buttons for 2 seconds on the VBOX Sport at which point the Bluetooth LED flashes rapidly. (Note that this will only happen if it has been previously paired with another device).
Once both stages are completed then you can repeat the initial pairing procedure with the new device. If you then connect to your old device again, you will need to go through the pairing procedure again.
 |
 |
Using the Performance Test app
To undertake a performance test you will need to download the free ‘VBOX Sport Performance Test App’ from the iTunesTM store. To find the app, search for ‘VBOX Sport’.
.png?revision=2)
Once the app is opened, a Bluetooth icon .png?revision=2) at the top left of the screen in the Test menu indicates whether the VBOX Sport is connected to the device.
at the top left of the screen in the Test menu indicates whether the VBOX Sport is connected to the device.
Acceleration testing
When you have installed the app and you have linked your VBOX Sport to your phone, you must wait for it to gain a good satellite lock. Press Start. The timing will begin when the car starts to move, and it will finish when the car begins to decelerate.
Note: If you move slightly and come to a stop again, the timing will reset.
You can examine the results by tapping on the Details button in the top right corner of the main screen.
You can display the graph by tapping on the Graph button in the top right corner of the results page.
.png?revision=3)
Brake testing
You can change the type of test using the Setup button at the bottom of the screen. The Brake test starts as soon as the car starts to decelerate.
Zero to Zero testing
You can carry out a 0-100-0 or similar acceleration followed by braking, by using the 0 to 0 function.
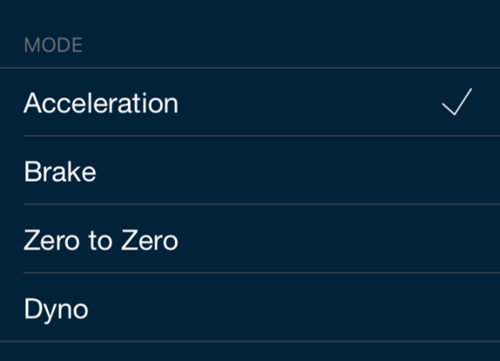
Dyno testing
Dyno tests can also be carried out to ascertain the horsepower details of a vehicle.
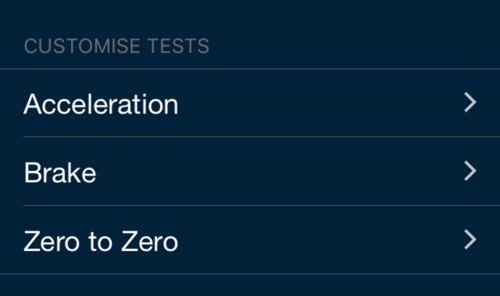
User-defined tests
This section is used to set and define test ranges. Only one range can be set for Zero to Zero tests, but there is no limit on the number of Acceleration or Brake tests.
Note: Distance acceleration tests will automatically calculate Mile, 1/2, 1/4 and 1/8 Mile results.
For further details on Racelogic’s iOS applications, please look at the app-specific manuals.
Connecting to VBOX Test Suite
VBOX Sport can connect via Bluetooth to a Laptop running VBOX Test Suite to view live data and perform tests.
- After the VBOX Sport has been mounted and the SD card inserted, briefly press the Power button to switch on the device.
- If this is the first time you have connected the device to the Bluetooth-enabled laptop, navigate to the Bluetooth Settings area.
- Click on the Add Bluetooth or other device button and select the VBOX Sport unit (you only need to do this once as the unit will be remembered and the connection will be made automatically when the unit is in range and the Bluetooth is on).
 |
 |
- Open the VBOX Test Suite Software and navigate to the 'Home' tab, select the 'Online' button and choose the correct COM port for the VBOX Sport from the drop down menu.

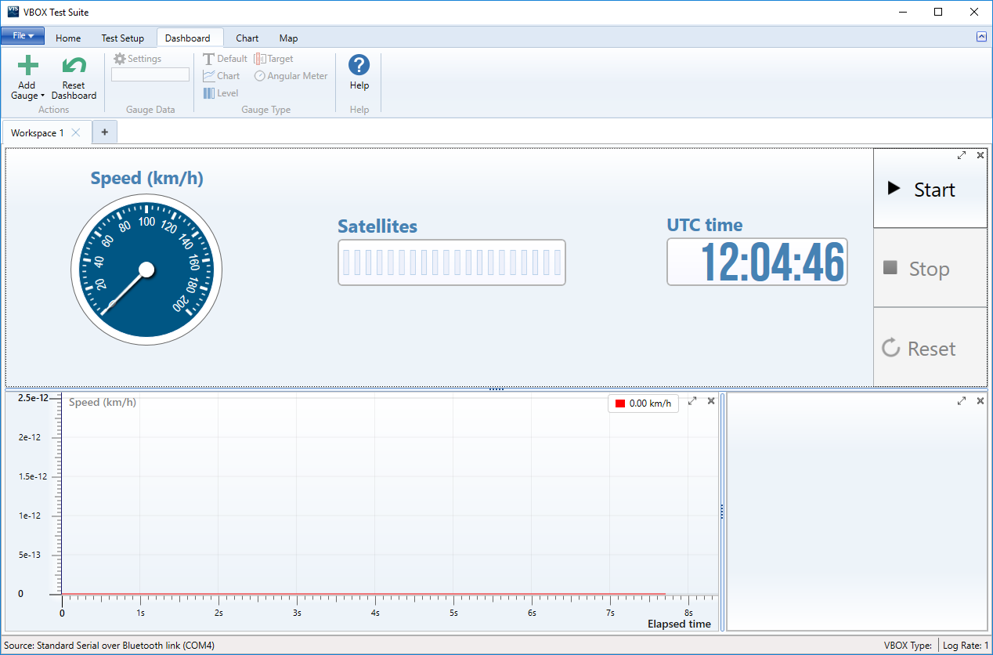
Once the software is connected to the VBOX Sport, the dashboard gauges will automatically start to display the data being sent live over the VBOX unit's serial stream.
In this Online mode, Start, Stop and Reset buttons will appear on the dashboard. These buttons are used to start, stop and reset any open tests.
When in online mode, a newly created session will be populated with session data from the previous session (if entered).
Note: You can cancel the COM port selection before the software has fully opened online communications. Click on the X button next to the connection progress bar in the bottom left corner of the software window, as shown below.
If the connection is lost, a Disconnected message is displayed. To reconnect again, select the Try Reconnect option.
You can find more information about viewing live data and performing tests with VBOX Test Suite here.