RACELOGIC Support Centre

Web Server

This page contains information about how to configure and monitor LabSat 4 Replay Only variants using the LabSat 4 Web Server.

To simplify the configuration and device control process of LabSat 4, we have created an internal web server that you can access via an Ethernet connection and a standard web browser. 

Connecting to the LabSat 4 Web Server via Ethernet

Navigate to the LAN Menu on the LabSat 4 Display:

Menu -> Setup -> LAN

LabSat 4 will use Dynamic Host Configuration Protocol (DHCP) by default for the IP address.

If you require a Static IP instead, you can enable and define the IP address in the LAN settings menu. 

  1. Connect a network cable to the Ethernet port at the rear panel on LabSat 4.

    When the network cable is connected, the allocated IP address will be displayed next to the LAN Menu header and also in the About Menu.
     
  2. Open a web browser.
  3. Connect to the Web Server by entering the  IP address from the LAN menu in the browser's address bar.
 

User Interface

LS4P_WebServer_Overview.gif


Click on a Web Server menu below to see more information about the features available in that menu. 
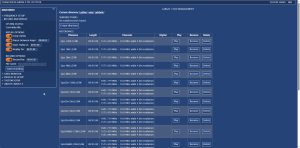
LS04P_WebServer_FrequencySetup_4JUL24_300px.png Record_and_replay_300px.png LS4(P)_WebServer_GNSSMonitor_4JUL24_300px.png
Frequency Setup Replay GNSS Monitor
LS04P_WebServer_DigitalIO_4JUL24_300px.png LabSat4_WebServer_SystemSetup_300px.png LabSat4 Webserver_About_300px.png
Digital IO Setup System Setup About LabSat 4
  • Was this article helpful?