How to Disable Driver Signature Verification on 64-Bit Windows 8.1 or 10

Some devices use drivers that are unsigned (for example, CAN USB adaptors), so, in order to install them on a Windows 8 or 10 PC, you will need to disable driver signature verification.
To do this, you will need to access the troubleshooting options from the boot manager. The easiest way to bring this screen up is outlined below.
Simply select restart from the power options menu (on Windows 8 that’s under charms or on the login screen, and in Windows 10 it’s on the start menu).
Hold down the SHIFT key while you click restart.
.png?revision=1)
Again, you can use this trick on any of the power menus in Windows 8 or 10, whether on the login screen, charms bar, start menu, or start screen.
Once your computer has rebooted you will be able to choose the troubleshoot option.
.png?revision=1)
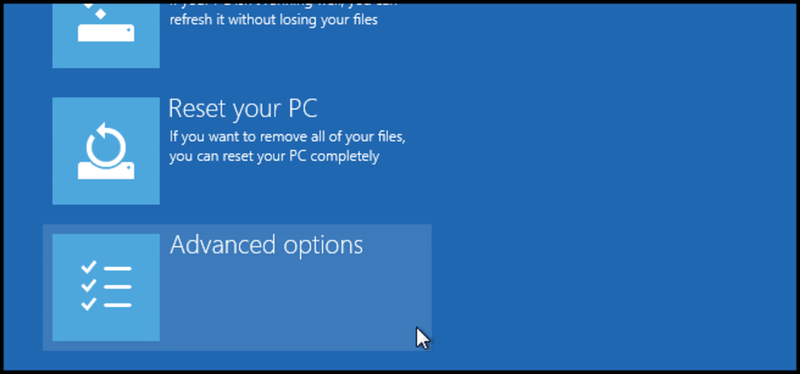
Then head into advanced options.
.png?revision=1)
Then startup settings.
.png?revision=1)
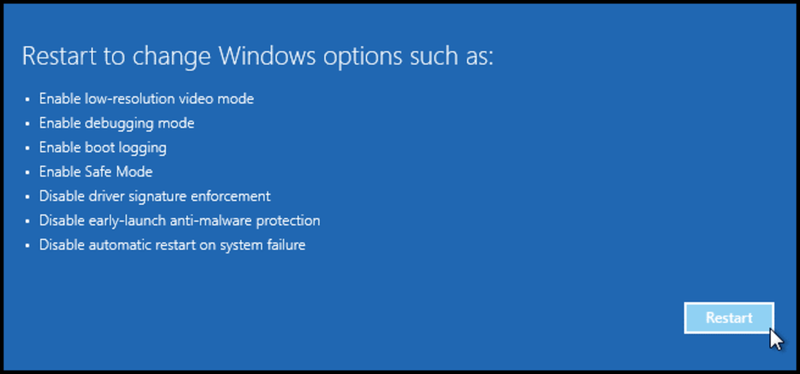
Since we are modifying boot time configuration settings, you will need to restart your computer one last time.
.png?revision=1)
Finally, you will be given a list of startup settings that you can change. The one you are looking for is “disable driver signature enforcement”. To choose the setting, you will need to press the F7 key.
.png?revision=1)
That’s all there is to it. Your PC will then reboot and you will be able to install unsigned drivers without any error messages.
