Manually Entering Up To 2 Contact Points
- Last updated
-
-
Save as PDF
-
To manually set vehicle contact points within an ACC, AEB, BSD or FCW test, please follow the steps below:
- Connect VBOX Manager to the VBOX within the Subject Vehicle.
- Select the 'ADAS' option from the 'SETUP' menu and then depending on how many target vehicles you are using, ensure '1 Target', '2 Target' or '3 Target' is selected.
- Select 'Subject' within 'ADAS Function' and then choose 'Subject Vehicle Contact Points'.

- Select 'Enter Contact Points'.

|
 |
- This menu allows you to select whether 1 or 2 contact points are to be specified. The current number of selected points is shown.

- To change the number of points, select the menu and scroll to the desired number, press again to confirm.

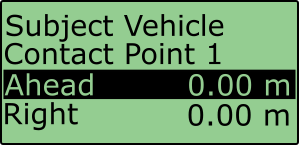
- Scroll down to 'Subject Vehicle Contact Point 1' and select.

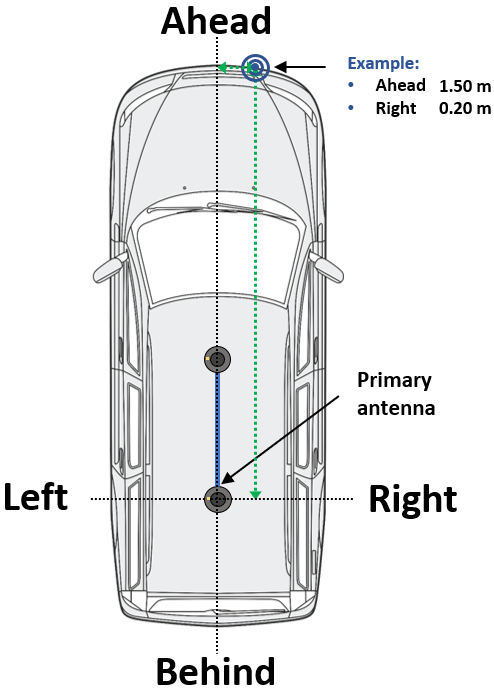
- This menu allows the user to translate the Primary antenna point (or IMU if IMU Integration is enabled) to a desired reference point on the vehicle. This is done by entering a numerical forward/back and right/left offset value. Scroll to 'Ahead' and select.
- Scroll to 'Ahead' or 'Behind' depending on whether the point is ahead or behind of the antenna and select.
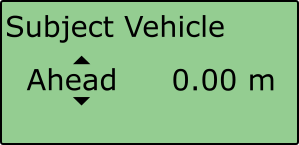
- Enter the offset value by pressing the scroll wheel to move along the digits and rotating to the desired number, selecting past the final digit will store the value.

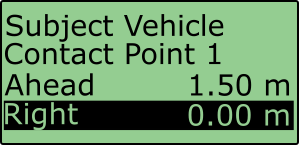
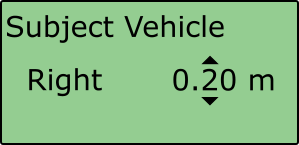
- Select 'Right' and choose 'Right' or 'Left' depending on whether the point is to the left or right of the antenna.
 |
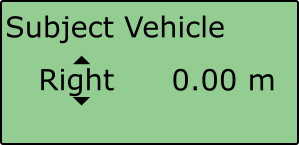 |
- Enter the offset value by pressing the scroll wheel to move along the digits and rotating to the desired number, selecting past the final digit will store the value.
- If you have selected 2 contact points, scroll down to 'Subject Vehicle Contact Point 2' and repeat the above process.

- Repeat the process to define the Target Vehicle(s) contact points by selecting 'Target Vehicle 1 Contact Points', 'Target Vehicle 1 Contact Points' or 'Target Vehicle 3 Contact Points' within the 'ADAS Function Subject' menu.