One of the easiest ways to calculate vehicle to vehicle separation offsets is to align vehicles bumper to bumper and create 1 contact point for each vehicle.
Target vehicle
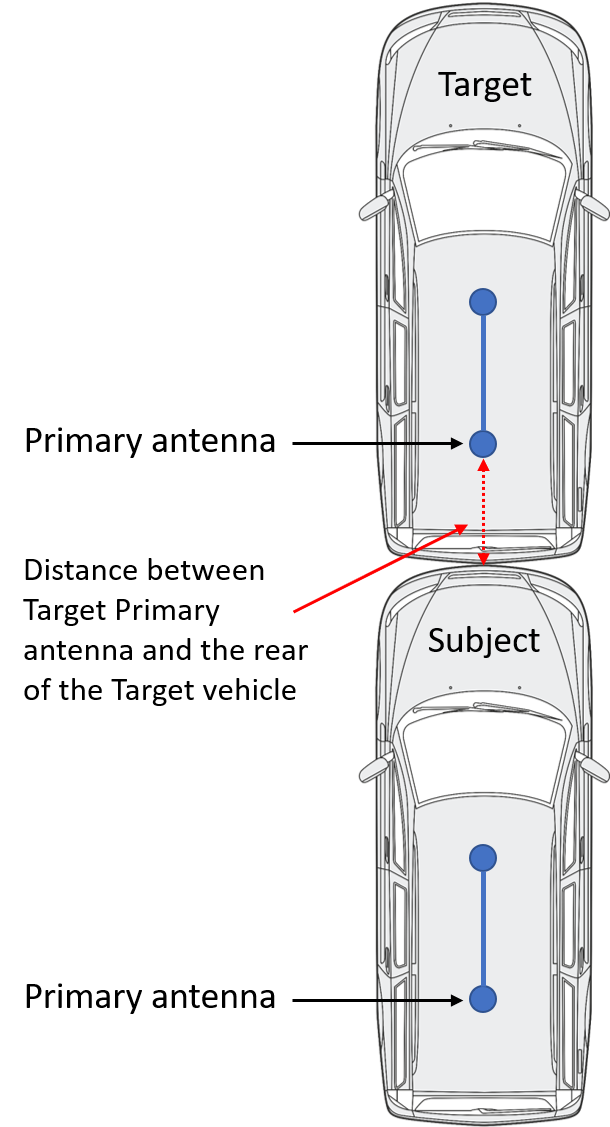
Park two vehicles in a line with the Subject car touching the bumper of the Target car.
Ensure the vehicles are perfectly aligned and parked straight. Note: In the example below, offsets are applied to two twin antenna VBOX’s in ‘pitch mode’ configuration. This can also be done in 'roll mode' configuration, the same instructions apply.
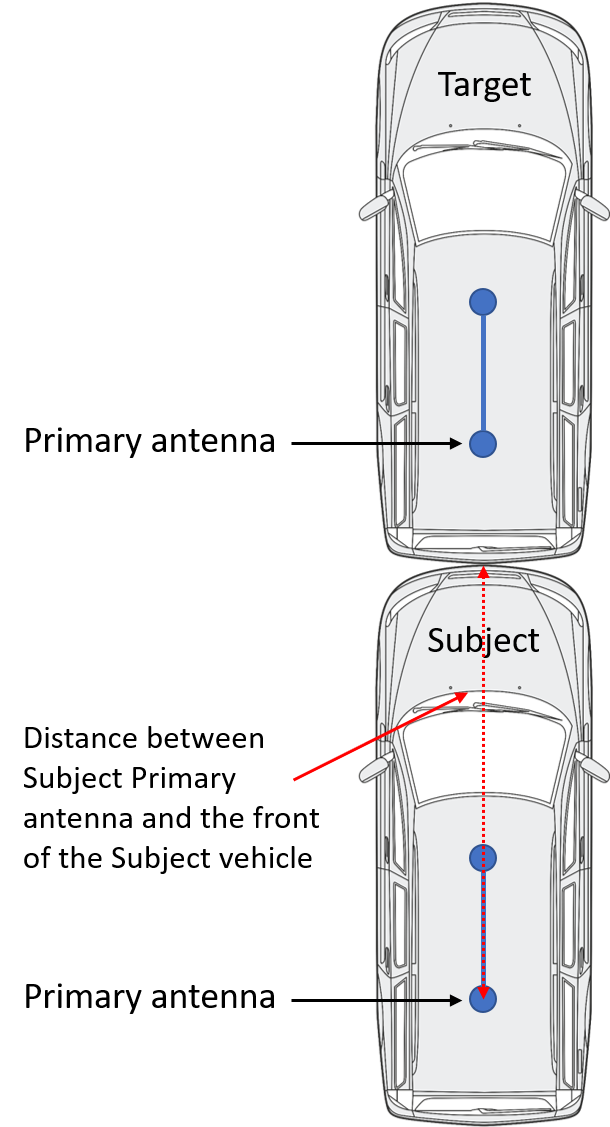
Measure the distance between the Primary antenna (or IMU if IMU Integration is enabled) of the Target vehicle and the rear bumper of the Target vehicle.
Using a VBOX Manager connected to the VBOX within the Subject vehicle, Select the 'ADAS' option from the 'SETUP' menu and then depending on how many target vehicles you are using, ensure '1 Target', '2 Target' or '3 Target' is selected.
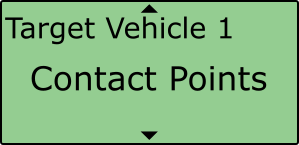
Select 'Subject' within 'ADAS Function' and then choose 'TargetVehicle 1 Contact Points'.
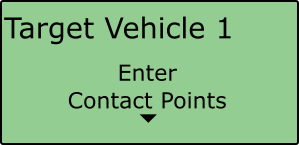
Select 'Enter Contact Points'.
Scroll to 'No. of Points', select and and choose '1'.
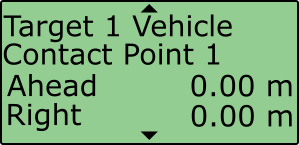
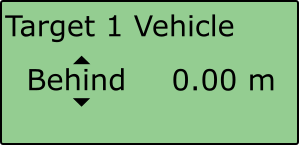
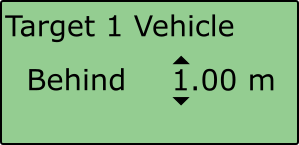
Scroll down to the 'Target 1 Vehicle Contact Point 1' and select.
Select ‘Ahead'.
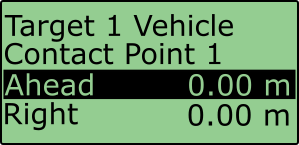
Scroll to 'Behind' and select.
Enter the rear offset value measured to the bumper by pressing the scroll wheel to move along the digits and rotating to the desired number, selecting past the final digit will store the value.
Subject vehicle
Ascertain the distance from the Primary antenna (or IMU if IMU Integration is enabled) of the Subject vehicle to the front bumper of the Subject vehicle, this can be achieved in two ways:
Measure the distance between the Subject car’s Primary antenna/ IMU and the Subject car’s front bumper (contact point).
Open VBOX Tools/ VBOX Test Suite and make a note of the ‘Vehicle separation range’ channel value (recommended). Note: The two values should be the same!
Using a VBOX Manager connected to the VBOX within the Subject vehicle, Select the 'ADAS' option from the 'SETUP' menu and then depending on how many target vehicles you are using, select either '1 Target' or '2 Target'.
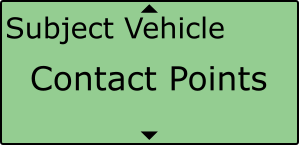
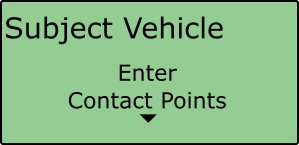
Select 'Subject' within 'ADAS Function' and then choose 'SubjectVehicle Contact Points'.
Select 'Enter Contact Points'.
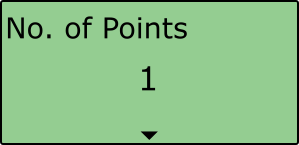
Scroll to 'No. of Points', select and and choose '1'.
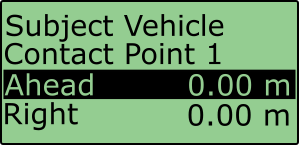
Scroll down to the 'SubjectVehicle Contact Point 1' and select.
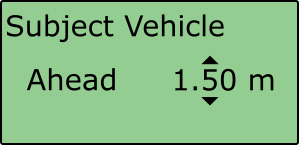
Select ‘Ahead'.
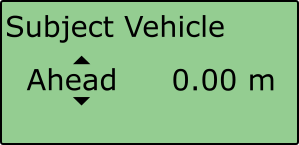
Select 'Ahead' again.
Enter the front offset value measured to the bumper/ ‘Vehicle separation range’ channel value by pressing the scroll wheel to move along the digits and rotating to the desired number, selecting past the final digit will store the value.
When the offset is applied to the Subject vehicle, the ‘Vehicle separation range’ channel value within VBOX Tools/ VBOX Test Suiteshould be zero. Repeat this process to define another target vehicle if required.