08 - VBOX Video OBD Settings - Windows

VBOX Video HD2 has the ability to capture up to 11 OBD channels via a Bluetooth module which plugs in to the vehicle's OBD port.
The OBD settings area can be accessed using the ‘Settings’ button in the top left menu bar.
.png?revision=1)
To return to the scene designer, either use the ‘Settings’ button again, or press the ‘X’ in the top right corner of the general settings area.
Further information on the operation of this module can be found here.
Overview
The three main areas of the OBD settings page are highlighted below.
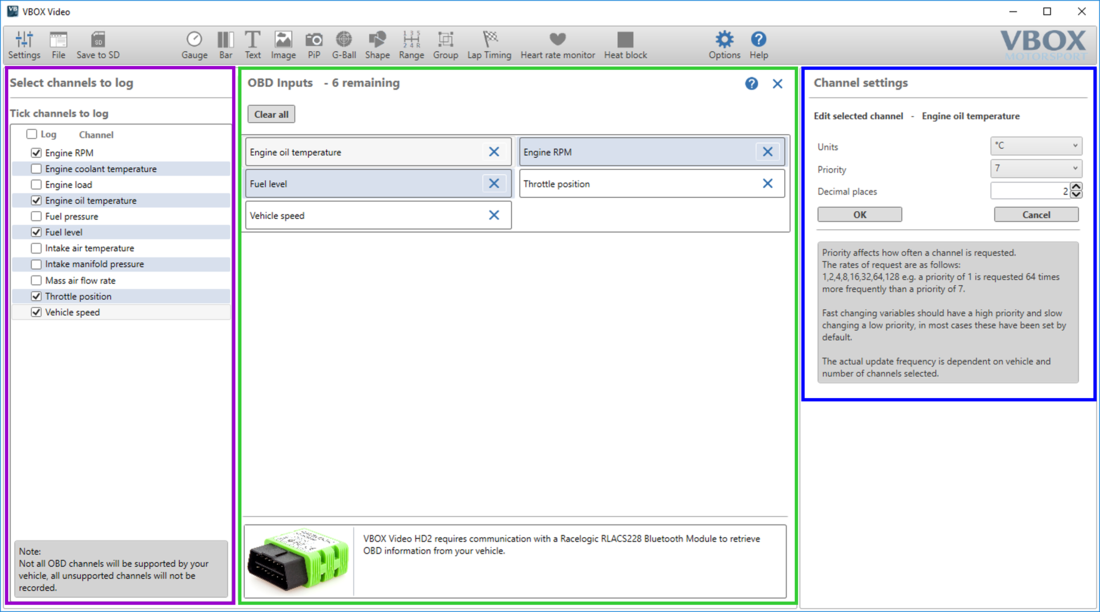
Select channels to log
The purple box highlights the area where OBD channels can be selected to be logged by VBOX Video HD2. To log all channels, tick the ‘Log’ box at the top of the list. Channels can also be ticked to log individually.
Note: Not all channels will be supported by your vehicle, all unsupported channels will not be recorded. Contact the vehicle manufacturer for further information.
OBD Inputs
The green box highlights the areas which display all OBD channels that are currently set to log. A counter at the top of this window shows the number of remaining channel spaces. Clicking on a channel set to log will cause its settings to display in the channel settings area.
Channel settings
The blue box highlights the settings for either the currently selected channel in the OBD Inputs section or the last selected channel in the 'Select channels to log' section.
The configurable settings, which will change dependent on the channel selected, include units, decimal places and priority. Priority is selectable from 1-7 and affects how often a channel is requested. For example, a priority of 1 is requested 64 times more frequently than a priority of 7. Fast-changing variables should have a high priority and slow changes a low priority, in most cases these have been set by default. The actual update frequency is dependent on the vehicle and the number of channels selected.
OBDII Port Location
The exact location of the OBDII connector varies from vehicle to vehicle, but it will be within a few feet of the driver and it will have easy access. Most often you can find the OBDII connector somewhere below the steering column, either above the pedals or perhaps inside a fuse box by the driver's knee. The OBDII connector will probably be in plain view, but some connectors are covered.
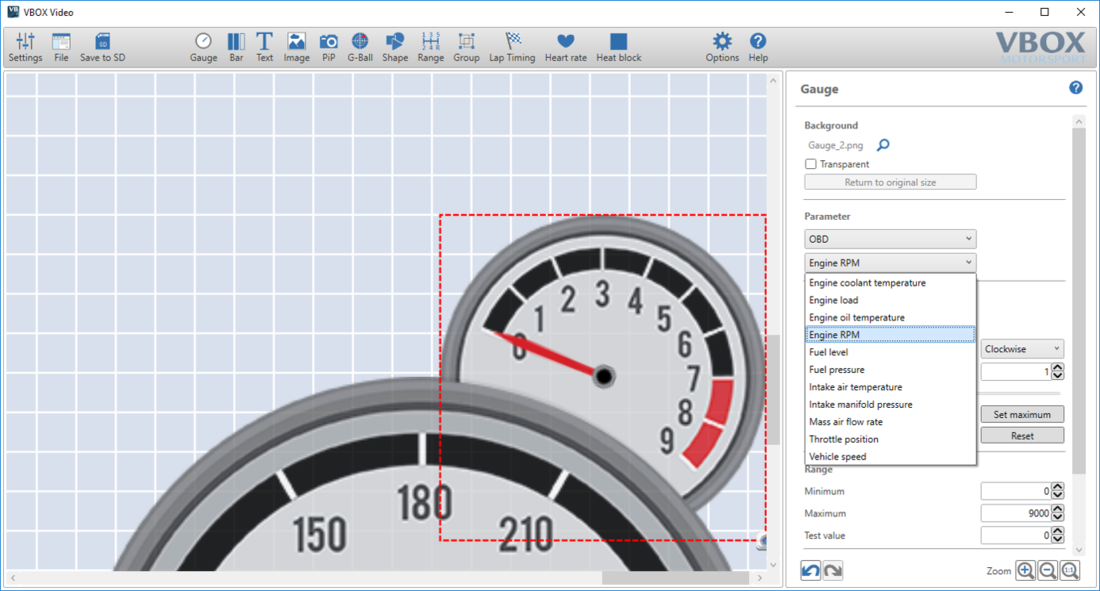
Assigning an OBD channel to an element
Once the OBD channels have been defined within the OBD settings area, return to the scene designer.
Select the element you wish to assign OBD data to. In the right-hand panel, under the ‘Parameter’ drop-down list, select ‘OBD’ and then the channel of interest.
Further information on setting up elements can be found here.