02 - VIPS Site Configuration Site
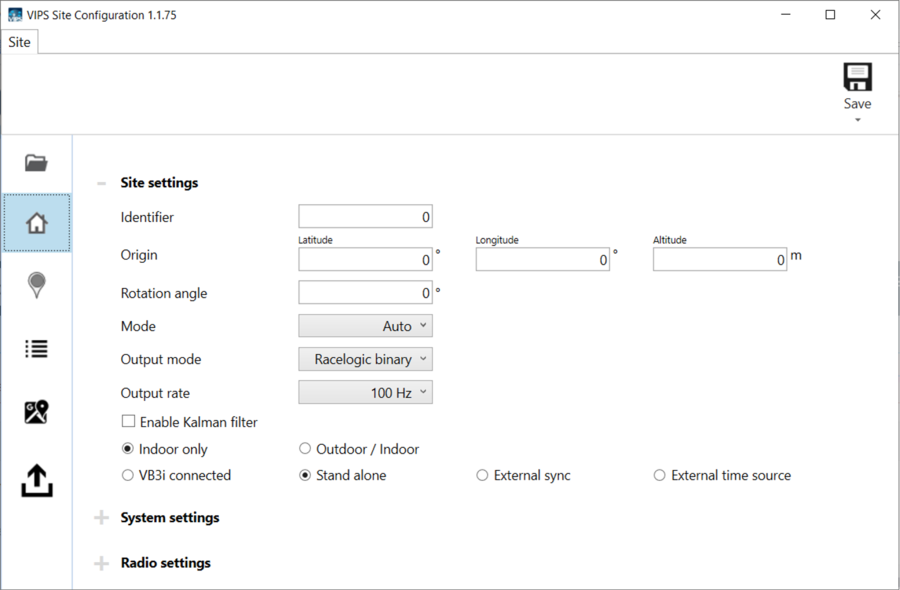
The first page the user is presented with is the Site tab ![]() . Here you can configure how the Rover is expected to operate and also change the Radio Settings.
. Here you can configure how the Rover is expected to operate and also change the Radio Settings.
Note: The radio settings are for Racelogic development purposes only.
Site Settings
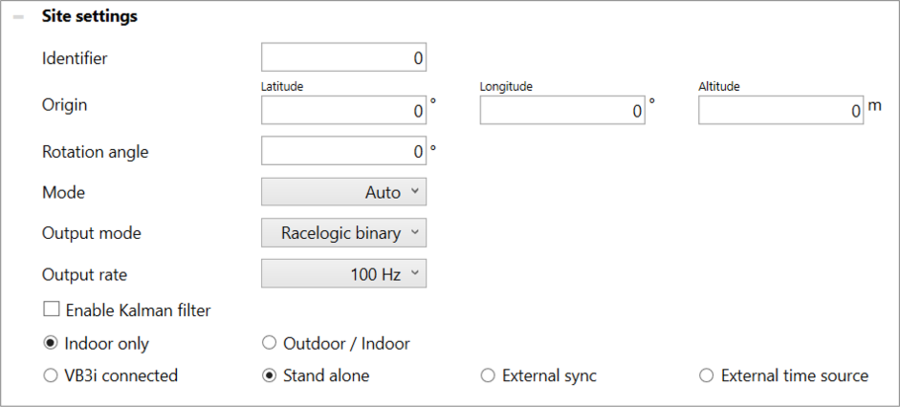
Identifier
There may be multiple VIPS operating within the same test ground and so to ensure the rover only uses the signals coming from the intended test site, a site identifier needs to be entered. This identifier will need to match the site identifier of the beacons that will be used.
For temporary installations, this identifier should be set to 0. For permanent installations a non-zero number should be used.
Origin
For indoor/outdoor use, it is important that the origin of the VIPS matches a global coordinate system to ensure there is a smooth transition between GNSS and VIPS position.
The enter value of the origin should be a georeferenced location that is the 0,0 point from which all VIPS beacon measurements are taken from.
Rotation Angle
As well as a georeferenced origin, it is also important that the VIPS x/y measurements are rotated correctly into a ‘North up’ frame.
The entered value in the rotation angle should be the bearing of the track direction, in degrees from North.
For indoor use only, the rotation angle should be set to 0.
Mode
Choose the Dynamics mode of the VIPS Rover, selectable between High accuracy, Auto and High dynamics.
If there are less than 10 beacons, High dynamics should be used. If there are 10 or more beacons but they are so spread out that the Rover will rarely have more than 8 Beacons in range at a time, then high dynamics should also be used. If there are 10 or more beacons in close proximity, then High accuracy should be selected.
Selecting the Auto option will pick the most appropriate mode when uploading to a Rover unit.
Output Mode
Choose the output mode of the VIPS Rover, selectable as VB3i integration (auto set when VB3i connected is chosen), Racelogic binary (default for non-VB3i modes) and
NMEA GGA.
Output Rate
Choose the output rate of the VIPS Rover, selectable between 100 Hz, 50 Hz, 20 Hz, 10 Hz, 5 Hz and 1 Hz. When VB3i connected is selected, this is automatically fixed to 100 Hz.
Enable Kalman Filter
Not available when in VB3i connected mode.
Enable or Disable Kalman Filter output.
Indoor or Outdoor/Indoor
Choose whether the expected use will be indoors only, or outdoors and indoors.
VB3i Connected, Stand Alone, External Sync or External Time Source
- VB3i connected: For use if the VIPS Rover is connected to a VBOX 3i, a 100 Hz PPS input is received from the VBOX.
- Standalone: The VIPS Rover will generate a 100 Hz PPS output that other equipment may use for synchronisation. The time is set by the rovers internal real time clock which is set to the current UTC time by the Site Configuration Software every time a new setup is loaded.
- External sync: Allows the system to be synchronised to an external 100 Hz PPS pulse and time source.
- External time source: Lets an external device set the system clock but the VIPS system will generate the 100 Hz PPS signal.
System Settings
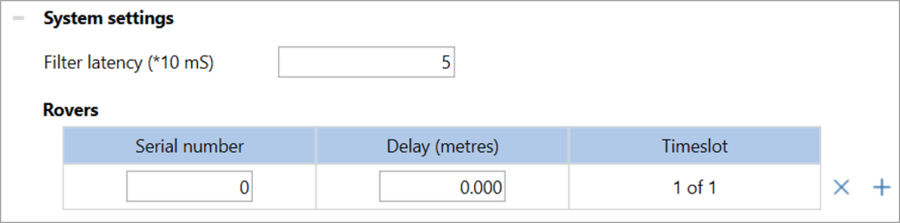
Filter Latency
Choose the filter latency of the system, selectable between 0-15. The value is multiplied by 10, providing a range between 0-150 mS in 10 mS increments, 50 ms by default.
Rovers
You can configure multiple Rovers (up to 5) by pressing on the + icon. You can also input the serial number of the rover(s) along with the delay, selectable between -0.2-0.2 m. Press the x button to remove a Rover.
If multiple Rovers are added, the current configuration will need to be uploaded to all defined Rover units.
Radio Settings
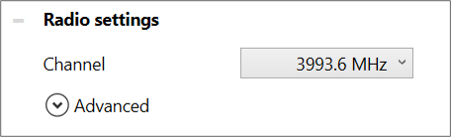
Channel
It is possible to change the radio frequency between 3993.6 MHz (default) and 6489.6 MHz.
Advanced
Advanced radio settings are also available, including Tx power level, Leading edge time threshold and Preamble number, however these should only be changed under the guidance of Racelogic Support.

Tx Power Level
The radio transmit power level can be altered by either typing in a new number or by using the up and down arrows. Changing the radio frequency will change the power level, if 3993.6 MHz is chosen as the radio frequency, 18.5 dB will be selected by default. If 6489.6 MHz is chosen, 8 dB will be selected.
Note: If the selected power level is above the maximum allowed for license free operation, a warning message will appear.
Leading Edge Time Threshold
This option can be used to filter out long lived reflections that can occur in certain buildings and cause false range measurements. For most applications, the default setting of Normal will suffice, other levels of filter trade off effectiveness against false rejection rate. Selectable as None, Minimum, Normal (default), Aggressive and Maximum.
Preamble Number
This option can be changed if systems are working in relatively close proximity to each other (e.g. another building). Ensuring the systems have differing numbers prevents accidentally picking up signals from another system. Selectable as 18 (default), 19 or 20.