Front and Rear Panels
This page contains information about the front and rear panels on the LabSat 4 Replay Only variants, including available ports and the functionality of buttons and LEDs.
Front Panel
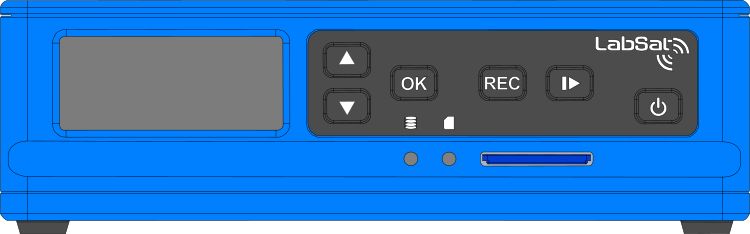
Display
The front panel display gives you the ability to replay and monitor scenarios and configure your LabSat 4 via the Settings Menu.
Keypad
Up and Down Arrow Buttons |
 |
OK Button |
 |
REC ButtonAs the replay variants of LabSat 4 cannot record files, this button will not have any functionality. |
 |
Play Button |
 |
Power Button |
LEDs
 |
SSD LEDThe SSD LED will flash blue when LabSat 4 replays data from the SSD. |
 |
SD LED |
SD Card Slot
 |
|
Rear Panel

Ports
 |
Power |
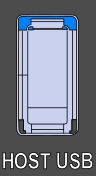 |
HOST USB |
 |
USB |
 |
ETHERNET |
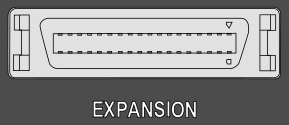 |
EXPANSIONYou can use the 36-way MDR port to connect 1 PPS, Digital I/O, CAN and RS232 devices to LabSat 4 to be replayed in the scenario files.
|
 |
REF |
 |
RF OUT |
 |
RF INThe RF Input SMA port is for file recording and does not have functionality on the Playback variant of LabSat 4. |
Lid Release Catch
 |