Adding Waypoints
- Make sure that you are connected to the Internet.
- Connect the security dongle to your computer. Wait for the dongle to activate and the light on it to become red.
- Open the SatGen 4 software.
There are 3 methods for adding waypoints:
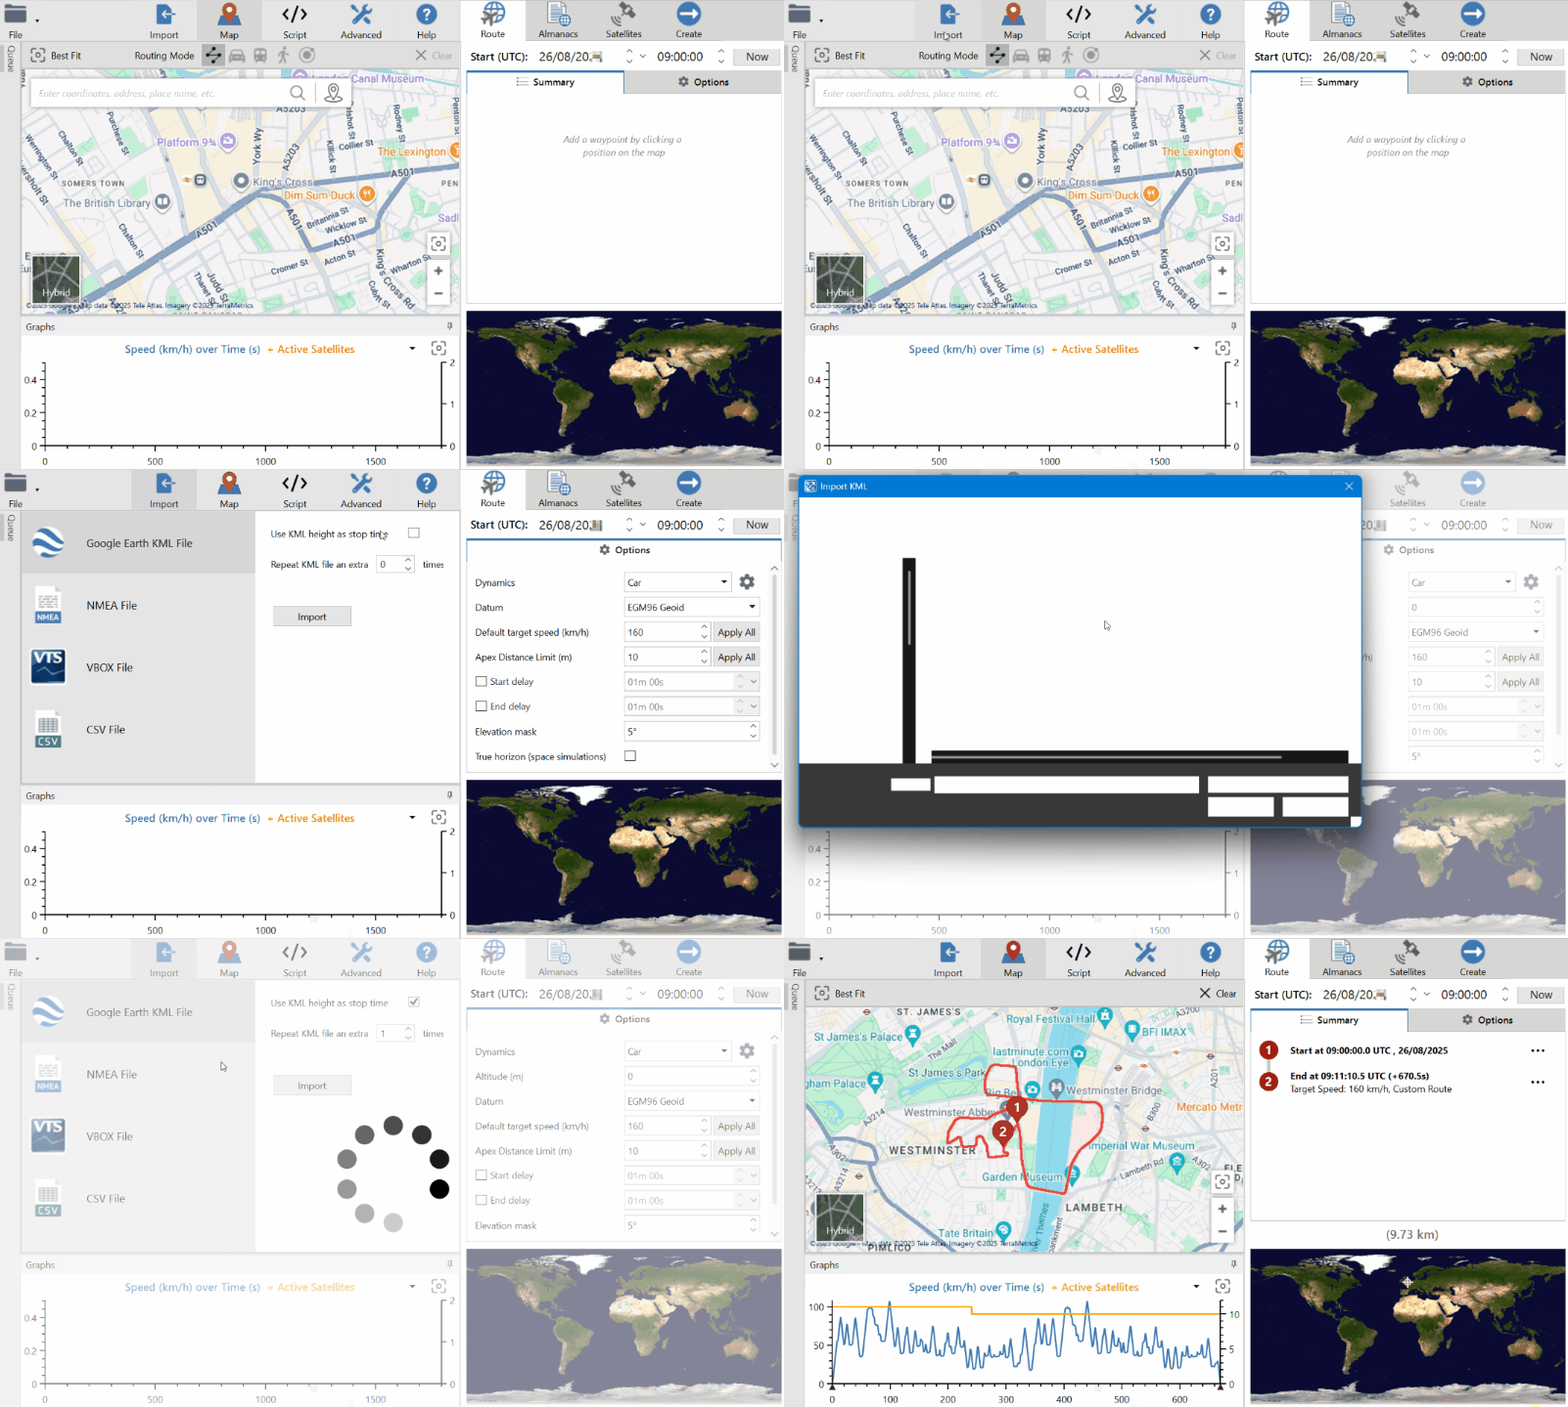
Import
Use the Import feature to import an existing route into the SatGen 4 software.
You can import one of the following file types:
- Google Earth KML File
- NMEA File
- VBOX File
- CSV File
- Click Import on the Toolbar.
- Select the required file type from the list on the left-hand side of the Import area.
- Configure the import settings (if relevant).
- Click Import. This will open the Import window.
- Navigate to the relevant directory on your computer and select the required file.
- Click Open.
The route from the selected file will be imported, and the mode will automatically be set to Map Mode, where you can view the route on the map and edit the waypoints in the Route tab in the Settings Area.

Map Mode
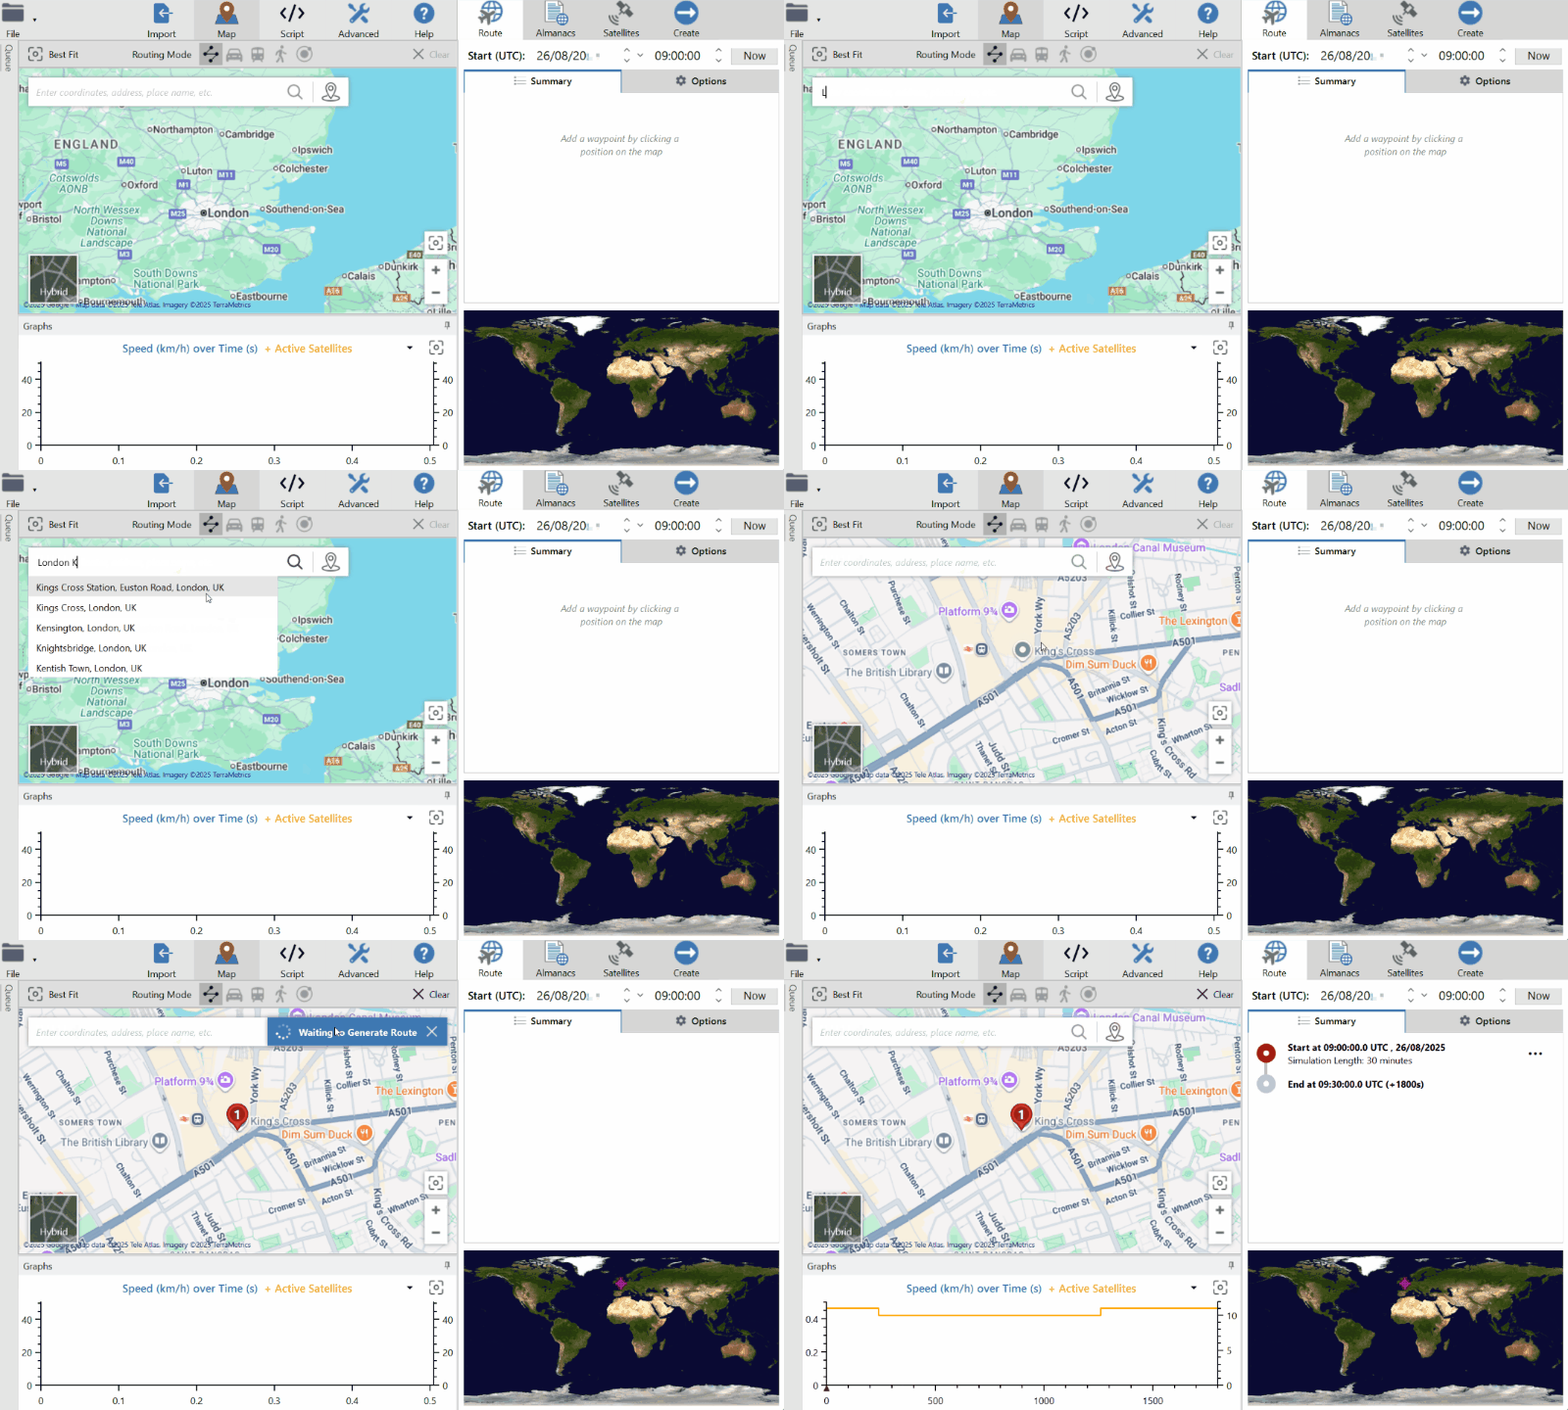
Setting the Start Position
- Make sure that Map Mode is selected on the toolbar.
- Navigate to your start location by entering coordinates, an address or a place name in the Location Search bar.
The map will be centred on the selected location.
- Click on the Add Waypoint button next to the search bar to add a Waypoint to the centre position on the map and start the trajectory.
Alternatively, you can left-click on the map where you want to set the first waypoint marker to start the trajectory.

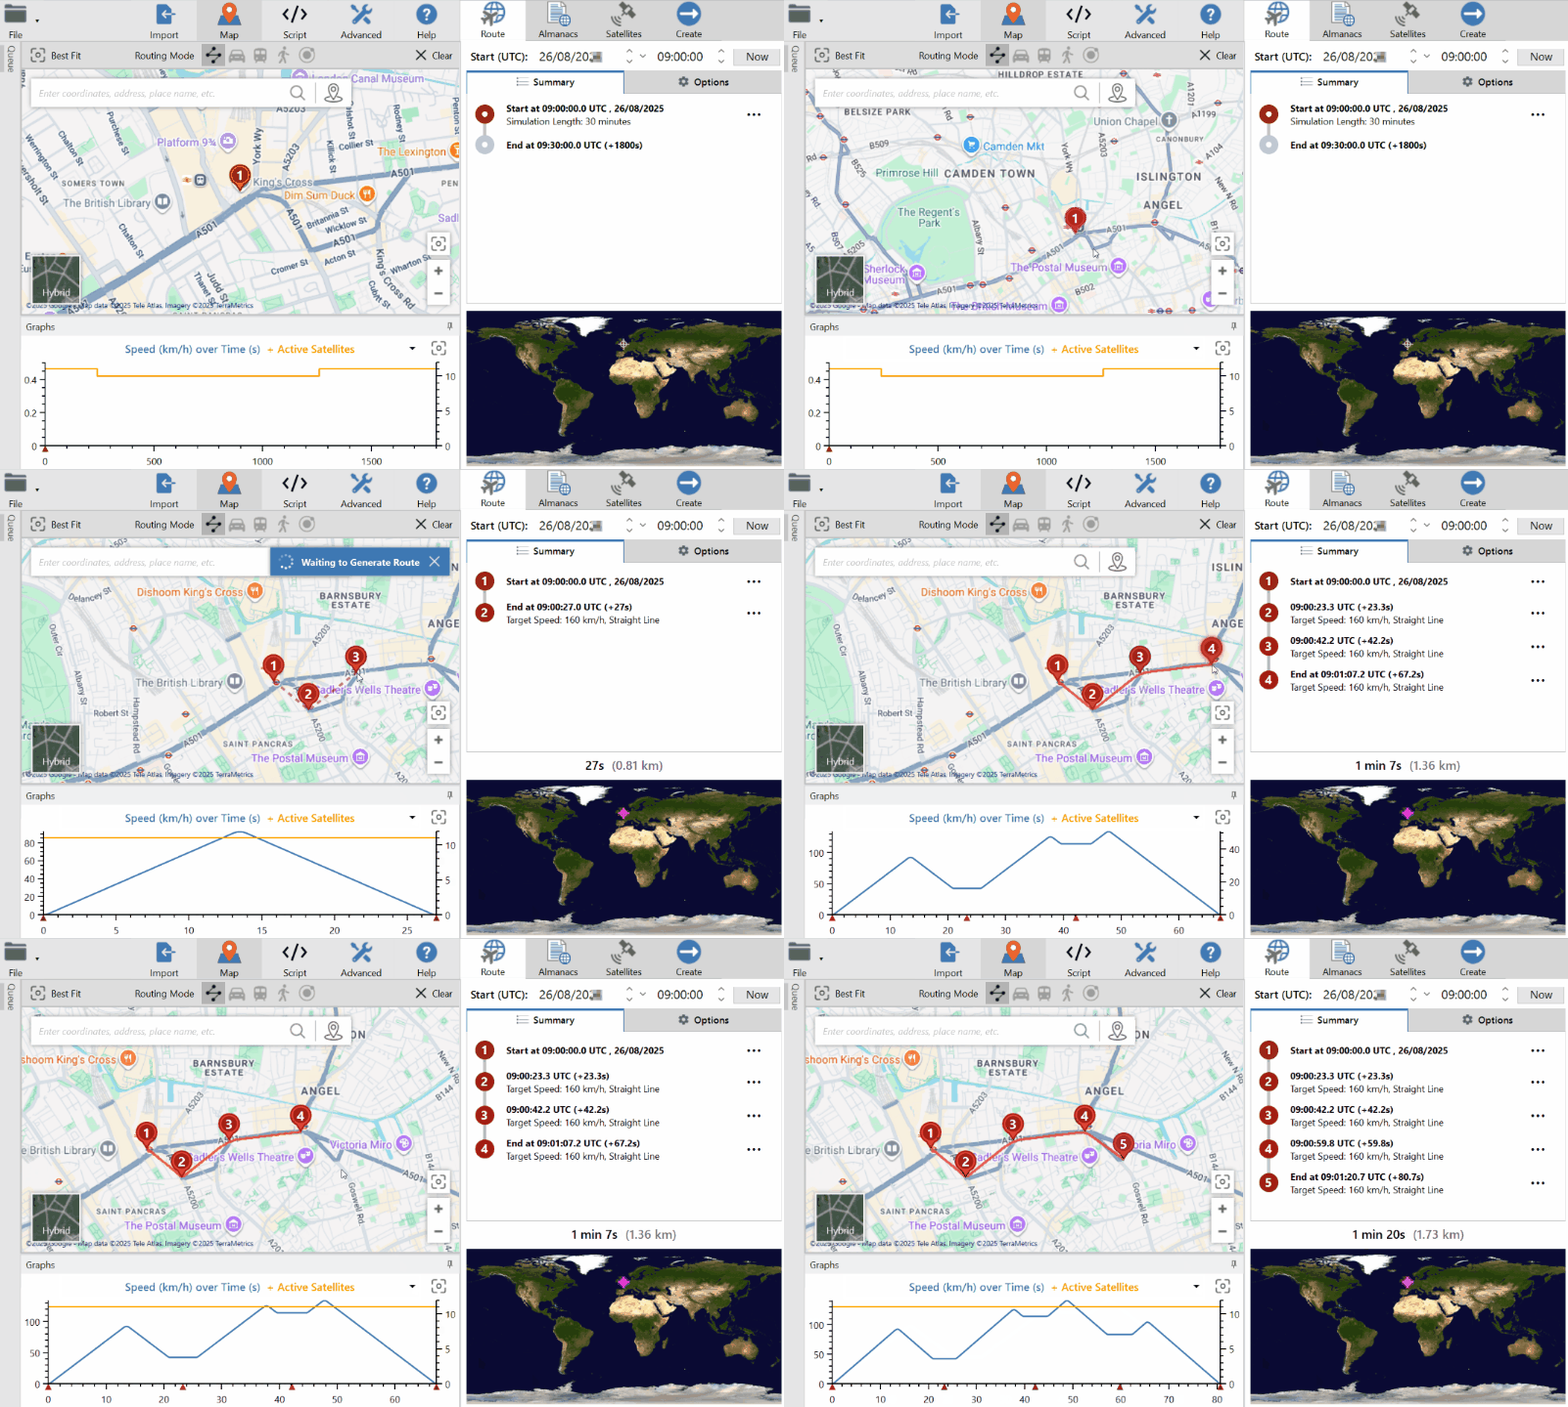
Add Waypoints
- Select the appropriate Routing Mode: Straight line, Road, Public transport or Walking.
If you want to create an Orbital Trajectory, you can find more information below.
- Left-click on the position on the map where you wish to add your next waypoint marker.
You can see the information about your waypoints in the Route Summary.
- Check that the time, position, and duration correspond to your scenario requirements.
- Check that the Route Options are correct for your scenario.
You can add as many waypoints as you wish and change the routing mode to adjust the directions and speed between the waypoints. Click on the Settings and more button for a waypoint in the summary to see the available details and options.
A solid line will represent the simulated route, and a dashed line will represent the guide route (the lines joining up the points).
You can pan the map by using either the left or the right mouse button.

Script Mode
Getting Started
- Make sure that you are connected to the Internet.
- Connect the security dongle to your computer. Wait for the dongle to activate and the light on it to become red.
- Open the SatGen 4 software.
Setting the Start Position
- Select Script mode on the toolbar.
- Click on the Set Start Position button to set the first waypoint marker.
- Navigate to your start location by entering coordinates, an address or a place name in the Location Search bar.
- Left-click on the map in the location where you wish to start the trajectory.
Script Commands
When you have set the starting position and adjusted the settings, you can add commands to the script to edit the trajectory.
- Type in your parameters commands or select from the available Example trajectories in the Examples tab in the Route options.
You can also use the IntelliPrompt feature to see available commands that you can add to your script to complete your scenario. - The map will update as you enter your parameters in the script.
