11 - VBOX Mini Setup Menu
There is a single Setup Menu that is accessible in all of VBOX Mini's modes.
To access the Setup Menu, press the MENU button in any mode and select the ‘SETUP’ option and press OK.
The Setup Menu contains the following options:
| SETUP MENU |
|---|
| LOGGING MODE |
| PREDICTIVE MODE |
| COMMS MODE |
| SPEED BUZZER |
| ALIGNMENT |
| CONTRAST |
| BRIGHTNESS |
| DIAGNOSTICS |
| COLDSTART |
| UPGRADE |
| EXIT |
Logging Mode
Allows the logging mode of the VBOX Mini to be configured, see Data Logging article or more information.
Predictive Mode
Pressing OK when this is highlighted enables / disables predictive mode. This can also be done by pressing OK on the main mode screen.
Comms Mode
The Comms Mode specifies the current use and configuration of the main serial port on the AUX connector.
You are able to select the current Comms Mode in the Comms Mode submenu of the Setup menu. The default mode is input module.
| COMMS MENU |
|---|
| INPUT MODULE |
| VBOX STREAM |
| LAPTIME TELEMETRY |
| LAPTIME PULSE |
| DRIFT TELEMETRY |
| YAW DIAGNOSTICS |
| EXIT |
Input Module
Sends an input module firmware version request at 1 Hz until a response is received.
Thereafter it sends a data request on receipt of every GPS sample.
Laptime Telemetry
Sends a telemetry message when a finish or start/finish gate is crossed. If ‘SplitOutput’ is enabled it will send a telemetry message when a split gate is crossed.
Laptime Pulse
Sets the lap time pulse for 0.25 seconds when a finish or start/finish gate is crossed. If ‘SplitOutput’ is enabled, it will set the lap time pulse for 0.25 seconds when a split gate is crossed.
Drift Telemetry
If in Drift Sectors mode and sector 1 start gate is crossed, the unit will send a telemetry message.
If in Drift Sectors mode and a sector end gate is crossed;
If ‘TELEM.FORMAT2’ is not enabled the unit will send telemetry message 1.
If ‘TELEM.FORMAT2’ is not enabled the unit will send telemetry message 7 and also write the information into a scores.log file.
If in Drift Practice mode (sectors not selected) the unit will output practice drift information at 10 Hz shown below:
$DBOX,sss.s,±g.gg,±l.ll,±ddd.d,pp.pp
Yaw Diagnostics
Will output temperature, yaw rate and yaw calibration (offset and gain) as shown below:
01828,01763,1766.10, 6.82545
01828,01767,1766.10, 6.82545
01828,01762,1766.10, 6.82545
01828,01767,1766.10, 6.82545
01828,01769,1766.10, 6.82545
01828,01764,1766.10, 6.82545
Where:
Temperature is corrected ADC count 2 + Calibration MinTemperature.
yaw rate is corrected ADC count 3.
yaw cal offset and gain are the current gain and offset being applied to calculate the yaw.
Speed Buzzer
The speed buzzer is generally for use whilst in Performance Mode, during 0-100-0 style tests. The speed is configurable from this menu option – see the Speed Buzzer section under Performance Mode.
Alignment
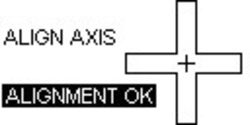
The alignment option allows you to perform a physical alignment of the internal motion sensors. It is important that you align VBOX Mini correctly whenever it is moved to a new position in your car or even to another car. To do this, park the vehicle on level ground and turn the engine off and select ‘ALIGNMENT’ from the SETUP MENU. Reposition VBOX Mini so that the two cursors form a small cross at the centre of the larger cross.
.jpg?revision=1)
The two cursors do not have to line up perfectly, just make sure ‘ALIGNMENT OK’ appears.
Contrast & Brightness
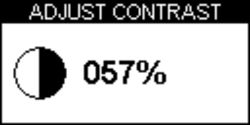
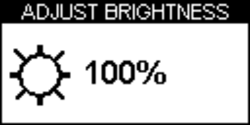
Use these to adjust the Brightness & Contrast of the screen, OK to return.
.png?revision=1)
.png?revision=1)
Diagnostic Screens
VBOXMini has two different diagnostic screens, use ▲▼ to swap between the two.
GPS Diagnostic Screen
.png?revision=1)
This screen allows you to view the following basic GPS information:
- Number of satellites being used by VBOX Mini.
- Signal strength of each satellite.
- Satellite time (UTC).
- Latitude.
- Longitude.
- Height (with respect to sea-level at Greenwich).
Note: In this screen data is logged to the SD card at 1 Hz not 10 Hz.
Yaw-rate Sensor Diagnostic Screen
.jpg?revision=1)
This screen displays the following information relating to the internal YAW sensor
- YAW rate in degrees per second.
- Angle (calculated from Yaw Rate).
- Temperature of the YAW rate sensor.
Cold Start
A cold start completely re-initialises the VBOX Mini GPS engine. GPS coldstarts clear the GPS engine’s list of satellite positions and configures the GPS engine for normal operation. For this reason, coldstarts should be performed at the following times:
- If the unit has not been used for more than three weeks.
- If the unit has moved over very large distances (thousands of miles) whilst turned off.
- If the unit’s firmware has just been upgraded.
Because each of these are common during distribution, it is also recommended that the VBOX Mini is coldstarted on its first use.
After performing a Cold Start the vehicle to which the unit is connected should be left in an open area for at least 15 minutes, to re-acquire the satellite almanac.
You should only need to do a cold start when you first receive your VBOX Mini, or you are experiencing poor satellite reception in an open area.
Performing a Coldstart
- Press the MENU button from any Display mode.
- Highlight the Setup option and press OK.
- Select COLDSTART.
- The following screen appears and a coldstart is performed.
.png?revision=1)
When it is finished VBOX Mini will automatically go back to the Setup Menu.
