CAN Bus - VBOX Touch (v2/v3)
|
The CAN Bus menu is where you can configure the settings for your CAN data capture. The menu is split into two sub-menus, one for each isolated CAN port on the VBOX Touch unit. You can set each port to one of the following modes: CAN input, Racelogic (RL) modules or CAN output. When you set it to CAN output, VBOX Touch will be transmitting its own GNSS-derived data, including lap timing data, to a third-party CAN logger. |
 |
CAUTION: Connect to the vehicle CAN bus at your own risk. |
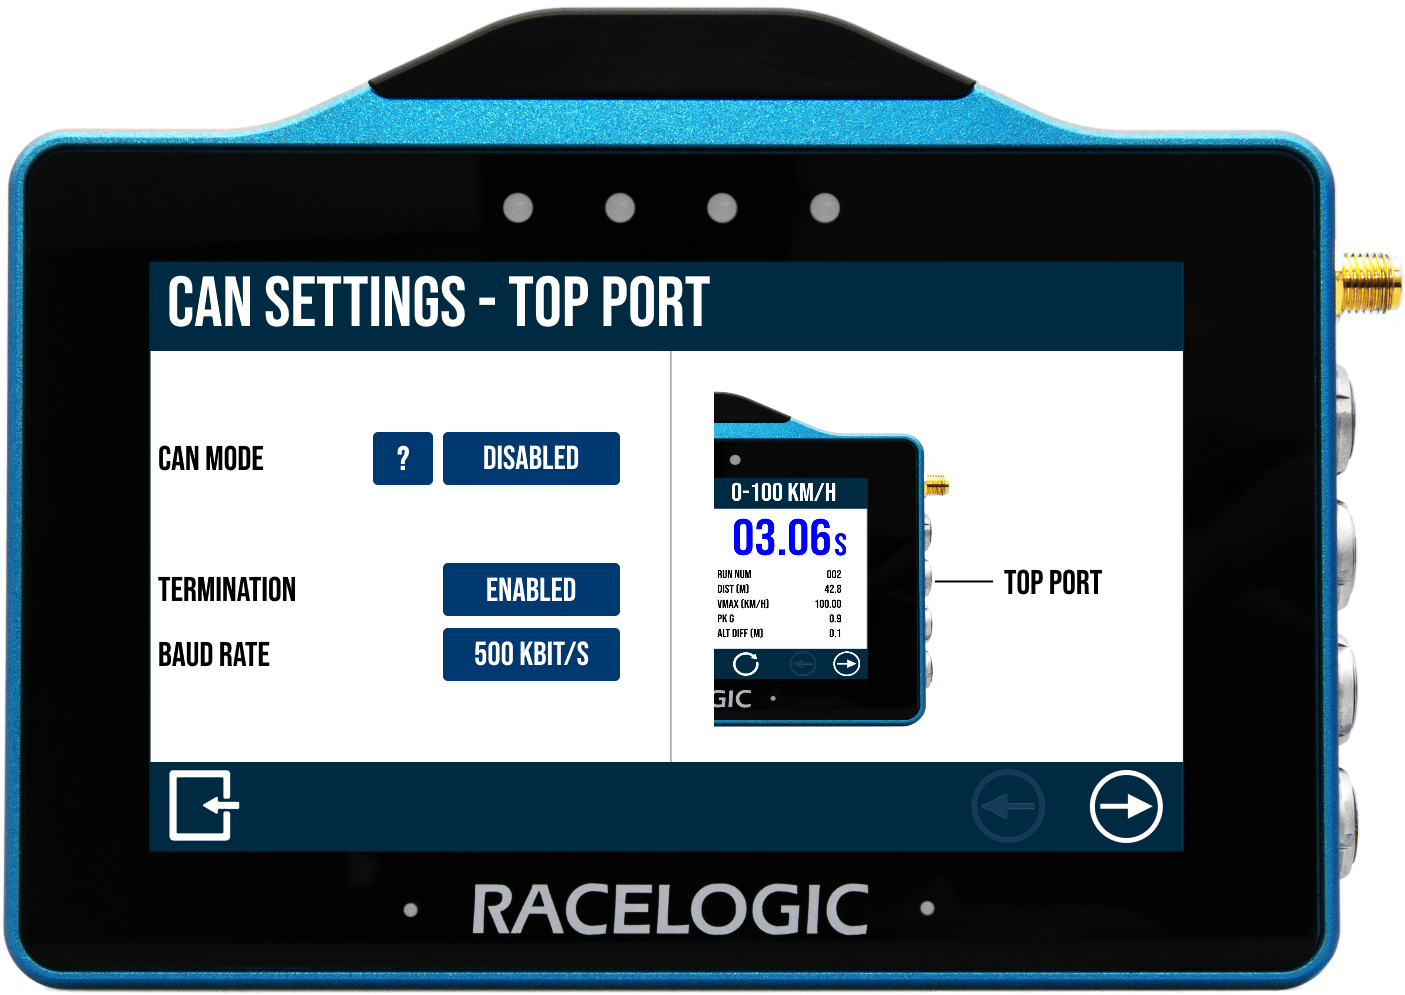 |
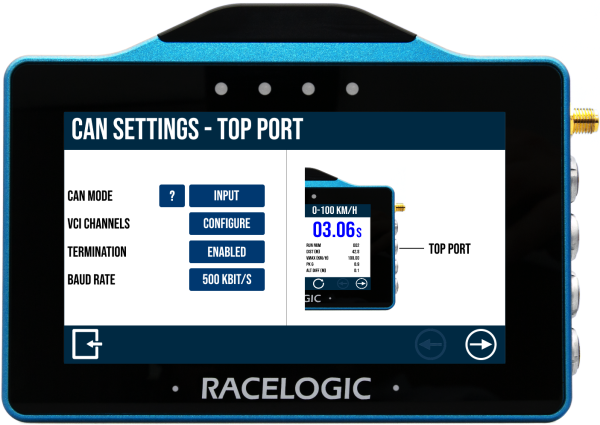
| Your first option is to select which port you want to configure the CAN settings for. Use the Forward and Back arrows in the bottom right-hand corner to navigate between the two ports and their settings. The settings options are the same for both the top and bottom port. |
CAN ModeThis setting lets you choose which CAN mode you want to use for this port. You can choose between RL Modules, Input, Output and Disabled. Press on the '?' to see an overview and an explanation of the different CAN modes available. When you have selected the CAN mode you want to use, you will get the option to configure the selected mode. Press the Configure button that appears below your CAN Mode selection. |
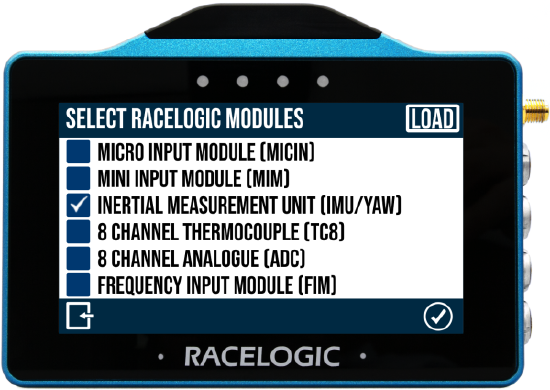
RL ModulesSet the CAN Mode to RL Modules and press Configure. When you select to configure the input from an RL Module, you will first have to select the RL modules you are connecting to. |
 |
|
You have 6 available modules and can choose to connect to one or more. Select them by pressing the respective tick boxes on the left-hand side and pressing the Confirm button to confirm your selection. Press the Cancel button if you want to return to the CAN Mode screen without saving. |
 |
Logged ChannelsWhen you have confirmed the modules you want to use, the Input Modules screen will be displayed. This screen is split into halves, with your selected modules on the left-hand side and the logged channels on the right-hand side. Press on a module on the left-hand side to see the channels it is logging. Press on a channel on the right-hand side to edit it. |
 |
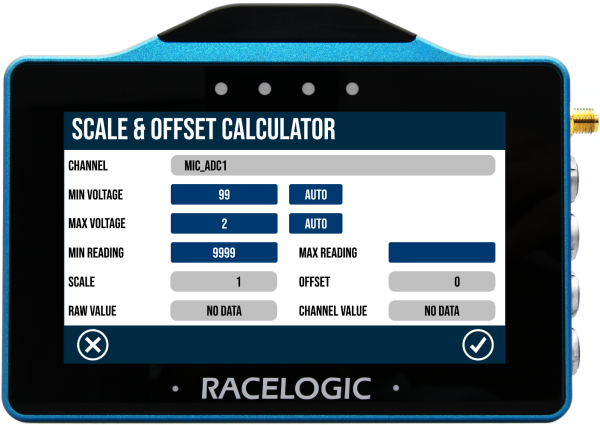
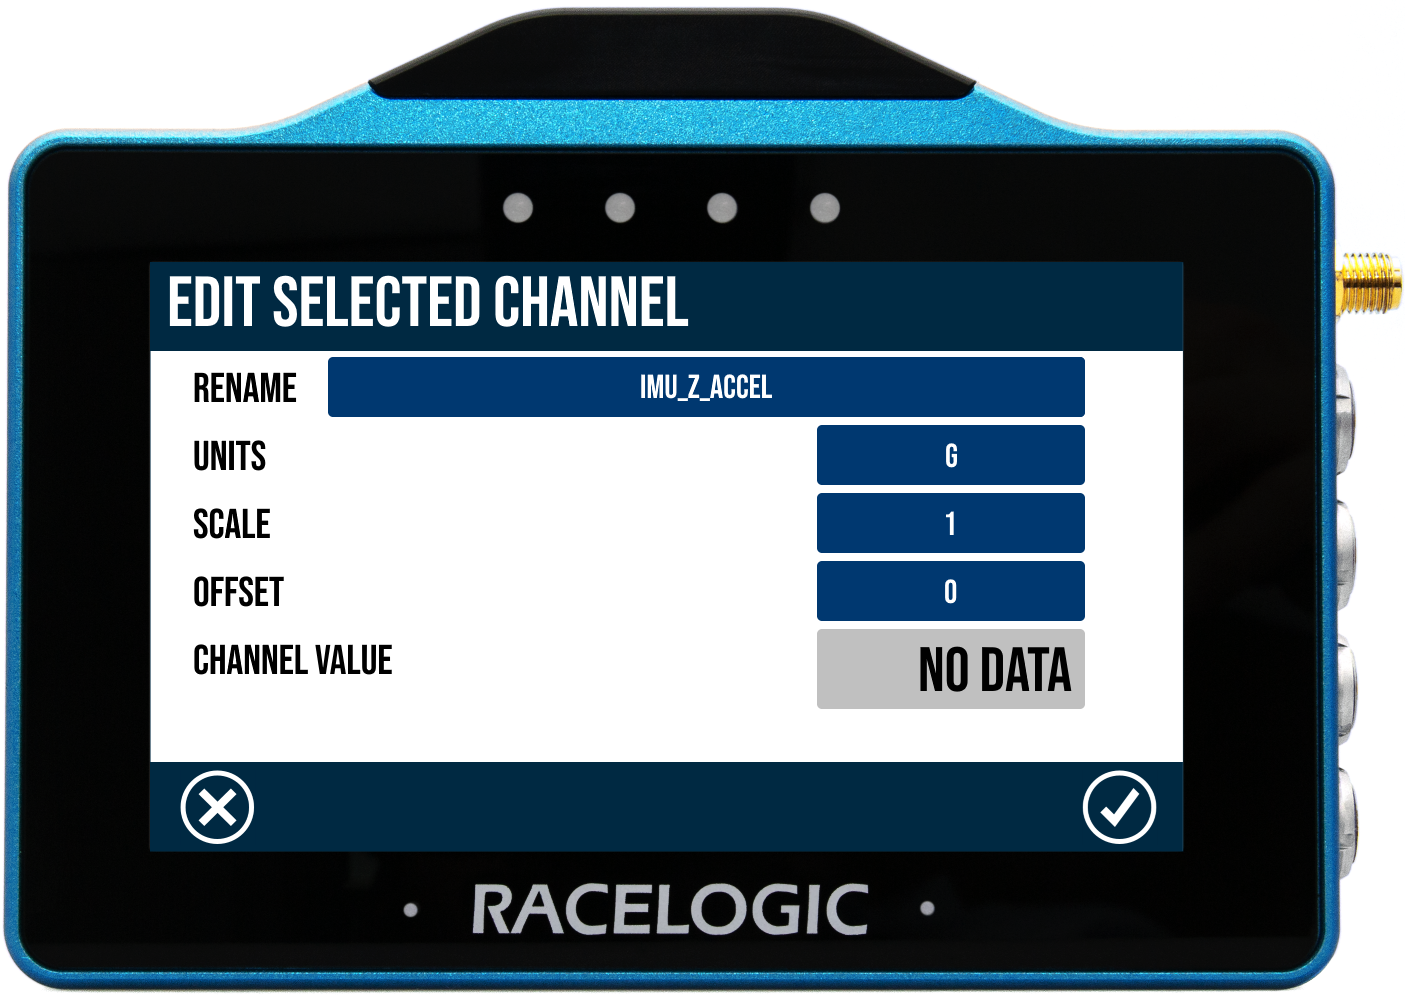
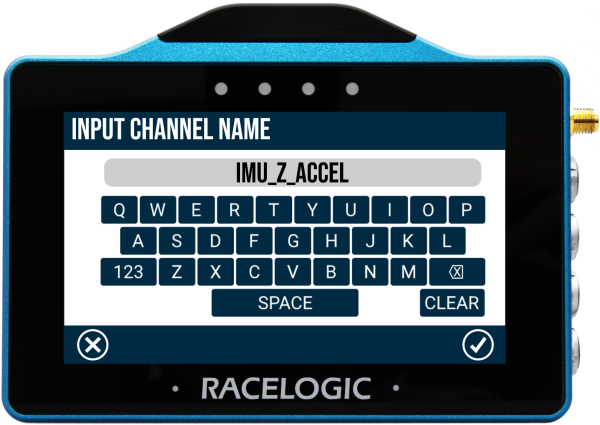
Edit Selected ChannelThis settings screen has relevant information for the selected channel. If you would prefer to use other units of measurement, you can configure the name, unit, scale, and offset for the channel here separately from the global setting on your unit. You can see the live channel value if it is connected and transmitting data. Depending on the selected module, you may get the option to calculate the scale and offset. When reading data from a vehicle using sensor equipment, such as the Micro-Input Module, it is often necessary to convert the data into a more meaningful format, for example converting a voltage from a throttle or brake pedal into something more useful like a percentage pedal press. You can read more about calculating scale and offset here. When you select one of the following modules, you will see a CALC button next to the scale and offset values.
|
 |
 |
 |
|
To complete the configuration, you have to confirm your channel selection on the Input Modules screen. There are two ways to confirm your channel selection:
|
|
|
Note:
|
|
|
IMPORTANT Note:
|
|
Capturing Multiple RL Modules of the Same TypeYou can use Input mode to capture single or multiple CAN modules or if you need to capture multiple RL modules of the same type (in a daisy chain). When setting up a daisy chain, you must:
|
|
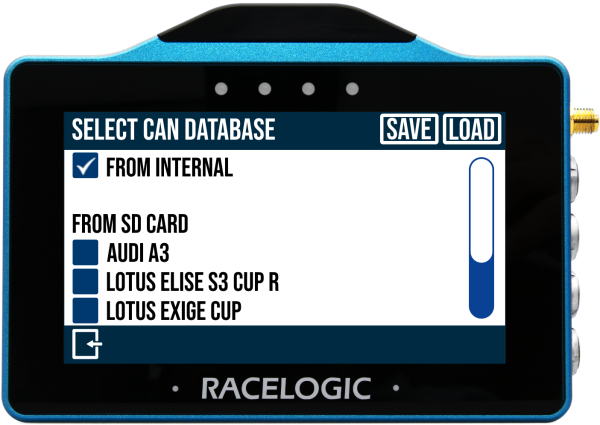
InputWhen you select to configure the port to capture CAN Input, you will first have to select which database you are using to decode incoming data. You will get a list of options and can either choose to use the internal vehicle CAN database or you can load external DBC files from an SD card. |
 |
 |
|
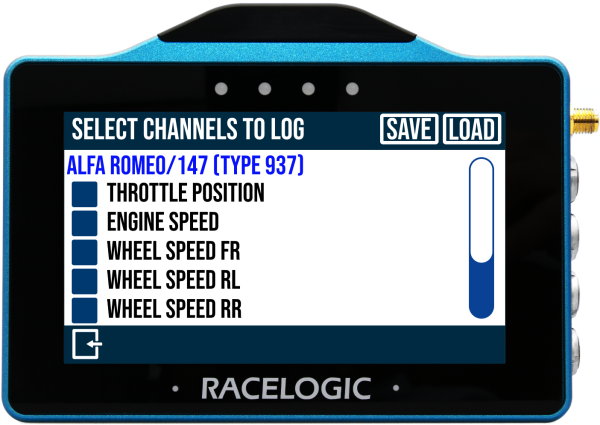
Internal Vehicle DatabaseTo use the internal vehicle database, choose From internal. This will give you a comprehensive list of makes and models with available channels. Make your selection by pressing the respective tick boxes on the left-hand side and pressing the Confirm button to confirm your selection. Press the Exit button if you want to return to the CAN Mode screen without saving. When you have confirmed the Manufacturer and Vehicle/ECU, the Select Channels to Log screen will open. |
From SD CardIf you have DBC files saved to the SD card in your VBOX Touch (in the CAN Databases folder on the root of the SD card), you will see a list of available CAN databases under From SD card. Use the tick boxes on the left-hand side to select the databases you want to use or configure. Press the Confirm button to load the database and see available channels on the Select Channels to Log screen. |
 |
|
| You will see the name of the chosen database at the top of the page and a list of available channels underneath. | |
| Select a channel by ticking its respective tick box. Press the channel name to open the Edit Selected Channel screen so you can configure the channel. | |
_Details-600px.png?revision=1) |
 |
| Channel from internal database | Channel from SD card |
|
Configure your channel and press the Confirm button to save the configuration. |
|
|
To complete the configuration, you have to confirm your channel selection on the Select Channels to Log screen by exiting the screen. Any channel edits will be confirmed at the same time. |
|
|
Notes:
|
|
|
Load Channel Configuration File You can also load already configured channels from a Channel configuration file on your SD Card. Press Load, select the file you want to load and press Yes. |
|
|
Save Configuration File You can save your current configuration to a Configuration file by clicking Save, giving your file a name and pressing Confirm. |
|
OutputBoth ports have the ability to output GNSS and Lap Timing CAN data from the VBOX Touch. You can export and save the CAN database (to decode) directly from the unit to the SD card, by using the Save Output DBC file function. This option will be available when you select Output as your CAN mode. |
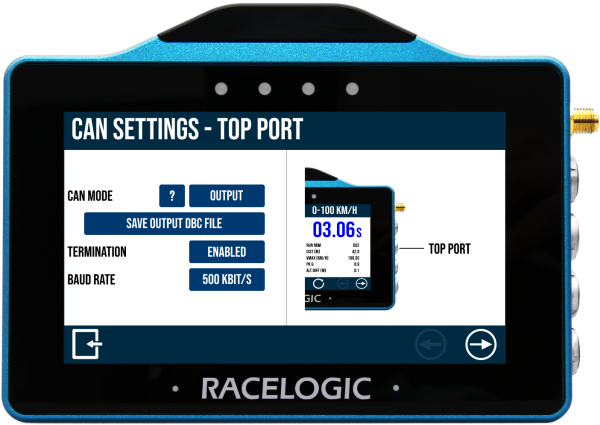 |
Termination and Baud RateIn addition to selecting the CAN mode and the logging channels, you can also Disable/Enable Termination and set the Baud Rate. Note: When you are using the internal CAN database, the termination and baud rate will be set automatically. |
|
| If, at any point, you have any questions or issues regarding CAN capturing on VBOX Touch, please contact Racelogic Support. | |