06 Settings – VBOX Touch (v2/v3)
|
This page contains the settings menu information for FW version 1.5 on VBOX Touch.
You find the VBOX Touch Settings menu by selecting the mode you want to use and pressing the Settings button at the bottom left of the display mode screen. |
 |
|
A Select Settings Screen is then presented, allowing to you choose Mode Specific settings (which will change depending on which mode you are using), General Settings, Date and Time Settings, Diagnostic Settings and Serial Port Settings. Press the Exit button on the bottom left to return to the Select Settings Screen. Pressing the Exit button again will return you to the main screen. |
Mode Settings
| The first option on the Settings screen depends on which Display Mode you are using. You can find more information on these on the page for each specific Display mode. |
General Settings
| This menu contains units, logging mode, save format and brightness options. |
.png?revision=1&size=bestfit&width=632&height=447) |
Speed
| This setting allows you to change the speed units between km/h and mph. Changing the speed units will affect all visual speed parameters on all screens, unit labels will change and all speed values will be automatically recalculated accordingly. Press the button to change the units. |
Distance
| This setting allows you to change the distance units between metres and feet. Changing the distance units will affect all visual distance parameters on all screens, unit labels will change and all distance values and results will be automatically recalculated accordingly. Press the button to change the units. |
Acceleration
| This setting allows you to change the acceleration units between m/s² (default) and g. Changing the acceleration units will affect all acceleration references on all screens, unit labels will change and all acceleration values and results will be automatically recalculated accordingly (with the exception of the PK G acceleration and deceleration test values). Press the button to change the units. |
Logging
| This setting allows you to toggle between 2 logging modes, press the button to change the mode: | |
|
Continuous The VBOX Touch will start logging as soon as an SD card is inserted and initialised. |
Moving (default) The VBOX Touch will start logging as soon as an SD card is inserted and a speed over 0.5 km/h is detected. Logging will pause when speed is less than 0.5 km/h for 3 seconds, and will then recommence recording once speed is greater than 0.5 km/h, appending the same file. |
|
Notes:
|
|
Results Save Format
| You can change the data format of results saved (to inserted SD card) from test history screens. Options are either text format (.txt, default) or comma-separated values format (.csv). |
Screen Brightness
| You can manually adjust the screen brightness between 5 levels, with 1 being the dimmest and 5 being the brightest setting. An 'Auto' setting is also available which uses the internal ambient light sensor to automatically adjust the screen brightness. In dark conditions, the screen brightness will dim, and in light conditions, the screen will brighten. Press the button to cycle through the available options. |
LED Brightness
| You can manually adjust the LED brightness between 5 levels, with 1 being the dimmest and 5 being the brightest setting (this is extremely bright!) or turn off the LEDs. Press the button to cycle through the available options, the LEDs will preview the brightness level. |
Date and Time Settings
| This menu contains date and time settings. |
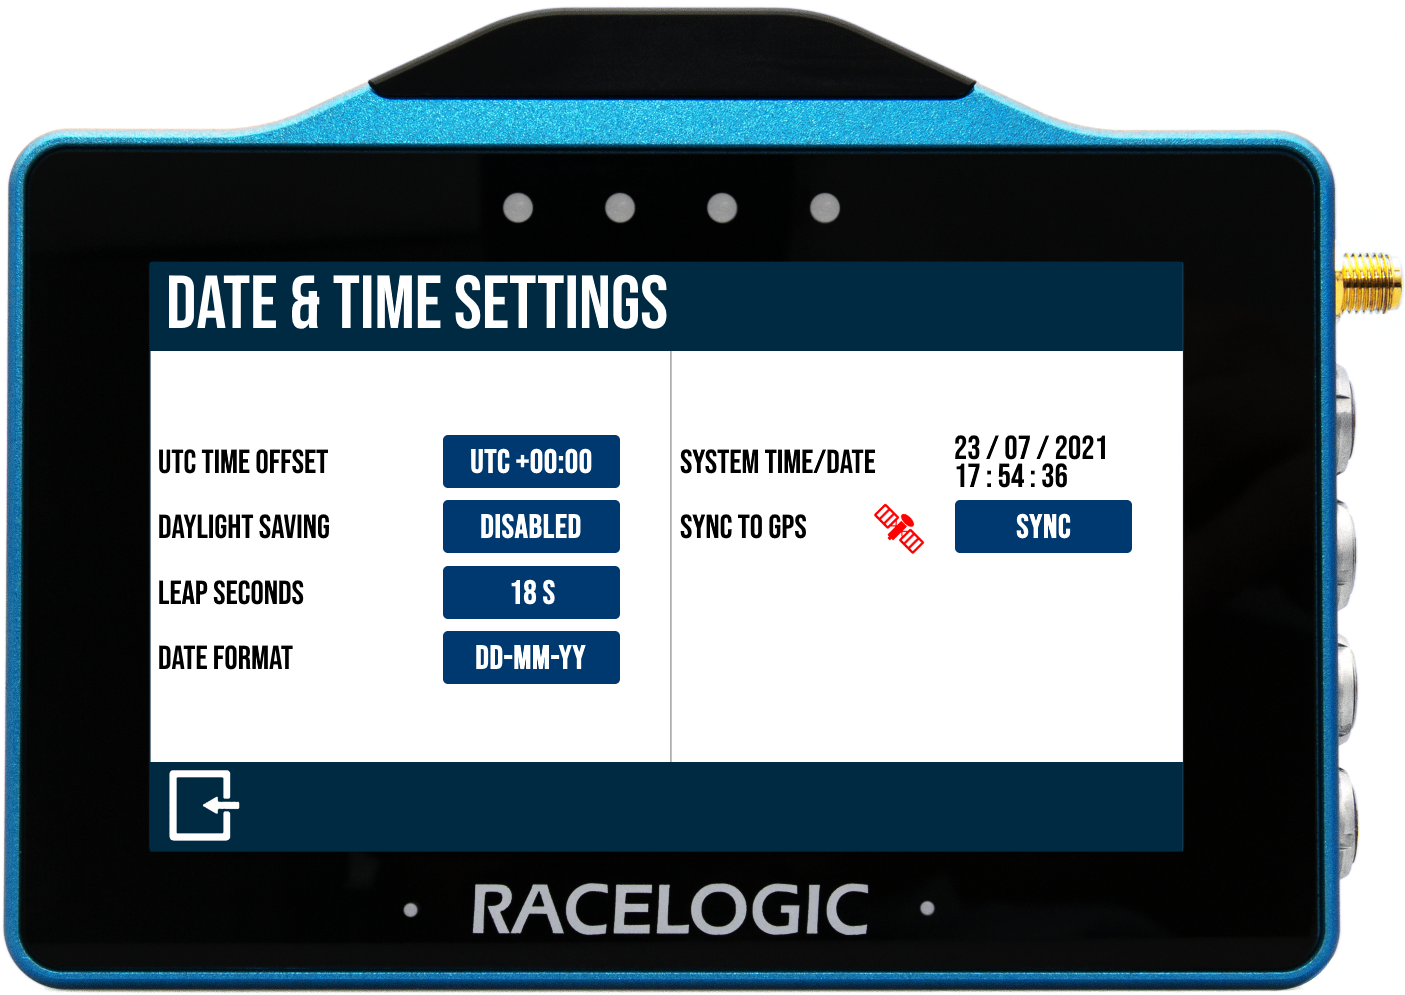 |
UTC Time Offset
|
The UTC offset value is set as '+00:00' by default and can be changed, if required, on the screen that is displayed when you press the current value button. Use the Plus (+) and Minus (-) buttons to select the desired time zone offset values (including available 30 and 45 minutes). Pressing and holding a button will fast-scroll through available valid time settings. Minimum: -12:00; maximum: +14:00. Notes:
|
_600px.png?revision=1) |
| UTC Offset Selector Example |
Daylight Saving
|
When 'Enabled', this setting will add +1:00 hr to the local time setting. 'Disabled' by default. Notes:
|
Leap Seconds
|
The leap second value is set as '18 s' by default and can be changed if required using the keypad presented when the current value button is pressed. This was increased to 18 seconds as of December 2016 - more information on this is available here. Notes:
|
|
To save your selected value, press the Confirm button at the bottom right of the screen, or press the Cancel button at the bottom left of the screen to return to the Time Settings screen without saving. Note: The maximum input value is 99. |
_-_No_Frame_600px.png?revision=1) Leap Second Keypad Example |
Date Format
| You can change the date format between DD-MM-YY (default) and MM-DD-YY. |
System Time/ Date
|
This displays the current time and date being used by the system. They are displayed within the .vbo header file, file date created time stamp, the acceleration history results session header, deceleration history results session header, laps history filename and the gates file (.spl) header. Note: The time/ date displayed by the unit may be inaccurate until a valid satellite lock is achieved. The unit will then update to the correct time/ date as long as the unit is not logging. |
Sync to GPS
| This feature will synchronise the internal real-time clock (RTC) to GPS time as long as the unit has obtained GPS time (no GPS time is indicated by a red satellite icon), isn't moving and isn't logging. When pressed, a synchronisation progress screen is presented. |
Serial Port Settings
| This menu contains serial output settings. |
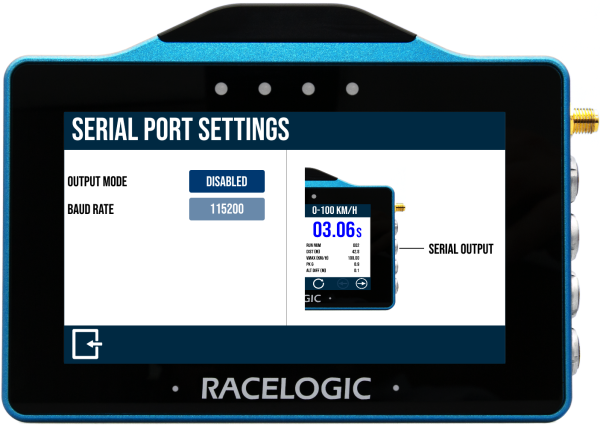 |
| Serial output is available on the top CAN/Serial port of the VBOX Touch, as shown in the image on the right-hand side of the Serial Port Settings. |
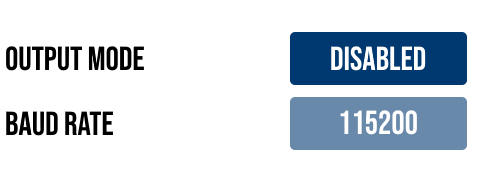 |
Output Mode
| If required, choose the output mode of the serial port, selectable as 'VBOX Stream', 'Lap Timing' or 'Disabled' (default). VBOX Stream allows you to connect VBOX Touch with a computer using an RLCAB001 and conduct online testing with VBOX Test Suite, more information on this is available here. Selecting the Lap Timing option will output lap timing parameters. |
Baud Rate
| Displays the serial output baud rate, set as 115200 kbit/s. |
Diagnostics
Note: On VBOX Touch V2 and V3, you can also see how many satellites it is using from each constellation, including GPS, GLONASS, Galileo and Beidou.
CAN Bus
The CAN bus settings are the latest feature added to the VBOX Touch. You can read more about the CAN settings here.