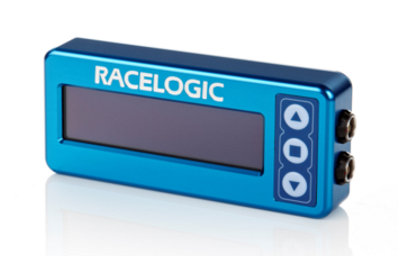
Quick Start Guide – OLED Display DSP04
Getting Started
RegistrationPlease register your OLED Display so that Racelogic can continue to provide you with notifications about the latest software releases and firmware upgrades for your Racelogic product, and offer technical support. Register your device here. |
 |
What is in the box?
When you purchase a OLED Display DSP04, you will find the following items when you open the box:
| Product Code | Quantity | Description |
|---|---|---|
| VBDSP04 | 1 | OLED Display Unit |
| RLACS287 | 1 | VBOX Lightweight Suction Mount |
| RLCAB063 | 1 | 5-way Fischer Plug to 5-way Lemo Plug - 2 m |
Features |
|
|---|---|
|
|
|
|
|
|
|
|
|
|
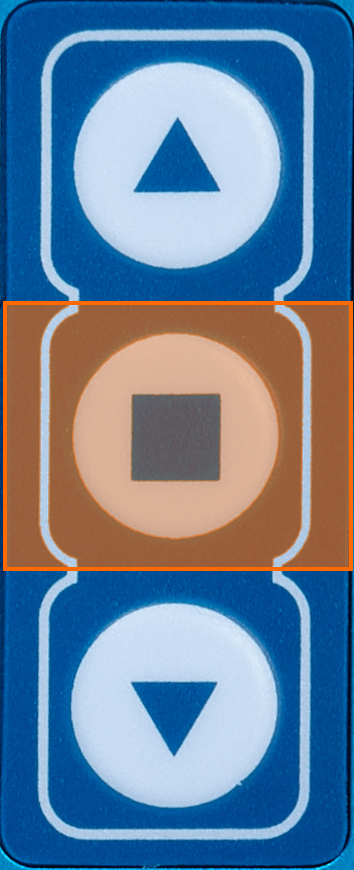
Square Button Functions
|
Depending on which mode is currently active on the screen, the function of the square button will change. The splash screen shown when scrolling through the menu describes the function of the square button in each mode. You can also find the complete list below: |
 |
| Mode | Function |
|---|---|
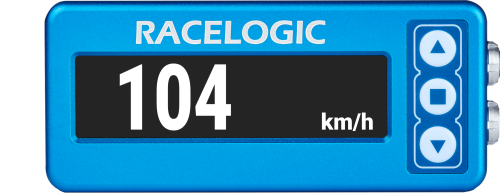
| Speed | Start and stop logging |
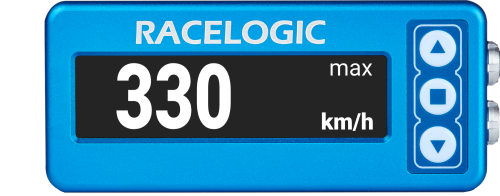
| Max Speed | Reset max speed value |
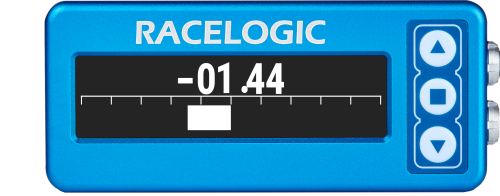
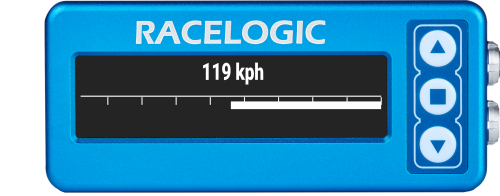
| Speed Bar | Set centre speed and speed display range |
| Predictive Lap Timing | Single Press fixes the reference lap according to your settings in Fixed Lap Mode |
| Predictive Lap Timing | Pressing for >4 s clears the stored reference lap and all lap timing data |
| Lap Timing | Set a new start/finish line |
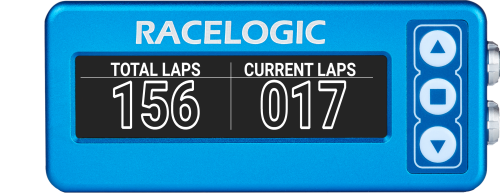
| Lap Count | No action |
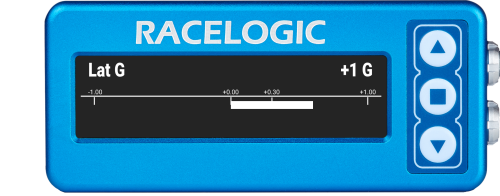
| Lateral G | Reset max g reached |
| Lateral G Bar | Set min g and max g (targets) |
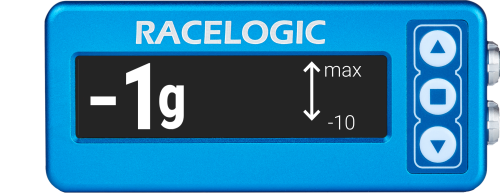
| Longitudinal G | Reset max g reached |
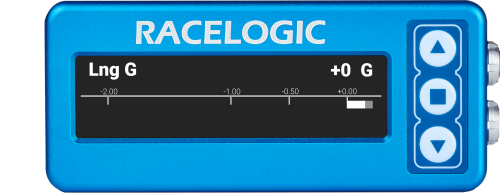
| Longitudinal G Bar | Set min g and max g (targets) |
| Menu | Access the Menu |
No Media
| If you do not have an SD card inserted in your VBOX data logger, the OLED Display will show a "No Media" message while the vehicle is moving at speeds of 5 mph or less. This makes it easier for you to make sure that you have an SD card inserted before you start your logging. |
Installing the DSP04 OLED Display
Display connection
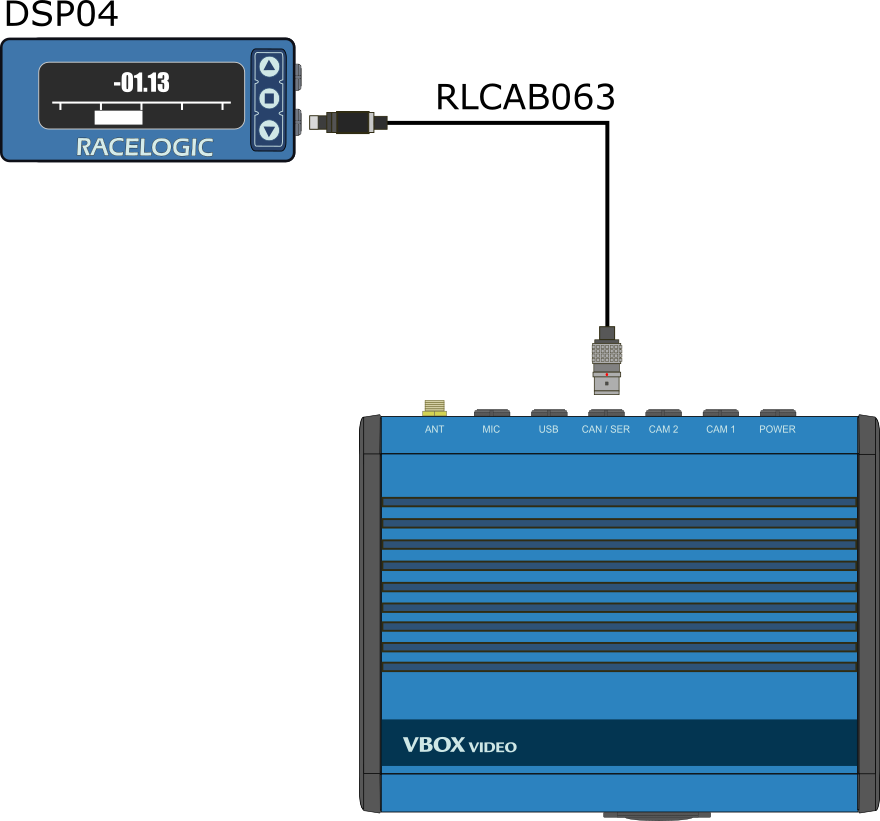
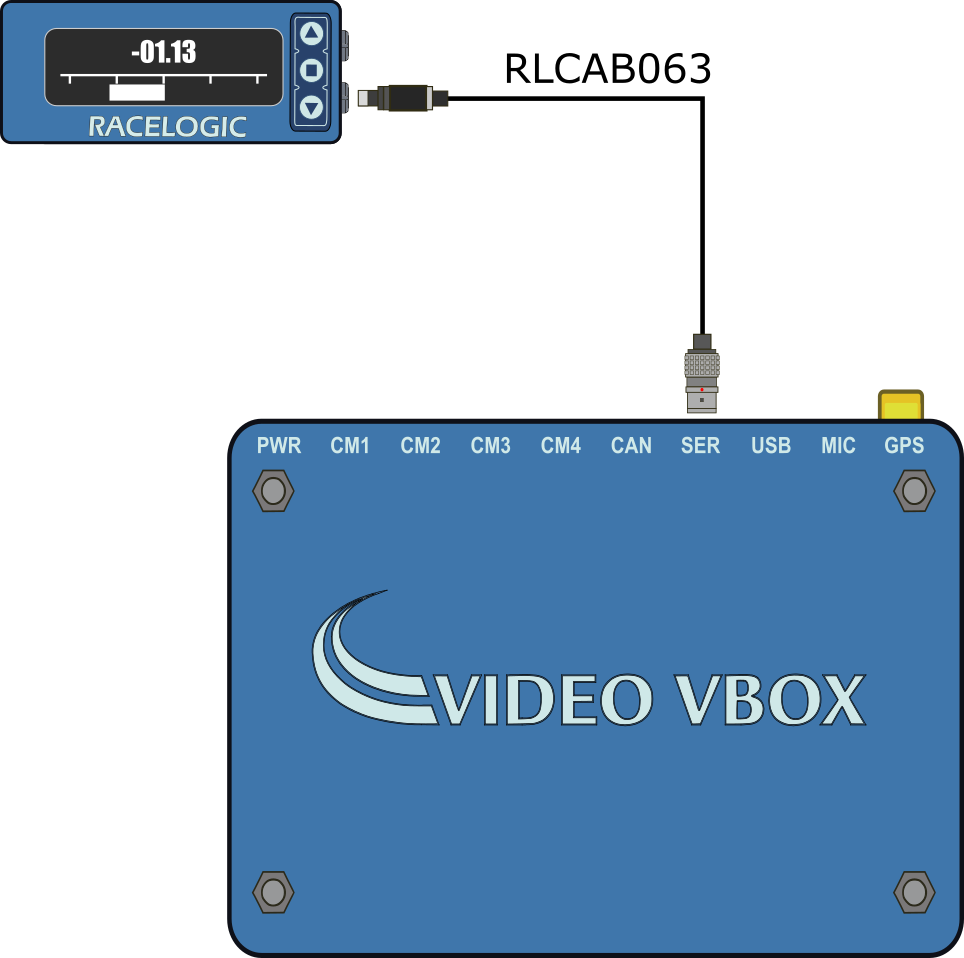
When you are setting up the DSP04 OLED display with a VBOX Video HD2 or a Video VBOX Pro, it is important that you connect to the correct port on the OLED display. The serial connection on the OLED display is on the lower connector only. (When you hold the unit with the buttons on the right-hand side and the logo in the correct orientation).
 |
VBOX Video HD2
To connect to a VBOX Video HD2, connect the cable to the ‘CAN/SER’ port.
 |
Video VBOX Pro
To connect to a Video VBOX Pro, connect the cable to the ‘SER’ port.
 |
Display Modes Overview
The DSP04 OLED display has different display modes, which you can access by using the ▲▼ buttons on the unit.
Even if you choose not to display it, the data displayed on each screen is always calculated by the connected VBOX data logger at all times (with the exception of Delta-T which is calculated by the DSP04 OLED Display). Click on the name of each mode to find relevant setup information.
|
|
|
|
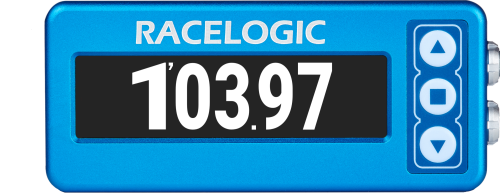
| Speed | Max. Speed | |
 |
 |
|
| Lap Timing | Predictive Lap Timing | |
|
|
 |
|
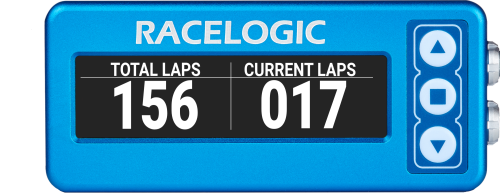
| Lap Count | Longitudinal G | |
 |
 |
|
| Longitudinal G Bar | Lateral G | |
 |
 |
|
| Lateral G Bar | Speed Bar | |
Menu Options
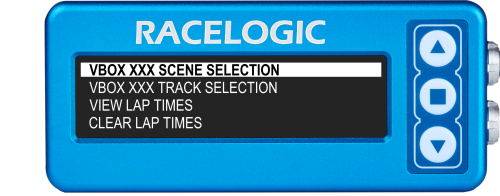
| You can access the OLED Display menu by pressing the square button when the ‘Menu’ screen is displayed. You can navigate the menu with the ▲▼ buttons. | 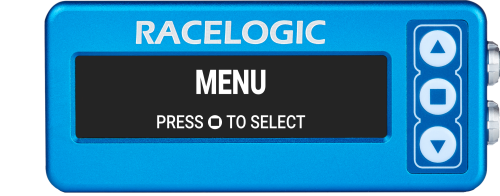 |
Scene Selection
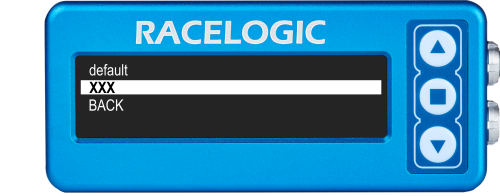
SpecifiedYou can load up to 8 user-defined scenes by placing them in the root folder of an SD card and inserting it into the connected VBOX data logger. All the required scenes must be loaded at the same time. Every time you load scenes to the VBOX data logger, they will overwrite those previously saved on the unit. You can select the scene on the DPS04 OLED Display. If there are scene files on the VBOX data logger, a screen will prompt you to select a scene when you power up the DSP04 OLED Display. If you press the ▼ button when you see this prompt, the DSP04 OLED Display will show you a list of available scenes. Once the DSP04 OLED Display is powered and in use, you can access the scene selection through the main menu. Note: If you are using a VBOX Video HD2, selecting a scene will make the 'OK' light will flash amber and the OLED Display will read 'Installing scenes, please wait'. The unit will automatically power cycle itself if needed after scene installations. . |
|
DefaultEach VBOX data logger has a default scene included within the firmware. Press the square button when this option is highlighted to use this scene. |
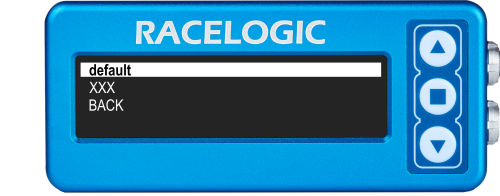 |
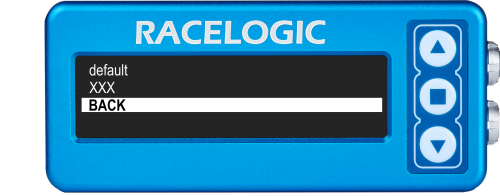
BackPress the square button with this line highlighted to exit the Scene Selection menu and go back to the main menu. |
 |
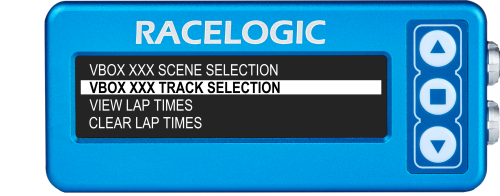
Track Selection
|
When the connected VBOX data logger has acquired satellites, it will check the GNSS location against Racelogic’s track map database and load the available layouts. Where a track has multiple layouts, you must use this menu option to select the layout you are driving, as this allows the DSP04 OLED Display to load the correct start/finish line(s). If start/finish lines are not available for your location, you can set them manually. |
|
BackPress the square button with this line highlighted to exit the Track Selection menu and go back to the main menu. |
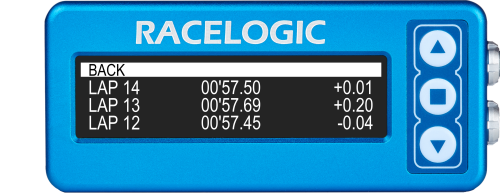
View Lap Times
|
The DSP04 OLED Display will store all the lap times from your current session (maximum of 99 lap times). The lap times will be cleared when you set a new start line or when you reset the lap timing data. BackPress the square button with this line highlighted to exit the Lap Times and go back to the main menu. |
|
Clear Lap Times
| Selecting this option will wipe all stored lap times from the DSP04 OLED Display’s memory. It will automatically take you back to the main menu after clearing the history. | 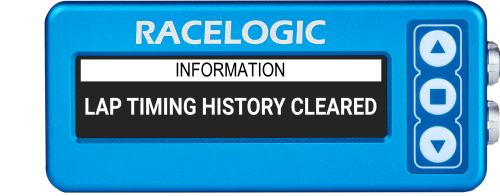 |
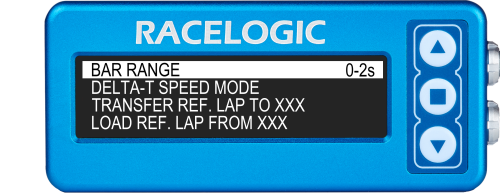
Predictive Lap Timing Settings
Bar RangeThis setting alters the amount of +/- time shown on the bar graph during lap prediction. You can choose either 2, 5, 10 or 30 seconds. |
 |
Delta-T Speed Mode |
|
|
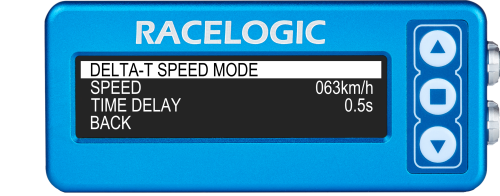
When enabled, this mode will change the Predictive Lap Timing display to show your current speed as well as Delta-T information, when your speed drops below a specified threshold for a set amount of time. This function is optimised for use with both 'Virtual safety car' conditions and Pit Lane speed limits. The Delta-T Speed Mode is disabled by default. The default settings are: Speed: 65 km/h The display will return to the Predictive Lap Timing mode when your speed increases to 5 km/h over the configured Delta-T Speed Mode value. For example, if you have set your DSP04 OLED Display to Predictive Lap Timing mode and you have enabled Delta-T Speed Mode;
|
|
Delta-T Speed Mode |
Press the square button when this line is highlighted to enable the mode. A tick will appear when enabled. |
Speed |
Press the square button to change the speed. You will see two arrows (up and down) appear next to the value. Use the two arrow buttons on the device to increase/decrease the speed value. Press the square button again to confirm your selected value. |
Time Delay |
Press the square button to toggle between the available time values. Each time you press the button the value will increase in increments of 0.5 s, up to 5.0 s, before it cycles back to 0.0 s. Press one of the arrow buttons to move away from the setting and save the displayed time. |
Back |
Press the square button with this line highlighted to exit the Delta T Speed Mode settings and go back to the Predictive Lap Timing Settings. |
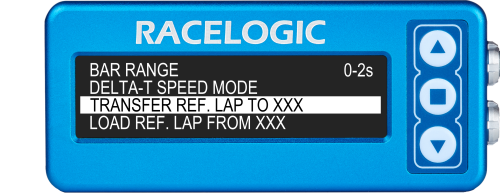
Transfer Ref. lap to...This feature lets you save a reference lap for future use. Insert an SD card into the connected VBOX data logger and use the following menu options: MENU > PREDICTIVE LAP TIMING SETTINGS > TRANSFER REF. LAP TO XXX, and press the square button. Once selected, a message will appear on the DPS04 OLED Display to confirm that transferring the reference lap to the SD card within the connected VBOX data logger has been successful. Note: The vehicle must be stationary to make this transfer. |
 |
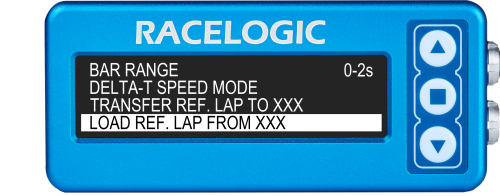
Load Ref. Lap from...To load a reference lap file stored from a previous session, put the desired file onto an SD card and load the card into the connected VBOX data logger. The file must be named OLED.REF and placed in the root directory of the SD card. Select the following menu options: MENU > PREDICTIVE LAP TIMING SETTINGS > LOAD REF. LAP TO XXX, and press the square button. Once selected, a message will appear on the DPS04 OLED Display to confirm that loading the reference lap from the SD card within the connected VBOX data logger has been successful. Note: The vehicle must be stationary to make this transfer. |
 |
Minimum Lap TimeThis setting allows you to set a minimum time for laps, making shorter laps invalid. Invalid laps will not be counted in the lap count, appear in the lap times or used as a reference lap. Press the square button to change the minimum lap time. You will see two arrows (up and down) appear next to the number. Use the two arrow buttons on the device to increase/decrease the minimum time. Press the square button again to confirm your selected value. |
 |
Fixed Lap ModePress the square button to toggle between the available settings: Note: When you have fixed a reference lap, you will see a message confirming your selection on the screen and a Padlock icon will appear. If you fix a stored lap the icon will appear instantly, if you fix the current lap, the icon will appear when the lap has been completed. |
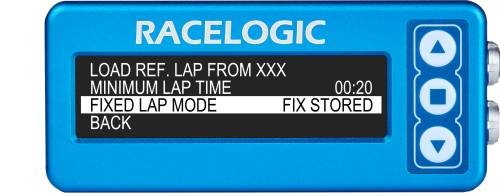 |
Fixed Stored |
When you have selected this option, pressing the square button in while in Predictive Lap Timing mode sets the reference lap that is currently stored in the memory as the fixed reference. |
Fix Current |
When you have selected this option, pressing the square button while in Predictive Lap Timing mode sets the reference lap once the current lap is completed. Note - if you choose to fix the current lap, this should override any Minimum Lap Time setting as you are making the decision to set the current and full lap as the reference. |
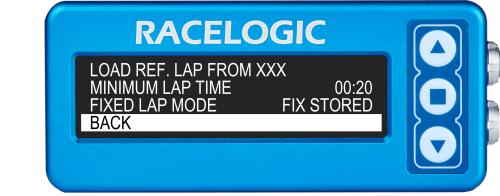
BackPress the square button with this line highlighted to exit the Predictive Lap Timing Settings and go back to the main menu. |
 |
.png?revision=1)
Lap Timing Menu
Set Start & SplitsPressing the square button sets a new start/finish point. After this, the DSP04 OLED Display will read “Set split 1”. Press the square button to set the split or ▼ to skip through split points, Finish line and back. If you set a new start/finish or split line, the lap count, best lap and all the best split time values will be reset automatically. |
 |
Clear Start & SplitsPress the square button to clear any start/finish and split point information from the DSP04 OLED Display's memory. Note: If the OLED is connected to a VBOX data logger, this will also clear the start/finish points in the memory on the VBOX unit. |
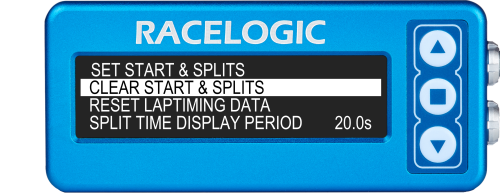 |
Reset Laptiming DataWith this option highlighted, press the square button to reset the stored reference lap, lap count and lap times. Note: This option fully resets the predictive lap timing mode. |
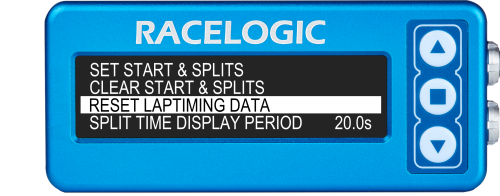 |
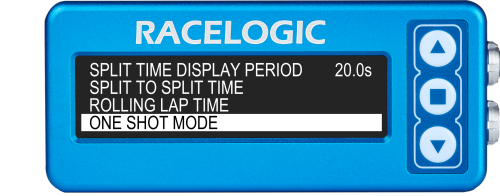
Split Time Display PeriodThis function allows you to set how long the split time is shown on the DSP04 OLED display when a split line or the start/finish line is crossed. There is a choice of 2 s, 5 s, 10 s, 15 s or 20 s. Press the square button to cycle between these options. |
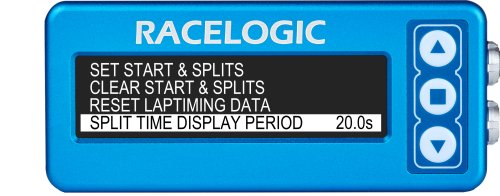 |
Split to Split TimeWhen this option is selected then the calculated split times will be split to split and not accumulative from the start of the lap. |
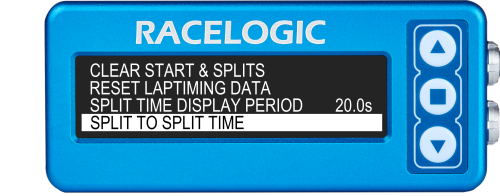 |
Rolling Lap TimeSelecting this function will show a continuously counting lap time which briefly freezes as the start/finish line is crossed. |
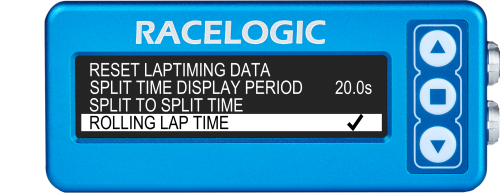 |
One Shot ModeWhen one shot mode is enabled, timing will start when movement is detected, after being stationary for more than 10 seconds. This will automatically reset when the user comes to a stop. After 2 seconds of being stationary, the screen counts down from 5 then shows 'ARMED – Start when ready'. |
 |
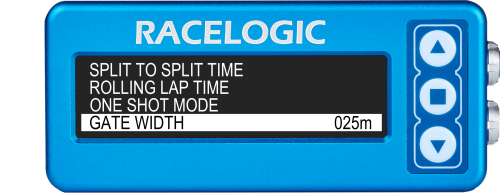
Gate WidthPress the square button to change the gate width. You will see two arrows (up and down) appear next to the number. Use the two arrow buttons on the device to increase/decrease the width of the gate. Press the square button again to confirm your selected distance. |
 |
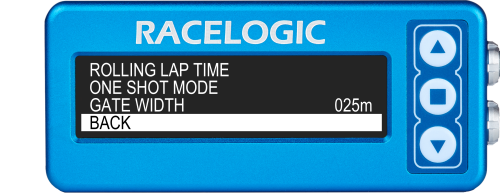
BackPress the square button with this line highlighted to exit the Lap Timing Menu and go back to the main menu. |
 |
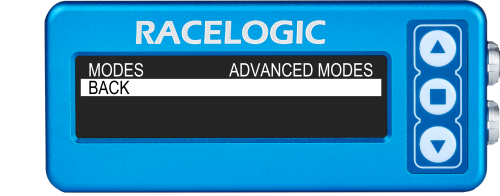
Display Menu
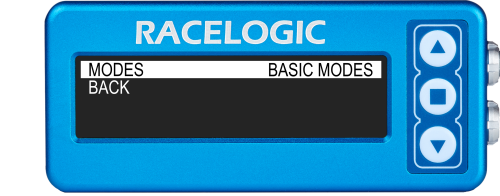
ModesThe DSP04 OLED Display has two Display Menu Modes for the Features; Basic Mode and Advanced Mode. This allows you to keep the full functionality of the DSP04 OLED Display or to reduce the amounts of Display modes to the Basic features. The tables below list the Display Modes available in each Display Menu Mode. Press the square button to toggle between the options: |
 |
||||||||||
Basic Modes |
|
||||||||||
Advanced Modes |
|
||||||||||
BackPress the square button with this line highlighted to exit the Modes settings and go back to the Display Menu. |
 |
||||||||||
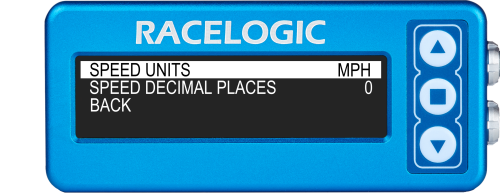
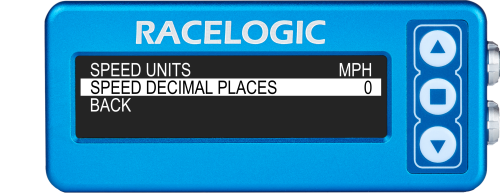
Speed Settings |
|||||||||||
Speed UnitsPressing the square button will cycle through KPH, MPH and KNOTS. |
 |
||||||||||
Speed Decimal PlacesPressing the square button will cycle through 0, 1, and 2 decimal places. |
 |
||||||||||
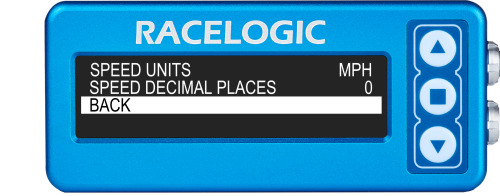
BackPress the square button with this line highlighted to exit the Speed Settings and go back to the Display Menu. |
 |
||||||||||
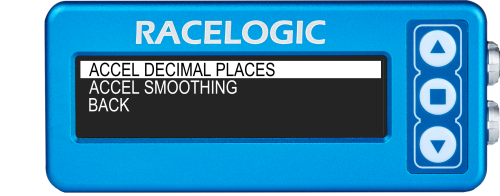
Accel Settings |
|||||||||||
Accel Decimal PlacesPress the square button to cycle through 0, 1, and 2 decimal places. |
 |
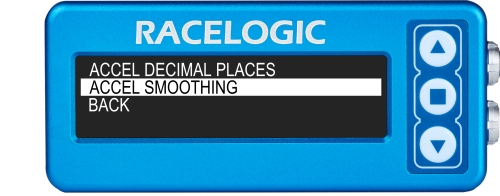
||||||||||
Accel SmoothingPress the square button to cycle through five smoothing settings. |
 |
||||||||||
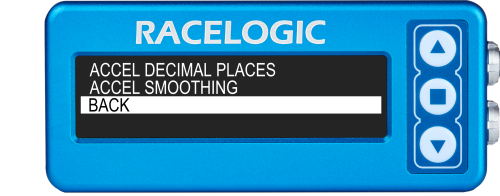
BackPress the square button with this line highlighted to exit the Accel Settings and go back to the Display Menu. |
 |
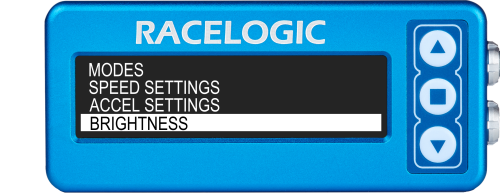
||||||||||
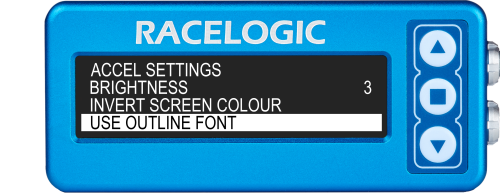
BrightnessPress the square button to toggle through five brightness settings. 1 is the darkest setting and 5 is the brightest setting. The display will change its brightness as you cycle through each setting to make it easier to find the correct level for you. |
 |
||||||||||
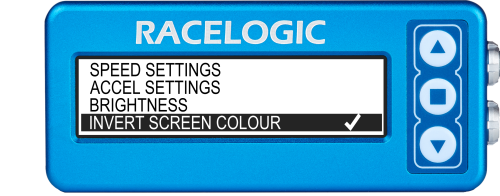
Invert Screen ColourPress the square button when an option is highlighted to toggle it on or off. When you select an option, a tick will appear next to it and the display applies the setting accordingly. |
 |
||||||||||
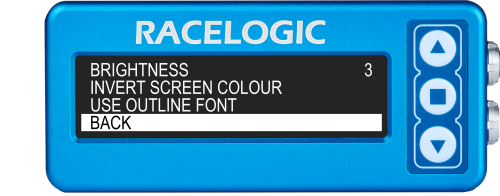
Use Outline FontPress the square button when an option is highlighted to toggle it on or off. When you select an option, a tick will appear next to it and the display applies the setting accordingly. |
|
||||||||||
BackPress the square button with this line highlighted to exit the Display Menu and go back to the Main Menu. |
 |
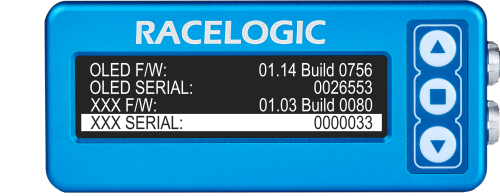
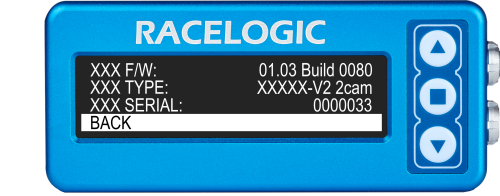
About
|
In this section, you can find the installed firmware version and the serial number for both the DSP04 OLED Display and the connected VBOX data logger. You can also find the unit type for the connected VBOX data logger. The firmware version of the OLED Display will also be visible on the screen while it boots up. BackPress the square button with this line highlighted to go back to the Main Menu. |
|
Exit
| Press the square button with this line highlighted to exit the Menu and go back to the Display Modes. | 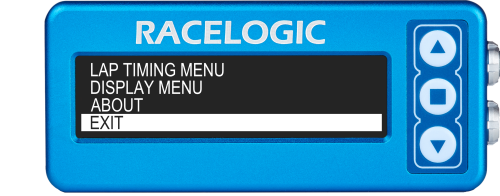 |