Using VBOX Touch with VBOX Test Suite to view live and recorded data
Viewing Live Data
|
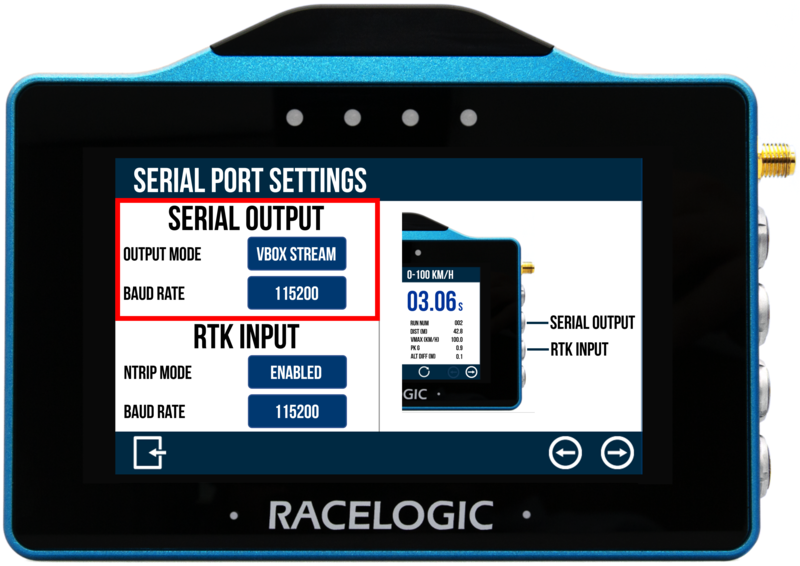
You can connect VBOX Touch directly to a computer that is running our data analysis software, VBOX Test Suite, to view live data and perform tests. What you need:
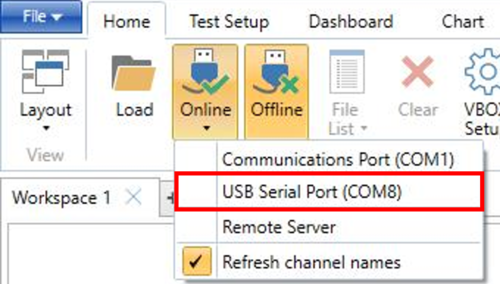
Follow the steps below to connect it to VBOX Test Suite:
|
 |
|
 |
|
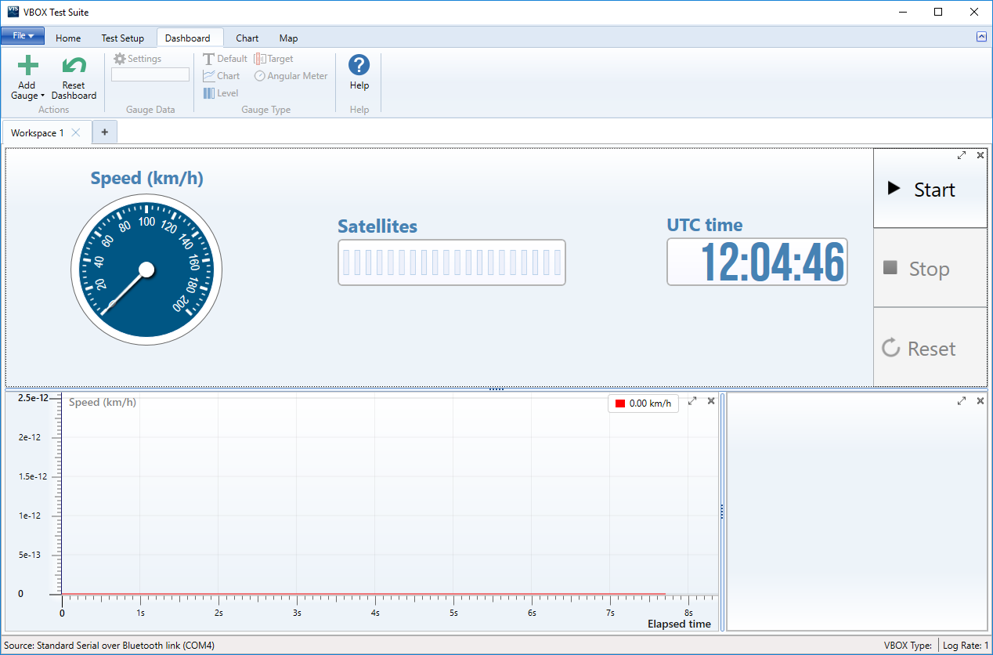
When the software is connected to your VBOX Touch, the dashboard gauges will automatically start to display the data that is sent live over the VBOX's serial stream. In the Online mode, Start, Stop and Reset buttons will appear on the dashboard. You can use these buttons to start, stop and reset any open tests. |
 |
|
When in Online mode, a newly-created session will be populated with session data from the previous session (if entered). Note: The COM port selection can be cancelled before the software has fully opened online communications. This is done by selecting the 'X' button at the bottom left of the software window, as shown below. |
.png?revision=1) |
|
If the connection is lost, a 'Disconnected' message is displayed. To reconnect again, select the 'Try Reconnect' option. More information on viewing live data and performing tests using VBOX Test Suite can be found here. |
Saving Live VBOX Data
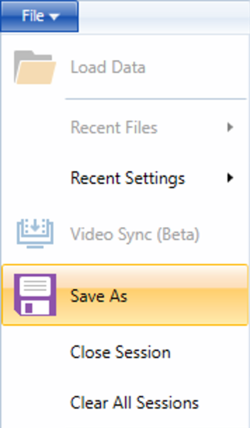
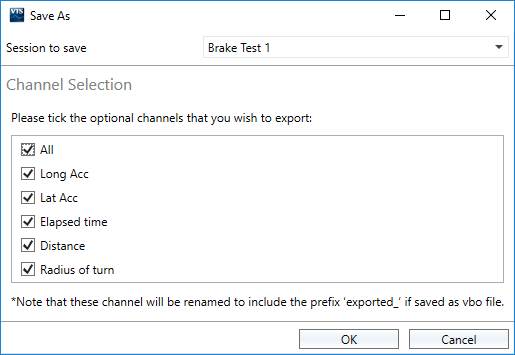
Whilst in 'Online' mode, live VBOX data can be saved as a .vbo or .csv file when a test has been completed. To do this, once a test has finished, navigate to the 'File' menu at the top left of the 'Ribbon' bar and select 'Save As' from the dropdown.
A pop up will then appear enabling you to choose VBOX Test Suite calculated channels, configured maths channels and test plugin specific channels to be included within the file. If there are multiple sessions, you can choose which one to save by using the drop down within the 'Session to save' option.
Pressing 'OK' will then let you name and save the file locally on the PC, enabling you to load this file in to VBOX Test Suite or a spreadsheet program for analysis at a later date.
Note: The saved .vbo will mirror the test data stored on the storage medium within the unit.
 |
 |
Recorded Data
If you do not need to conduct live testing, a recorded session will also be saved within the SD card as a .vbo file, which can be analysed later within the software.
If a file is loaded in that does not contain a valid satellite fix at the start of the file, the software will temporarily hide the first 20 seconds of the file to avoid a potentially large time when the GNSS engine establishes the correct time.
.png?revision=2)