Using the Wireless Logging Switch with VBOX Video HD2
Wireless Logging Switch
There is an optional extra Wireless Logging Switch (RLACS224) that you can use to start/stop the logging on an HD2 unit. The switch was designed for in-car use and has a range of around 2 m.
The switch will automatically connect to the HD2 unit when they are powered on. To avoid confusion or accidental pairing to an incorrect unit, the pairing process uses the individual MAC code, a unique identifier for each logging switch.
To pair the logging switch with your HD2 unit, you must first select the correct setting in the VBOX Video Setup software.
- Insert the SD card you want to use into a computer and open the VBOX Video Setup Software (which you can download here).
- Add a new scene or select a previously saved scene.
- Select Bluetooth in Settings and make sure that the Enable button is ticked.
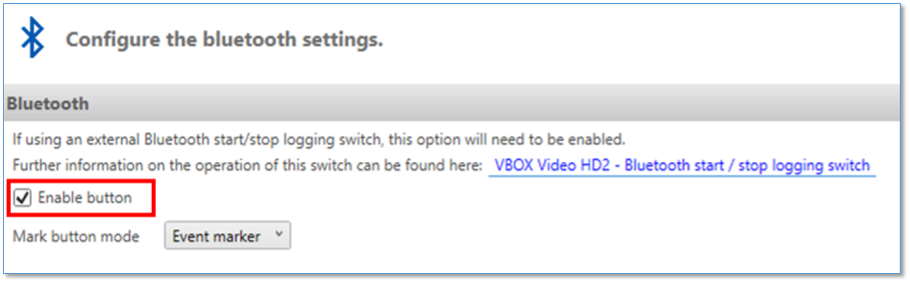
Windows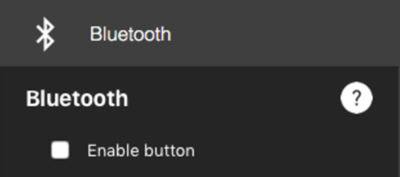
macOS - Save the configuration to the SD card and remove the card from your computer.
Pairing the Wireless Logging Switch
To pair a Wireless Logging Switch, you must first make sure that the HD2 unit is fully powered on.
- Power on the HD2 unit and wait for it to boot up.
- Insert the SD card into the fully booted VBOX Video HD2.
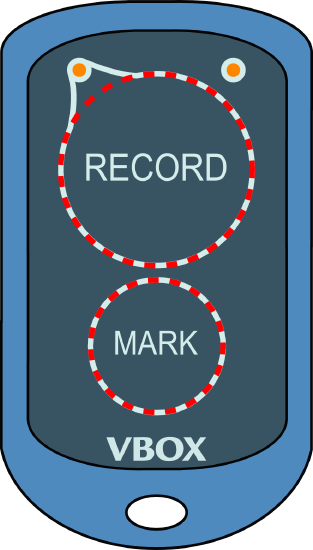
- Turn on the Wireless Logging Switch by holding it within 1 m of the HD2 unit and pressing the Record button. You should see the Record LED flashing orange while it searches for a VBOX Video HD2 to connect to.
If no other Wireless Logging Switch is paired with the HD2, and the unit is running Firmware Version V1.3.72 or later, the switch will automatically connect to the unit when you turn it on.
If another Wireless Logging Switch is paired with the HD2, you must remove the paired switch before you can pair the new one.
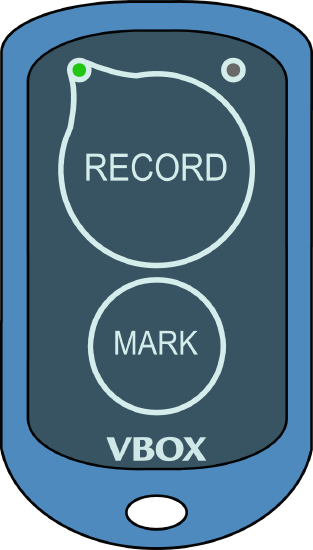
- Once connected, the Record LED will flash green (roughly once every three seconds). You can now use the logging switch to start/stop recordings and add event marks to files.
|
Notes:
|
If, for some reason, the logging switch does not automatically connect with the unit, you can install a pairing file onto the HD2 by using the following steps:
- Once the scene has loaded, remove the SD card from the HD2 unit and insert the SD card provided with the switch.
Note: If the switch was not supplied with an SD card, you can find instructions for how to install a pairing file in the grey box below. - Upload the pairing file from a computer to the SD card and insert it back into the VBOX Video HD2.
- Within a few seconds, the HD2 unit will beep and the OK light will slowly flash orange.
- Power-cycle the unit HD2 unit.
- Remove the logging switch SD card and insert the SD card you are using for your recording.
|
IF YOU DO NOT HAVE AN SD CARD FOR YOUR WIRELESS SWITCH Wireless Logging Switches purchased before the release of firmware version 1.2.45 (prior to October '16) would not have been supplied with an SD card and will require a pairing file, obtainable from Racelogic, to upgrade to firmware version 1.2.45 or later. Remove the rear cover of the logging switch. You should see a 12-digit code (MAC Code) on a silver sticker on the inside of the rear cover, as illustrated below:
Give us a call or email this code, along with a request for a Wireless Logging Switch pairing file, to support@racelogic.co.uk. We can create a file and send this to you via email.
|
.jpg?revision=1)
Un-Pairing VBOX Video HD2 From a Wireless Logging Switch
To un-pair a speific Wireless Logging Switch from an HD2 unit, you can either press and hold both buttons on the logging switch until both LEDs light orange or use the Camera Preview App.
Wireless Logging Switch Operation
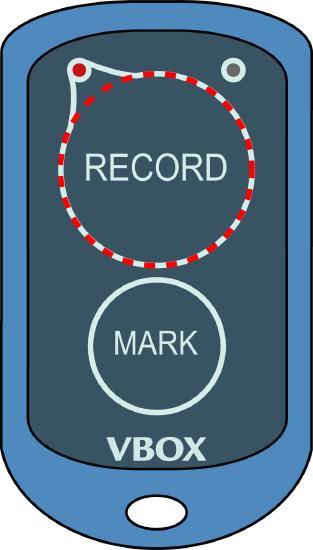
RECORD Button
Once you have paired the Wireless Logging Switch with the HD2 unit, the logging switch will start/stop the logging on the connected HD2.
| Note: The HD2 unit will still follow the set logging conditions. Click here for more information on logging settings. |
The RECORD button on the logging switch should always act as a manual override to control the logging on the HD2 unit, in the same way as pressing the button on the front panel of the HD2 unit itself.
- If the paired HD2 is recording, the RECORD LED on the logging switch will flash green (roughly once every two seconds).
- If the paired HD2 has no logging media inserted, and the manual logging control is activated, the RECORD LED on the logging switch will flash red.
|
HD2 unit recording |
No media fitted to HD2 – unable to record |
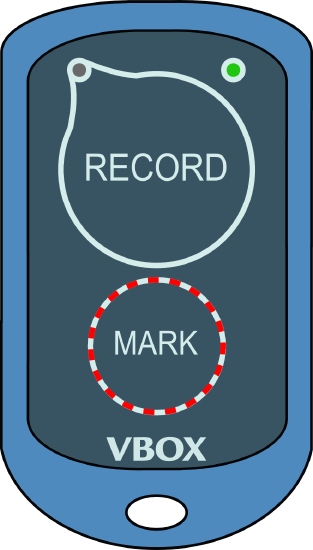
MARK Button
|
If the Mark button mode in the Bluetooth Settings is set to Event marker, you can press the MARK button to mark an event. This will cause the MARK LED to flash green once, and an event marker will be logged in the .vbo data file. |
 |
|
If the Mark button mode in the Bluetooth Settings is set to Set gates, you can press the MARK button to set start/finish and finish gates. Press once to set the start/finish gate at your current location. If you want a separate finish gate, press the button again when you are in the location you want to set the gate. Pressing the button will cause the MARK LED to flash green once, and the relevant gate will be logged in the .vbo data file. |
Technical Information for the Wireless Logging Switch
| Battery Type | CR2032 |
| Battery life – continuous use* | Approximately 900 hours |
| Battery life – standby use** | Approximately 3 years |
| Wireless range | Approximately 2 m |
*Continuous use means that the Wireless Logging Switch is displaying a logging state, so the logging LED would be illuminated and there would be a live Bluetooth link to the VBOX Video.
**Standby use means that the Wireless Logging Switch has no live Bluetooth link, is not searching for any devices and is essentially ‘asleep’. You can wake the logging switch at any time with a button press.
Battery Replacement in the Wireless Logging Switch
Open the case using the bottom indent. Slide the battery out by gently pulling the two tabs (highlighted in the image below) forward. Insert the new battery and snap the case shut.
.jpg?revision=1)