Quick Start Guide
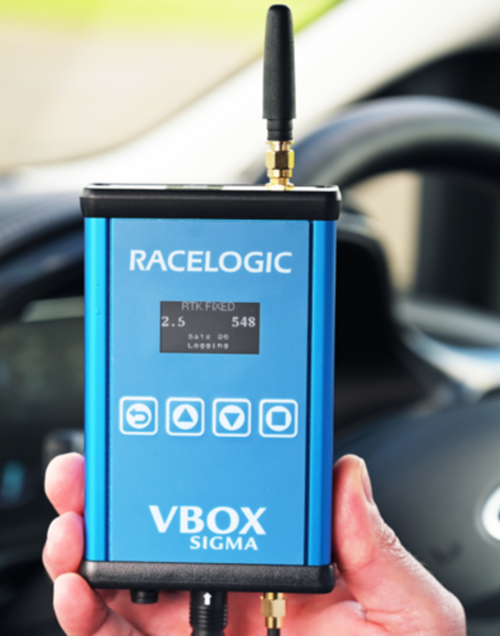 |
VBOX Sigma (RLVBSIGMA) is a cost-effective, RTK enabled 10 Hz data logger with integrated NTRIP modem. Its multi-constellation, multi-frequency GNSS engine offers outstanding performance even in areas with poor and multi-path satellite coverage. When used in conjunction with an RTK base station or NTRIP correction service, VBOX Sigma is accurate to within a centimetre and is the ideal reference for ground truth.
|
What’s Included
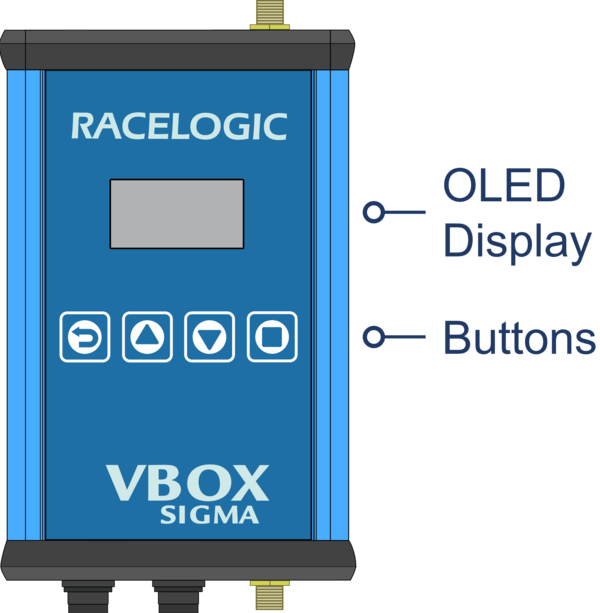
Hardware Overview
FrontOLED DisplayButtonsBack ButtonUp/Down ButtonsSquare Button |
 |
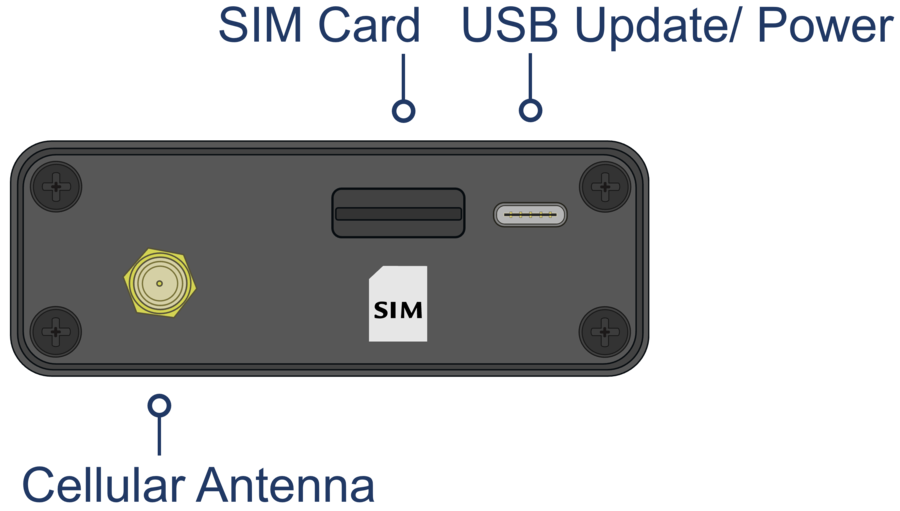
Top
The top of the unit houses a slot for inserting a Standard SIM card if are intending on using the internal 4G modem to connect to the NTRIP server, and a USB socket for updating the unit using the supplied USB cable. If you are connecting to another GNSS receiver rather than a VBOX, the USB socket can also be used to power the unit if power isn't available via the Hirose connection (more information on USB power is available here).
An SMA connector is also included for attaching the supplied cellular antenna (ANTMSTUBSMAM).
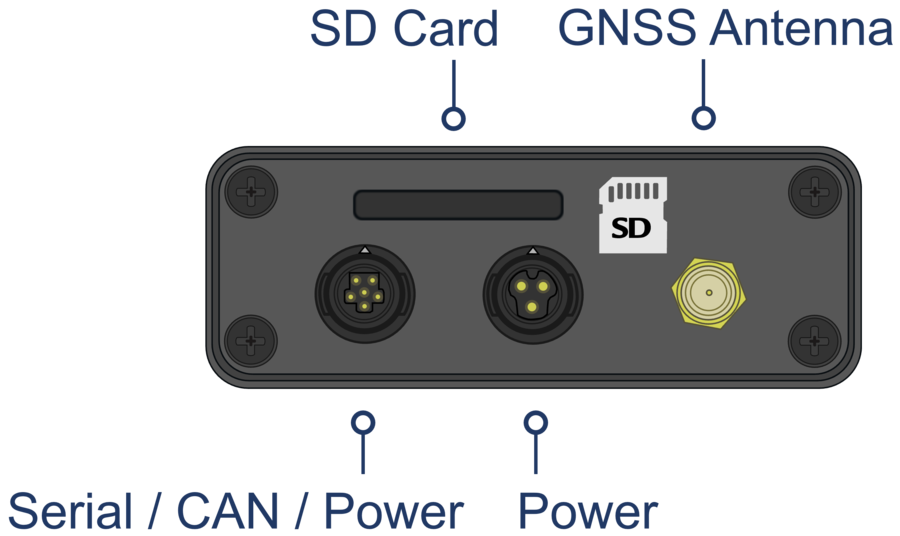
Bottom
The bottom of the unit houses 2 Hirose connectors, the centre one can be used to supply power to the unit via the supplied RLCAB010H cable. The other connector can be used to connect to a VBOX or other GNSS sytem to supply RTK correctional messages via CAN.
There is also a an SD card slot for logging data and an SMA connector for attaching the supplied GNSS antenna (RLACS308).
Further connector pin information is available here.
Screen Overview
Three display screens are available; the Home Screen, Sats Screen and the Network Screen, accessed by using the Up and Down Arrow Buttons on the front of the unit.
More detailed information on the display screen can be found here.
Home Screen

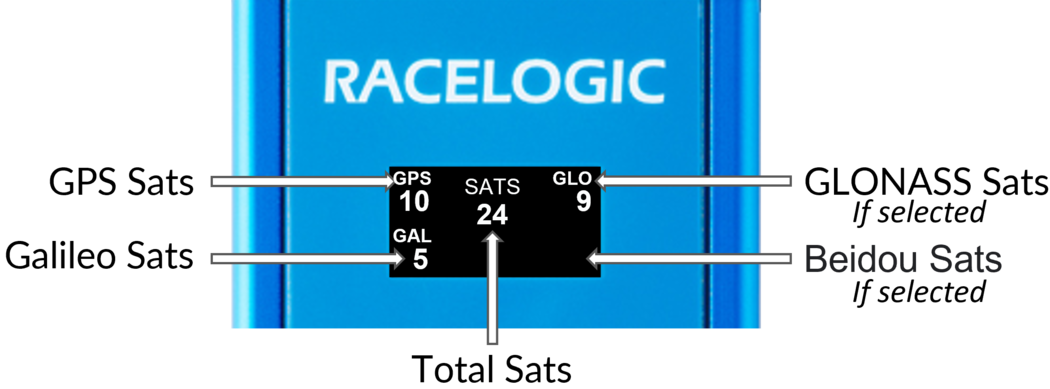
Sats Screen
Network Screen

Setup
Configuration of VBOX Sigma is performed using a Wi-Fi hotspot access point created by the unit. You can then log in to this access point on your phone or a computer and use a webpage to configure the unit to either use the internal GSM modem or an external Wi-Fi hotspot to connect to your chosen correction service. Other settings options include CAN and VBO log settings along with status information. Settings are retained after a power cycle.
If the unit is configured to use both the internal GSM modem and an external Wi-Fi hotspot, it will attempt to auto connect to the Wi-Fi hotspot first on power up.
- Attach the supplied cellular antenna (ANTMSTUBSMAM) to the SMA connector on the top of the unit.
- Attach the supplied GNSS antenna (RLACS308) to the SMA connector on the bottom of the unit and mount in the centre of the roof of the vehicle, away from roof bars and other antennas. For more information on antenna mounting positions click here.
- insert the SD card in to the slot on the bottom of the unit, more information on SD card logging is available here.
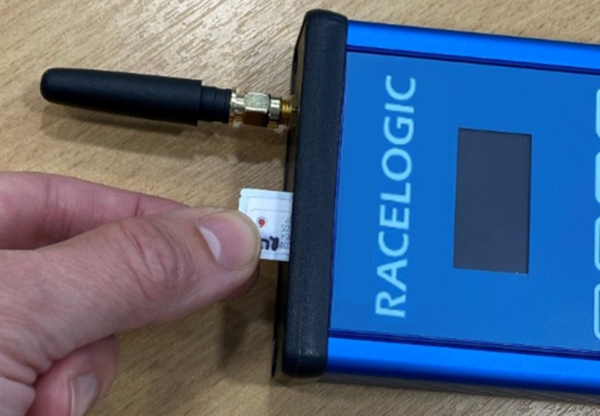
- If you are intending to use the internal 4G modem, insert a data Standard SIM card in to the slot on the top of the unit, with the logo facing the front screen side/ contact facing the rear, chamfered edge in first.
Note: Ensure the card has been activated.
- The VBOX Sigma unit can be either powered from the 3-way hirose connector on the bottom of the unit using the supplied RLCAB010H cable which is inserted in to a vehicle's 12 V cigar power socket, from the USB socket on the top of the unit using the supplied TTV1AM20MB31 cable, or through the 6-way hirose connector on the bottom of the unit if being connected to another VBOX to provide NTRIP correction messages. Apply power to the unit.
-
Configuration of VBOX Sigma is performed using a Wi-Fi hotspot created by the unit. The hotspot name and IP address is displayed on the Network Screen of the unit when powered, accessed by using the Up or Down Arrow Buttons on the front of the unit. Using a phone or a computer, navigate to the Wi-Fi settings on the device and connect to the hotspot name. Open an internet browser and enter the IP address within the address bar.
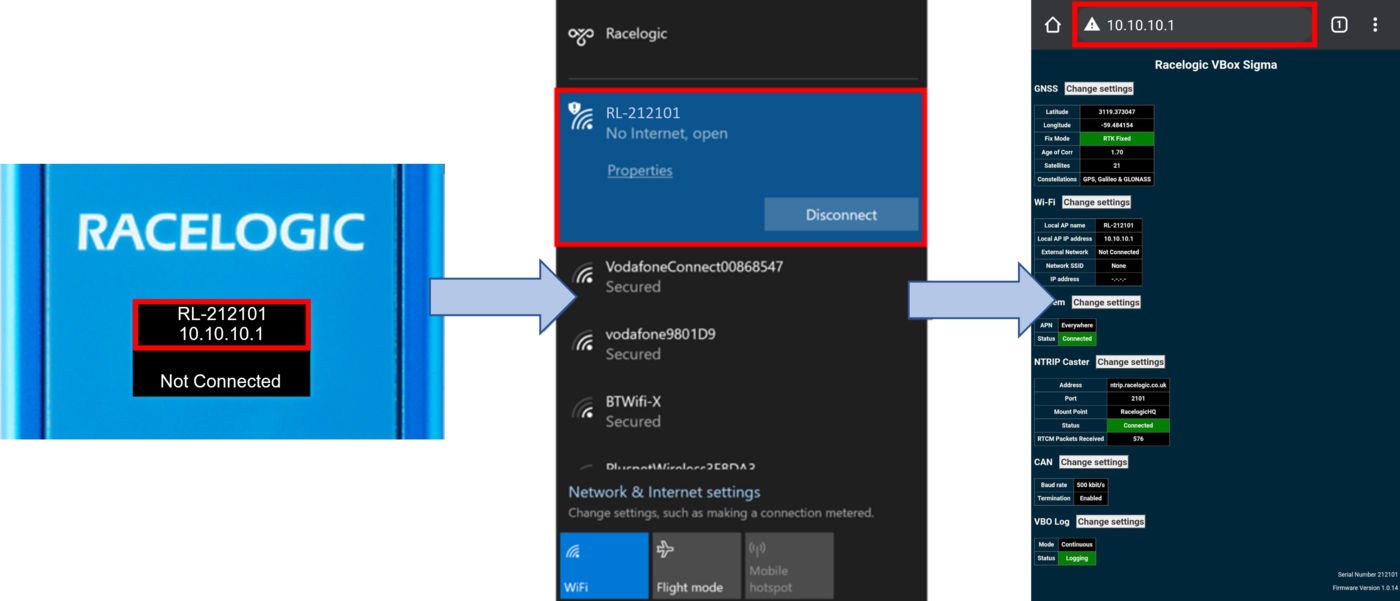
Wi-Fi hotspot name and IP address example
- If you are intending to use an external Wi-Fi hotspot, such as a mobile phone or battery powered hotspot to connect to the NTRIP sever, press the 'Change settings' button next to the Wi-Fi heading. Enter the name and password of your hotspot and then press the 'Save and restart' button. Once connected to the Wi-Fi hotspot, the unit will briefly display a 'Wi-Fi Connected' message.
- If you are intending to use the internal 4G modem, press the 'Change settings' button next to the Modem heading. Enter the APN, Username and Password associated with your network provider and then press the 'Save and restart' button. Once connected to the network provider, the unit will briefly display a 'Connected (mobile data supplier)' message.
- To configure the NTRIP correction service details, press the 'Change settings' button next to the NTRIP Caster heading. Enter the Server Name/ IP Address, Port, Mount Point (correction data stream), Username and Password information (if required) and then press the 'Save' button. Once connected to the NTRIP server, the unit will briefly display an 'RTCM Streaming' message. If there is a problem with the server details entered, the unit will briefly display an 'Invalid Caster Credentials' message.
Note: These details will be provided by your NTRIP service provider.
- VBOX Sigma is configured to log continuously when an SD card is inserted as standard, if you would like to change to logging when the vehicle is moving (>0.5 km/h), press the 'Change settings' button next to the VBO Log heading and use the dropdown menu to select 'Only when Moving'. Once you are happy with the settings, press the 'Save' button to confirm. Logging can also be started/stopped using the Square Button on the front of the unit.
- VBOX Sigma is now setup ready for use, the front screen will display status and connection information.
