03 Camera Preview App - VBOX Video HD2 (v1-5)

Once the HD2 system is fitted in your vehicle, the camera positions can be fine-tuned and bluetooth devices can be paired using the VBOX Video iOS/Android App, which connects to VBOX Video HD2 using a Wi-Fi connection.
Read the Hardware Overview for connection notes, or view the Quick Start Guide for a guide of fitting the system in a vehicle.
The VBOX Video App can be downloaded from the Apple App Store or the Google Play Store.
Once the application is installed, a VBOX Video icon should show on the device.

Power on the VBOX Video HD2, and wait for it to fully boot up. As soon as the HD2 is on, it will transmit a Wi-Fi signal which can be picked up by the iOS/Android device.
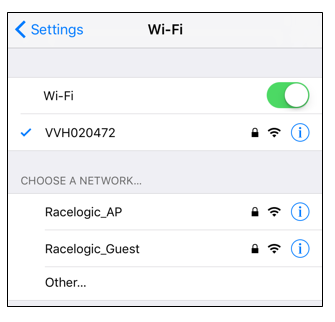
In order to pick up a live camera preview, open the settings area within the iOS/Android device, and navigate to the Wi-Fi settings area. There should be an option to select the detected VBOX Video unit. Note: the number listed after the device is the HD2 unit's serial number.
.png?revision=1)
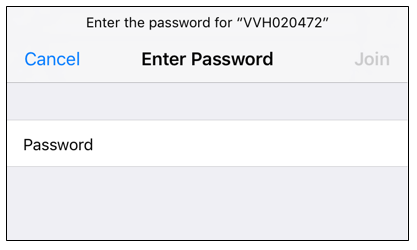
This will prompt the app to request a password confirmation:

The password to connect to the HD2 set as default is the serial number of the HD2 unit. In this example it is VVH020472.
Enter this as the password and you should see the device connect to the HD2:

When there is a successful Wi-Fi connection to the HD2, open the application to view a live camera preview.
.png?revision=1)
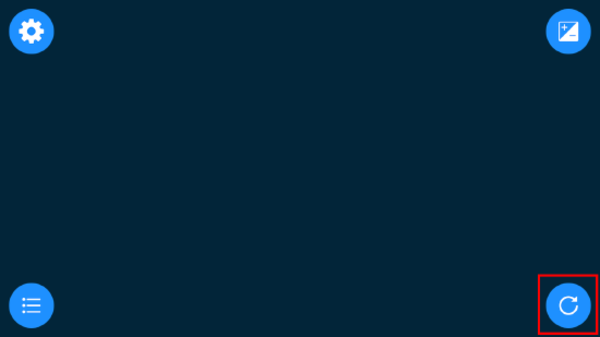
If the connection drops at any time, press the ‘refresh’ button shown below to connect to the unit again.
.png?revision=1)
If the app is opened with no connection to a VBOX Video HD2, the user will see the message displayed below. Check that the Wi-Fi connection is still open in the device and that the HD2 is still powered.
.png?revision=1)
Settings Menu
The Settings icon highlighted below opens the Settings section where specification details of the HD2 unit and cameras can be found:
.png?revision=1)
WIFI
Here it is possible to change the Wi-Fi SSID by tapping on the Wi-Fi name. A box will appear which allows a new Wi-Fi name to be entered and saved:
.png?revision=1)
Save diagnostic logs to SD card
This instructs the HD2 to save its encrypted diagnostic log to the SD card, for use by Racelogic support when requested.
Export current scene to SD card
This saves the current HD2 scene to the SD card. This feature is particularly useful if you have not got the scene file saved locally on a computer and would like to edit the scene.
Bluetooth
This option allows you to:
-
View all devices paired and see if any are currently connected
-
Remove a device from the list of paired devices
-
Add a device to the list of paired devices
.png?revision=1)
This allows pairing of a Bluetooth Start/Stop Logging Switch, Heart Rate Monitor or OBD Module if for some reason they do not automatically connect with the HD2.
.png?revision=1)
When 'Bluetooth' is selected, the HD2 will scan for available devices and display them alongside previously paired devices. To pair a device, select the device you wish to connect to and confirm the prompt. Likewise, to remove a paired device, select within the paired devices section and confirm the prompt.
Note: The device will automatically connect to the unit when turned on as long as no other Bluetooth device of the same type (e.g. OBD dongle) is already paired with the HD2.
.png?revision=1)
Note: A Bluetooth device will need to be turned off to be unpaired with the HD2 as it will constantly try to reconnect if on.
If a Bluetooth connection is active, a 'Bluetooth' icon will appear on the top right of the main app screen.
.png?revision=1)
Track Selection
The track selection icon is available if an auto track map element is being used in the current scene in the VBOX Video. Selecting this icon allows a specific version of the track at the current GPS location to be selected:
.png?revision=1)
Exposure Setting
The exposure setting icon allows the main camera exposure to be tailored to the specific light conditions and camera position. This is particularly useful if the camera is mounted a long way back in the vehicle and the view through the windscreen is washed out or over exposed.
When selecting the exposure icon a message will appear which enables the exposure window to be set manually or returned to the default setting.
Selecting 'Set window' allows the user to drag a box around the area of the image the exposure should be set to.

