Record and Replay
Recording Operation
Media/Memory
Setup
Recording Example
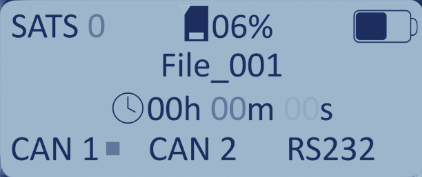
This is an example of how to record a file to the internal SSD on LabSat 4.
|
1 |
2 |


|
3
|
4
|


|
5
|
6
|


Record Screen
 |
Additional Info
During recording, if the SSD becomes full, the recording will stop automatically.
LabSat 4 contains an onboard GNSS receiver that gives you the ability to monitor the RF signals during record or replay. If you press the OK button while the unit is recording, it will switch the display to show available satellite levels for the different constellations. In this display mode, you can use the UP/DOWN buttons to toggle between the different constellations. Press the OK button in this display mode to open the file status. Press the OK button again to return to the record status display mode.
| Note: During recording, while using battery power, the GNSS monitor display will automatically revert to the record display after a short period to conserve battery power. This power save feature can be switched off, but it is recommended to be left active for maximum battery life. |
Replaying Operation
Media/Memory
Replaying Example
Example of how to replay a scenario file from the SSD.
|
1
|
2
|


|
3
|
4
|


Replay Screen
 |
Additional Info
LabSat 4 contains an onboard GNSS receiver that gives you the ability to monitor the RF signals during record or replay. If you press the OK button while the unit is replaying, it will switch the display to show available satellite levels for the different constellations. In this display mode, you can use the UP/DOWN buttons to toggle between the different constellations. Press the OK button in this display mode to open the file status. Press the OK button again to return to the replay status display mode.
|
Note: When you switch between GNSS monitor modes, it will take some time for the internal receiver to re-acquire satellite signal levels. |
Replay Behaviour
Pressing Play
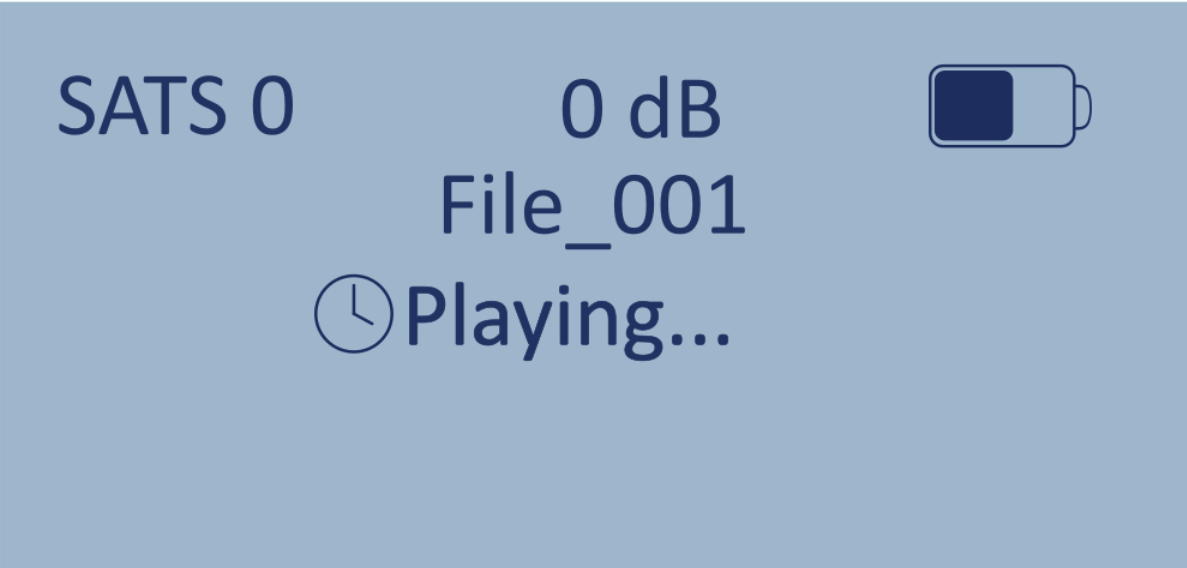 |
When you press the Play/Pause button to start replaying a file, the unit will display the status "Playing" while the file is being prepared. The file will start playing, with the replay settings configured in the Play Options Menu, as soon as it is ready. |
Looped
 |
If you have selected to loop the file during the replay, you will see the Loop symbol displayed on the right-hand side, above the progress bar, when the file starts replaying. The file will continue to play until you press the Play/Pause button again.
|
Looped with Pause
 |
If you select to loop the file during replay, but with an added pause before the file loops, LabSat 4 units will display a Loop with Pause symbol on the right-hand side, above the progress bar, when the file starts replaying. |
 |
When the file has finished replaying, LabSat 4 will display a message stating that the replay has been paused and a countdown with the set pause time. When the countdown reaches 0, the file will restart from the beginning. |
Play From and Play For
 |
If you have set a time you want to start the replay From in the Play Options Settings, LabSat 4 will display an arrow at the beginning of the progress bar to indicate that the setting has been applied. If you have set a time you want the replay to Play For in the Play Options Settings, LabSat 4 will display an arrow at the end of the progress bar to indicate that the setting has been applied.
|
Record and Replay External Signals
|
Model Limitations LabSat 4 Lite models cannot record or replay external signals. |
In addition to GNSS Signals, you can also record and replay the following data: