Quick Start Guide: Lap Timing Mode - Performance Box Touch V1
Performance Box Touch features a 10 Hz GPS receiver and a responsive 4.3” colour touch screen. The Lap Timing Mode allows you to view live Lap Timing information in relation to a set Start/Finish line.
There are 2 Lap Timing screens; the Main Screen, which contains live reference lap speed comparison (Delta-V), live reference lap time comparison (Delta-T), current reference lap time, last lap time, last lap time difference to best, session time and completed lap count. The Basic Screen contains either just a rolling lap time or a static previous lap time.
Registration
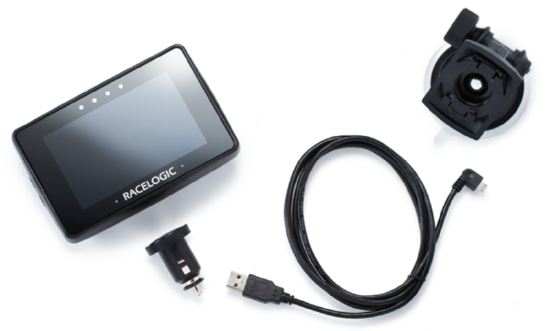
The box content
Performance Box Touch V1 (RLPBT-V1)
 |
| Product Code | Quantity | Description |
|---|---|---|
| PBT-V1 | 1 | Performance Box Touch Unit |
| RLACS184 | 1 | Cigar Plug USB Adapter |
| USB2-007241 | 1 | USB 2.0 A to Right Angle Micro B data and Charging Cable, 1.5 m |
| RLACS313 | 1 | 8 GB SD Ultima Pro UHS-1 Memory Card |
| RLACS277 | 1 | Swivel Neck Richter Suction Mount |
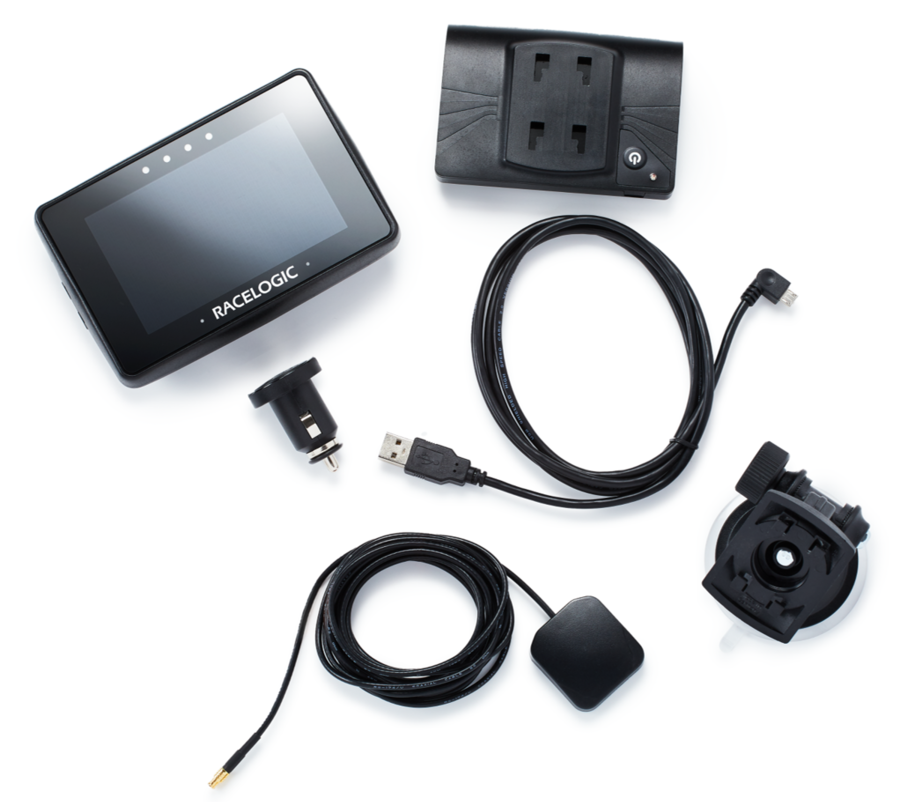
Performance Box Touch V1 Bundle (RLPBT/B)
 |
| Product Code | Quantity | Description |
|---|---|---|
| PBT-V1 | 1 | Performance Box Touch Unit |
| RLACS184 | 1 | Cigar Plug USB Adapter |
| USB2-007241 | 2 | USB 2.0 A to Right Angle Micro B data and Charging Cable, 1.5 m |
| RLACS313 | 1 | 8 GB SD Ultima Pro UHS-1 Memory Card |
| RLACS277 | 1 | Swivel Neck Richter Suction Mount |
| RLACS290 | 1 | Performance Box Touch Battery |
| RLACS284 | 1 | GPS/GLONASS Low Profile Antenna, 2 m |
| RLACS281 | 1 | Plastic Carry Case |
Hardware Overview

Logging
| Performance Box Touch V1 logs data via an SD card inserted into the SD cad Slot on the left-hand side of the unit. Depending on the Logging Strategy you have selected in the General Settings area, the unit will either log continuously or when it detects movement. |
| You can manually override the configured logging strategy by tapping on the SD Card Icon when it is green to start or stop the logging. |  |
|
The Record Icon will show when the unit is logging data to the SD card. If you have come to a stop, but the Record Icon is still on, you must press the SD Card Icon to stop the logging before you remove the SD card.
Note: If the SD card is removed while the box is still recording, you may need to repair it on a PC before you can use it again. |
 |
SD Card Format
|
Performance Box Touch is supplied with an 8 GB SDHC card in a FAT32 file format, which is the only file format it supports. If you are looking to purchase a new SD card, we recommend that any card you use has a write speed of above 7 MB/s (4 MB/s is the absolute minimum) and a speed class of 10 (4 is the absolute minimum). We recommend that you use SD cards from quality brands such as Transcend, SanDisk, Kingston or Lexar to ensure the best results. IMPORTANT |
SDHC cards (2 GB to 32 GB)
| Supplied or purchased SDHC cards are formatted in the FAT32 file format. This format is supported by Performance Box Touch. |
SDXC cards (64 GB and above)
| Purchased SDXC cards will be formatted in exFAT or NTFS file formats; these formats are not supported by Performance Box Touch. Please reformat as per the instructions below. |
SD Card Reformatting
|
Logged Channels
|
Performance Box Touch logs channels to a .vbo file on an inserted SD card. The channel information is as follows:
|
Screen Overview
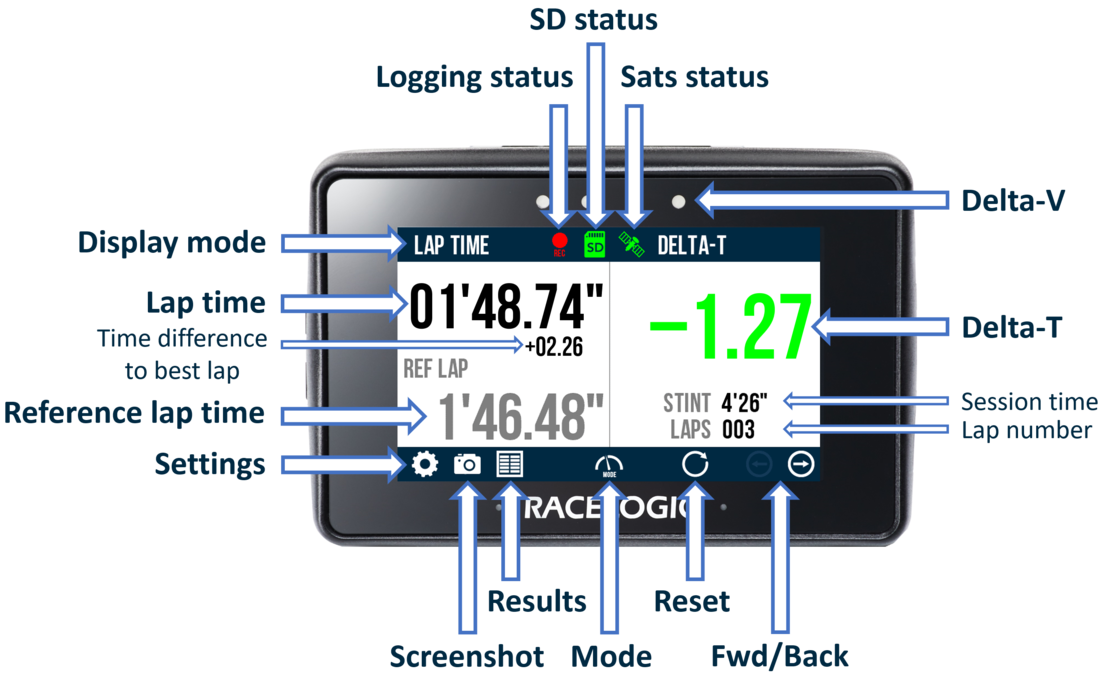
Main screen example
Setup
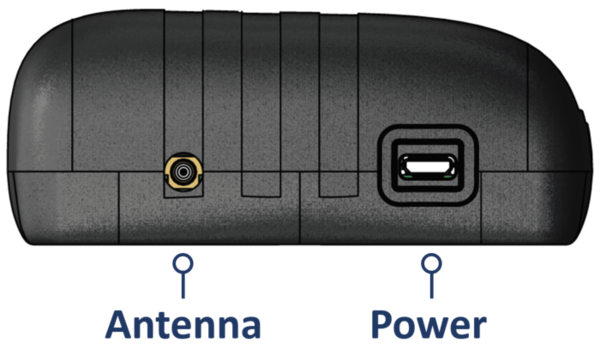
- Performance Box Touch V1 has an internal patch antenna. This means that where the unit has a clear view of the sky without any interference, an additional antenna is not required in most circumstances.
However, if it is required, you should mount the external GPS antenna (RLACS284) in the centre of the roof of the vehicle, away from roof bars and other antennas. You can find more information about how to mount your external antenna here.
- If you are using an external antenna, connect it to the Performance Box Touch.
- Connect the Battery (RLACS290) if required. You can find more information about the battery here.
- Connect the Swivel Neck Richter Suction Mount (RLACS277) to the rear of the unit (or the battery if applicable) and attach the suction mount to the vehicle's windscreen. You can find more information about the mounting of the unit here.
- Connect the power via the Power socket, or if you are using the battery independent of a power source, press and hold the Power button on the battery for a few seconds.
- Insert the SD card into the SD card slot. The SD Card Icon should display in green as long as the card has available space.
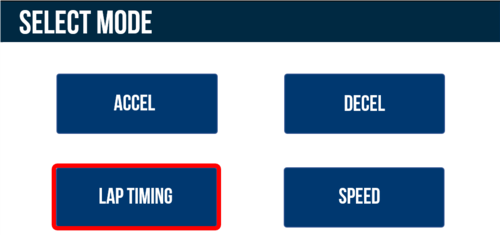
- When the unit has booted, select the Mode Button and press LAP TIMING if it is not already selected.
- Take the vehicle outside and wait for the Performance Box Touch to gain satellite lock. The Satellite Icon should display as solid green.
Note: The first time you use the unit, it may take up to 10 to15 minutes for it to fully acquire satellites. After this, it will usually only take 1 to 2 minutes to acquire satellite lock. - Select the Settings Button, then the Lap Timing option and navigate to the Track Settings. The unit will display the currently selected track based on the GPS location. If there are multiple layouts available, you can press the Select button to scroll through the different options. It is important that you make sure that the correct circuit has been selected!

- Press the Exit Button to return to the Lap Timing screen.
- Select which Lap Timing display you would like to use (Main or Basic) by using the Forward and Back arrows on the bottom right of the screen or by swiping left or right.
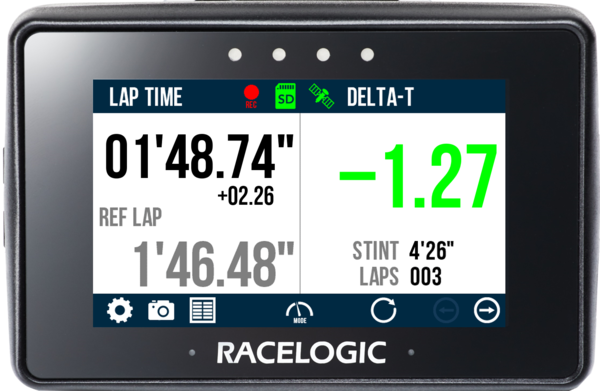
Main screen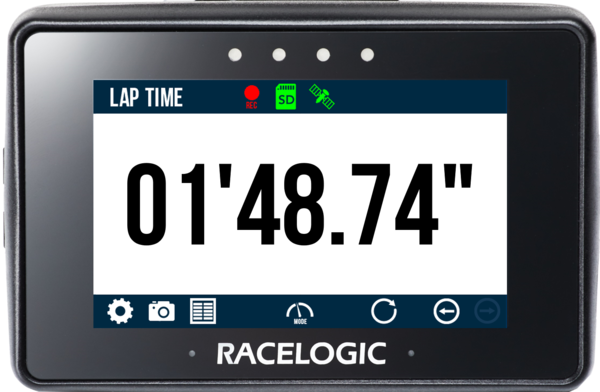
Basic screen - The unit is now ready to display live Lap Timing values.
Main Screen:
- Once the start/finish line is crossed, Performance Box Touch will automatically begin to create a reference lap. When a reference lap is being created, a 'Creating a Reference Lap' message is displayed within the Delta-T section and the reference lap section will show a rolling lap time. The LEDs will also illuminate blue during the creation process. The reference lap will update if a faster lap is achieved unless the Reference Lap has been Fixed within the Settings.
- Once a reference lap is created, the unit presents a live difference in lap time (Delta-T) between the current lap time and the stored and active reference lap at the current location on the track.
- The 4 LEDs at the top of the screen provide a live reference lap speed comparison (Delta-V), varying in colour between green and red depending on whether you are travelling faster or slower than the reference lap at the current location on the track. You can change the settings for this in the Delta-V Range settings.
Basic Screen:
- Performance Box Touch will display the current live lap time. When a new lap starts, the previous lap time will be displayed for 3 seconds before reverting to displaying the current live lap time. You can just display the previous lap time by Disabling the Rolling Lap Time.
- You can override the detected start/finish line by manually setting a Start/Finish Line or just a Finish Line.
- Performance Box Touch can also start lap timing from a Standing Start if you have set a separate Finish Line, this is particularly suitable for sprint style events.
- By default, Performance Box Touch will automatically start recording when detecting a speed of over 0.5 km/h. You can change this in the General Settings.
- If you tap on the SD Card Icon when it is green, you can manually start or stop the data logging, overriding the Configured Logging Strategy.
-
The Record Icon will show when the unit is logging data to the SD card.
If you have come to a stop, but the Record Icon is still on, tap the SD Card Icon to stop the logging before you remove the card from the unit.
Sometimes, due to poor satellite visibility, for example in a garage or close to a building, the box may start recording even if the car is stationary. Always check the Record Icon before you eject the card.
IMPORTANT
You must not remove the SD card when the Record Icon is on as you may lose data.
Note: If for some reason the SD card is removed while still recording, you may have to repair it on a PC before you can use it again.
-
You can take a screenshot of the displayed content at any time by pressing the Screenshot Button.
-
You can reset lap timing data, lap time history and the reference lap, by pressing the Reset Button.
-
When you have finished, you can view a history of the lap results by pressing the Results Button.
You can find more information on the Lap Timing Mode here.
The recorded session will be saved on the SD card as a .vbo file. You can do post-analysis on this file in the VBOX Test Suite or Circuit Tools softwares, which you can download from the VBOX Motorsport Website. Features include a graphical display of logged parameters, a full circuit plot, overlaid comparison laps and detailed performance analysis.
.png?revision=2) VBOX Test Suite |
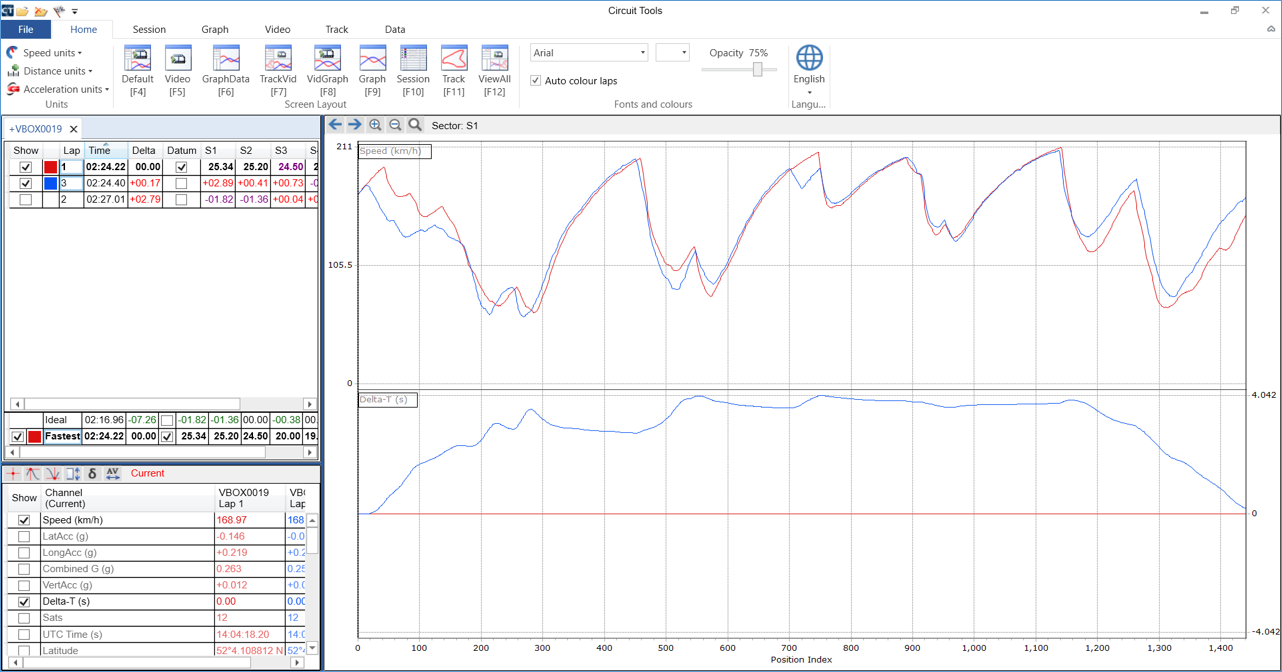 Circuit Tools |