ADAS Moving Base Setup
Place one VBOX into each vehicle - one will be the subject vehicle and one or two will be the target vehicle(s). Racelogic recommend that the first target vehicle is used as the moving base. This means that the subject vehicle is only receiving the separation and correction data, not both sending and receiving it. This improves the reliability of the data.
In the Subject vehicle
- Mount the GPS Antenna in the centre of the roof at the highest point away from obstructions (more info)
- Attach the Antenna cable to the VBOX Antenna socket
- If using Splitters:-
- Connect a CAN Splitter (RLVBACS024) into the VBOX CAN port
- Connect a Serial Splitter (RLVBACS024/1) into the VBOX Serial port (if required)
- Connect the MB ROVER radio into the CAN Splitter
- Connect the VBOX Manager into the CAN Splitter
- Connect the Telemetry Radio into the VBOX Serial port or to the Serial Splitter
- Apply power to the VBOX power connector
- If using a CAN Hub:-
- Connect the CAN Hub to the VBOX CAN port and Serial port
- Connect the MB ROVER Radio into the CAN Hub DGPS Port
- Connect the VBOX Manager into the CAN Hub MFD Port
- Connect the Telemetry Radio into the CAN Hub Serial port
- Apply power to the CAN Hub power connector
- Use VBOX Manager to change DGPS Mode to MB Rover
- Use VBOX Manager to enable either 1 Target or 2 Target, Subject Vehicle ADAS mode
In the First Target vehicle
- Mount the GPS antenna in the centre of the roof at the highest point away from obstructions (more info)
- Attach the Antenna cable to the VBOX Antenna socket
- If using Splitters:-
- Connect a CAN Splitter (RLVBACS024) into the VBOX CAN port
- Connect a Serial Splitter (RLVBACS024/1) into the VBOX Serial port (if required)
- Connect the MB BASE Radio into the CAN Splitter
- Connect the VBOX Manager into the CAN Splitter
- Connect the Telemetry Radio into the VBOX Serial port or to the Serial Splitter
- Apply power to the VBOX power connector
- If using a CAN Hub:-
- Connect the CAN Hub to the VBOX CAN port and Serial port
- Connect the MB BASE Radio into the CAN Hub DGPS Port
- Connect the VBOX Manager into the CAN Hub MFD Port
- Connect the Telemetry Radio into the CAN Hub Serial port
- Apply power to the CAN Hub power connector
- Use VBOX Manager to change DGPS Mode to MB Base
- Use VBOX Manager to enable either 1 Target or 2 Target, Target Vehicle 1 ADAS mode
In the Second Target vehicle (if required)
- Mount the GPS antenna in the centre of the roof at the highest point away from obstructions (more info)
- Attach the Antenna cable to the VBOX Antenna socket
- If using Splitters:-
- Connect a CAN Splitter (RLVBACS024) into the VBOX CAN port
- Connect a Serial Splitter (RLVBACS024/1) into the VBOX Serial port (if required)
- Connect the MB ROVER radio into the CAN Splitter
- Connect the VBOX Manager into the CAN Splitter
- Connect the Telemetry Radio into the VBOX Serial port or to the Serial Splitter
- Apply power to the VBOX power connector
- If using a CAN Hub:-
- Connect the CAN Hub to the VBOX CAN port and Serial port
- Connect the MB ROVER Radio into CAN Hub DGPS Port
- Connect the VBOX Manager into CAN Hub MFD Port
- Connect the Telemetry Radio into the CAN Hub Serial port
- Apply power to the CAN Hub power connector
- Use VBOX Manager to change DGPS Mode to MB Rover
- Use VBOX Manager to enable 2 Target, Target Vehicle 2 ADAS mode
Using VBOX Manager in all vehicles
- Check Log Rate is set to '100 Hz'

- Check Dynamic Mode is set to to 'Medium' if you are not using IMU integration, or 'High' If you are using IMU integration.
 |
 |
- Check DGPS Rate is set to '115200'

Confirm that non base VBOX units are now in RTK 'Fixed' DGPS status, indicated by either of the following:
- DIFF LED on the VBOX front panel is illuminated green
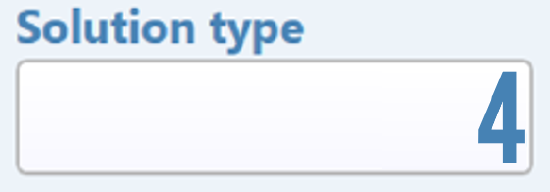
- Open a VBOX Tools or VBOX Test Suite live window set to Solution Type. This should show either of the below:
|
VBOX Tools view |
VBOX Test Suite view |


