The Video tab has a unique toolbar that contains the buttons needed to control playback and also provides a screen capture facility.

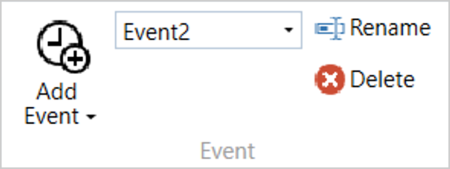

Click on the Add Event button to add an event marker at the current location in the file.
The event markers will be named EventX (where X is the next consecutive number in the list of event markers), and added to the dropdown on the right-hand side of the Add Event button.
Click on the Add Event button to add an event marker at the current location in the file.
The event markers will be named EventX (where X is the next consecutive number in the list of event markers), and added to the dropdown on the right-hand side of the Add Event button.
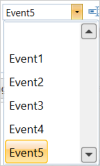
Use the Event dropdown to see the set event markers and select an event to view and edit.

Use the Event dropdown to see the set event markers and select an event to view and edit.
Click on the Rename button to edit the name of the event selected in the dropdown list.

Click on the Rename button to edit the name of the event selected in the dropdown list.
Click on the Delete button to delete the event selected in the dropdown list.

Click on the Delete button to delete the event selected in the dropdown list.
You can create an .mp4 video recording of everything being displayed on the VBOX Test Suite screen. You can use this feature in both online and offline mode.
Before you can use the screen capture facility, you must download and install the Racelogic Video Capture software extension by clicking on the Download and Install button.

If you are using the Screen Capture feature for the first time, you will first need to download and install the extension. Click on the Download and Install button to open a pop-up window for the Screen Capture extension. This pop-up provides information about the extension.
Click on the Download and Install button in the top left corner to start the download. Accept the terms in the License Agreement and wait for the extension to install.
When the installation has been completed, the screen recording options will be available.


Click on the Start button to start the screen recording of the VBOX Test Suite screen.

Click on the Start button to start the screen recording of the VBOX Test Suite screen.

When the screen is being recorded, the Pause button will become available.
Click on the Pause button to temporarily pause the screen recording. You can resume the recording at any time by clicking on the Pause button again.

When the screen is being recorded, the Pause button will become available.
Click on the Pause button to temporarily pause the screen recording. You can resume the recording at any time by clicking on the Pause button again.

When the screen is being recorded, the Stop button will become available.
Click on the Stop button to stop and save the screen recording as an .mp4 file in the Set Output Folder.

When the screen is being recorded, the Stop button will become available.
Click on the Stop button to stop and save the screen recording as an .mp4 file in the Set Output Folder.

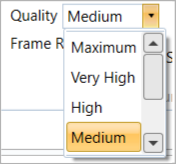
You can change the quality of the screen recording. The selectable quality setting will be limited by the performance of the computer. If the computer cannot keep up with the recording quality, the recording may stop. The higher the quality of the recording, the greater the file size.
The following are the available quality settings:
- Maximum
- Very High
- High
- Medium (default)
- Low
- Very Low
- Minimum
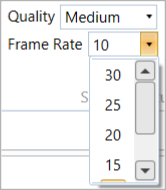
You can change the frame rate (frames per second) of the screen recording. The frame rate setting will be limited by the performance of the computer. If the computer cannot keep up with the recording frame rate, the recording may stop. The higher the frame rate of the recording, the greater the file size.
The following are the available frame rate settings:
- 30
- 25
- 20
- 15
- 10 (default)
- 6

Click on the Set Output Folder button to select the output folder that the software will save your screen recording to. This is by default set to the local Videos folder.
Click on the Set Output Folder button to select the output folder that the software will save your screen recording to. This is by default set to the local Videos folder.

Click on the Open Output Folder button to open the set output folder in File Explorer, where you can browse all the saved screen recording files from VBOX Test Suite.
Click on the Open Output Folder button to open the set output folder in File Explorer, where you can browse all the saved screen recording files from VBOX Test Suite.

Click on the Check For Updates button to manually search for any available updates of the Racelogic Video Capture software extension.
Click on the Check For Updates button to manually search for any available updates of the Racelogic Video Capture software extension.

Click on the Play button to start or resume the playback of the video.

Click on the Play button to start or resume the playback of the video.
This button will only be available when a video is playing.
Click on the Pause button to temporarily pause the playback of the video.
Resume the playback at any time by pressing the Play button.
This button will only be available when a video is playing.
Click on the Pause button to temporarily pause the playback of the video.
Resume the playback at any time by pressing the Play button.

Click on the Stop button to stop the playback of the video and reset the video back to the beginning.

Click on the Stop button to stop the playback of the video and reset the video back to the beginning.

Click on the Help button in the Map tab to open a browser window and load the relevant topic from the VBOX Test Suite User Guide at the Racelogic Support Centre.
This page will only be displayed if there is a valid internet connection.

Click on the Help button in the Map tab to open a browser window and load the relevant topic from the VBOX Test Suite User Guide at the Racelogic Support Centre.
This page will only be displayed if there is a valid internet connection.